Annual 31 Nights of Halloween Celebration

Good evening my DAH-lings, Franken Schmutz here with some SMASHING news.  Me and all my frightful friends at Whimsy Stamps welcome you to join us for our annual 31 Nights of Halloween blog extravaganza. 

Get ready for Whimsy's creepy Creative Team and spooky Special Guests sharing 31 haunted Halloween projects and inspiration.
Over $350 in prizes with frightful fun all month long!!
Come celebrate with us at 6pm EST each night for a new project and random night giveaways.

GRAND PRIZE $100 Whimsy Stamps Shopping Spree!!

TO ENTER...

💀  Share our Halloween event banner on any/all social media and TAG at least one friend
💀  Link your posts back here on the Whimsy blog with the linky tool below
💀  Each new post counts for one entry
💀  Enter as many times as you'd like between now and 10/30/19 by 11:55pm

The more individual posts you share the more chances you have to have win so share all day, everyday, everywhere!
  
All prize winners will be announced on Halloween Night right here on the Whimsy Blog. 
All winners must claim their prizes by 11/7/19.

Have a frightfully good time and good luck
Mwaaahaahaha!
UPDATED 10/31/19:
I hope you have a hauntingly, frightfully, and fun Halloween!! And I hope you've enjoyed our 3rd Annual 31 Nights of Halloween blog celebration. 
CONGRATULATIONS to the WINNERS and THANK YOU to everyone who played along!
All winners have until 11/7/19 to claim their prize.

GRAND PRIZE $100 Whimsy Stamps Gift Certificate - Wizardessofcards
Night 1  $15 gift cert  - Pauletta 
Night 3 Going Batty clear set and Flying Cat Witch rubber stamp - Karenladd
Night 7 Two digis of your choice - Jennifer Scull
Night 8 Dracula I Compel You and It's a Nail Biter stamp sets - Veronica Embley
Night 10 $15 Gift Certificate - Beverly S
Night 12  DoveArt's Country Porch, Pumpkin Patch rubber stamps - Dee Earnshaw
Night 14 Stencils (Star Dangle, Beaded Curtain, Puddles) - Sladjana Perisic
Night 18 Dracula's Coffin, Bats and Bubbles, and Happy Halloween word dies - TracyM#6773
Night 21 Two digis of your choice - Miss Boo
Night 22 Candy Corn Dress Up clear and Dragon Costume rubber - Waving My Wand
Night 24 Goth Prize Pack (Goth Girl, Goth Star, Goth Die set) - Denise Bryant
Night 25 $20 Gift Certificate - MadeByMeghanK  
Night 28 Penguin Trick or Treaters, and Cat Witch rubber stamps - Tina Z.
Night 30 $15 Gift Certificate - LIZARD


You are invited to the Inlinkz link party!
Click here to enter


Bleh, Bleh Bleh


Bleh, bleh bleh. Hey. How you doin'?  That poor frankencandle seems a bit uncomfortable with Dracula's attention. And that witch is so judgy. LOL.


I couldn't resist getting a bit sassy with the Whimsy Candle Creeps set. It's so cute (and clever)!


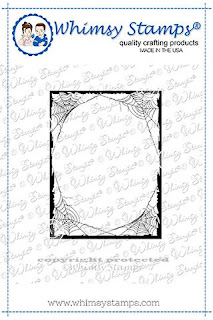
I colored up the images with Copics. The Whimsy Spider Web Frame is stamped with Distress Oxide Wilted Violet.


I used the negative of the image cut out as a stencil to create a shadow before mounting the image on foam tape.  I really like the effect.
 

Special Guest - Michelle Bala

Hello again!
I'm back for a second post as a Guest Designer 
for Whimsy Stamps!!!!

I am using the stamp sets Candy Corn Dress Up, and Going Batty
I also used some dies, Kinetic Curved Basics, Kinetics Curved Hills, and
Stitched Cloud.


I had a lot of fun creating this interactive card using the Kinetic Curved Basics Dies.
I used Bristol Smooth Cardstock and distress oxide inks in the following shades:
wilted violet, evergreen bough, fossilized amber, and black soot. Then I added some splashes of water and splatters of white and gold paint.


I colored up Going Batty with Copic Markers in shades of
V12, W0, W1, W3, and B000.
For the moon I used a circle die and colored it with C0, C1, C2, C3, C7, and W5.
I heat embossed the sentiment and added some googly eyes to
the moon bat. I added clear stickles for shimmer.


For this next card I inked up the Stitched Cloud Dies with hickory smoke.
The colored fence with antique linen and vintage photo inks
and the field with mowed lawn.
I used tattered rose for the sky. I added some accents
with Copic Markers.


I colored up images from Going Batty and Candy Corn Dress Up with Copics:
YR04, YR07, Y11, Y15, Y17, G000, G02,
E23, E29, C1, C2, C5, V01, W1, W2.


I heat embossed the sentiments and added clear stickles for shimmer.

For this last card, I used Prismacolor pencils and Copics to shade in
Candy Corn Dress Up.


I colored the unicorn cutie with the following Copics: YR02, YR04, Y11, Y15, BG49, BG09
V01, and V05. I added Stickles for shimmer.


Thanks for stopping by for a peek!!!

Hope you enjoyed this post!!!

Michelle

Candy Corn Dress Up Clear Stamps Going Batty Clear Stamps Kinetic Curved Basics Die Set
Kinetic Curved Hills Die Set Stitched Cloud Die Set

Fa La La Llama!...

Hello friends!
It's Sue here today.

While I'm on a bit of a roll with my card making catching up I thought it was time to make a start on stuff for 'you know what'!  (;

I decided a good place to begin was with these cuties by Krista -Heij-Barber for

You can say 'aaaahhhh'
(aren't they just the cutest and the fluffiest)!

I die cut three pieces of Kraft Card with a 

I stamped these gorgeous images onto the tags and coloured them with Caran d'Ache Luminance pencils.

I used Mod Podge to add 
Glamour Dust to the yellow bows and furry hat.  (Such a shame the pics don't quite pick that detail up)!

I stamped sentiments from the
onto Kraft card and cut them out into little rectangles and fixed them to the tags as shown. 

I die cut three more tags and embossed them with folders.

Finally I punched a hole in the tags with a red brag and fixed the image and the embossed card together with twine!

Yay- merry 'you know what'!!! (;


Thank you for popping by!

Please have a good look around the 
At the gorgeous new release cards by the rest of the Whimsy Stamps Creative Team – and then follow that with a trip to 
store for some essential retail therapy!

Happy Crafting


From Sue…xxx

*NEW Fa La La Llama Clear Stamps Tombstone Tag Die Set

DecoArt® Glamour Dust 


Jingle Owl the Way

Good morning everyone!

Oh my goodness...I fell in love with this set the minute I saw it!!  Who can resist this sweet little face?

This adorable set called Happy Owlidays is part of September's new release at Whimsy Stamps.  For my design team project today I created a shaker card with this little cutie patootie.


~Copics~
Antlers:  E33/31/30
Owl:  E47/44/43/42/41/40
Beak & Claws:  YR23/Y15/Y11
Greens:  YG17/03/01
Bells:  C4/3/2/1
Reds:  R46/27/24


I created the shaker with the Pierced and Stitched Circle Dies and the Notched Squares Dies, and filled it with lots of pretty little bits.  I fussy cut out the owl and attached her to the shaker with double sided foam tape.


You can find all these awesome goodies and tons more in the store here.
*NEW Happy Owlidays Clear Stamps
Pierced and Stitched Circle Die Set
Pierced and Stitched Circles Die Set
Notched Squares Die Set
Quick Strips Die Set
**I participate in Whimsy Stamp's affiliate program.  That means I receive a small commission when products are purchased through the links on my blog at no extra cost to you.
Thank you so much for your support!
Crafty Hugs x


Fa La La Llama Christmas Card

Hello everyone!  It's Rachel here and I have a winter-themed card to share with you today featuring the super cute Fa La La Llama Clear Stamp Set. (Affiliated links used.)


To start, I first created my ink-blended background by blending some Blueprint Sketch Distress Oxide Ink onto a sheet of Neenah Solar White 110lb Card Stock.  I then splattered this piece with some drops of water using a #4 paint brush and secondly blotted my panel dry after letting the water sit for about a minute.  Lastly, I splattered some diluted Opaque White Ink to resemble falling snow and heat embossed my sentiment on the top right corner with Fine Detail White Embossing Powder.


I stamped all of my llamas with Memento Tuxedo Black Ink onto another sheet of Neenah Solar White 110lb Card Stock and used Copic Markers to color them.  I cut them out using my Brother ScanNCut.

Copic Colors Used:

Reds: R05, R46, R89, RV99
Greens: YG01, YG03, YG17, G28
Whites: 0, C00, C2, C4, C5
Blues: B0000, B01, B04
Yellows: Y11, Y13, Y15, E34


To create some snowy drifts, I diecut some white card stock using the Stitched Border Die Trio.  I adhered the rear snow drift to my card with liquid adhesive and the front snow drift with some 3D Foam Adhesive Squares for added dimension.  I then added my images with 3D Foam Adhesive Squares as well.

I hope you enjoyed my card today!  Thank you all so much for stopping by!

Wishing you all a lovely day!

https://rachelalvaradodesigns.com/


Fa La La Llama


Stitched Border Die Trio

Special Guest - Lisa Mensing


Lisa here with you today and I'm sharing several samples featuring the adorable Fuzzy Spiders Stamp Set. How perfect are they for those Too Cute to Spook cards you need for Halloween? As always, I have a video to share with you, and you can find it over on my YouTube Channel or on my website.


HOW TO
  • Stamp the medium spider five times using bright inks in the colors Lime Green, Ultra Pink, Orange Slush, Grape Juice, and Audrey Blue onto #80 cardstock.
  • You can fussy cut the spiders out, but I used the Scan N Cut. It makes things a bit quicker.
  • Cut a piece of acetate to 37/8" x 37/8", adhere to stamped and die cut panel using a heavy-duty adhesive. Add 3D mounting to the backside of the acetate. Be sure there are no gaps between your foam to ensure your sequins don't fall out. Essentially, you're creating a dam for the sequins. Lay sequins on top of a card base, remove the backing from foam, and adhere panel over sequins, pressing firmly to create a tight bond between paper and foam. Set the shaker card aside.
  • Stamp the Happy Halloween sentiment in the center of the one card base using Versafine Onyx Black Ink.
  • Stamp cobweb on the card base using Versafine Onyx Black ink.
  • Add 3D mounting foam to the back of two of the stamped and didie-cut panels and adhere them to the card bases with the stamped sentiment and image. I do believe that finishes up the card bases. Now we just need to add the spiders, sentiment banners, and enamel dots.
  • Add googly eyes with liquid adhesive and an action wobble to the back of the lime green spider, Adhere to the card base. Use mounting foam to adhere to spiders and sentiment strips.
How cute is this big fuzzy guy?

  • I had an extra stamped and die cut panel, added mounting foam to the back of it, use the lime green ink and blend the ink straight to a card base, stamp the spider with black ink, run through Scan N Cut or fussy cut, add mounting foam to the back of the spider, stamp the sentiment, and then adhere the stamped, die-cut panel over the ink blended card base, add spider and finish off with two black enamel dots for the eyes. Different sized enamel dots add a fun, goofy touch making him extra cute.
Thank you for joining me!

Fuzzy Spiders
*NEW Fuzzy Spiders Clear Stamps


~ Wolf Stamp, Two Ways by Nicolette ~

Hello Whimsy Stamp Fans!

Today I am sharing with you two different ways to color the Wolf Head Stamp from Whimsy Stamp's newest release.   I love being able to take one stamp and totally create two totally different looks. This stamp is super easy to color as the shading areas are already marked where they need to be.


For my first card, I decided to make an elegant masculine birthday card in my favorite color combination, black and white.  I embossed the white panel using Whimsy's Sun Rays Stencil.  The picture below gives you a better look at how embossing this panel really elevates this card.  I added some foliage die cuts using Whimsy's Leaf Foliage 2 Die Set.  This set has a lot of great foliage dies but this die is my favorite. 


Coloring the wolf's eyes blue really brings him to life.  I love how stunning this card turned out!

Whimsy Stamps Products ~

~ Copics ~
Wolf:  W00 W1 W3 W5
Nose:  W0 W1 W3 W5 W7 W9
Eyes:  B91 B93 B95

~ Misc. ~
Silver Rhinestone

For my second card, I decided to design a card that reminded me of those cool wolf shirts you see at gas stations when you travel.  This card would not only be perfect for halloween but a boy's birthday. I know this, because when my grandson saw this card he goes, "This looks so cool, how did you do that!  Best compliment ever!!!


I embossed the grapevine looking arch from the Howling Night's Clear Stamp Set with WOW!'s Ebony Embossing Powder.  I think this stamp is creepy cool and I love how it helped bring my vision to life.


I added Clear Wink of Stella to the stars.  It's hard to tell in the picture how shimmery they really are but trust me, it adds twinkly goodness to the night sky.  I decided to color the wolf's eyes yellow in this design.  I think it makes them look piercing and like he's peering deep into my soul.

Whimsy Stamp Products ~

*NEW Wolf Head Rubber Stamp
*NEW Wolf Head Rubber Cling Stamp

Howling Night Clear Stamp Set
Howling Night Clear Stamps

Shaker Maker Rectangle Die Set

Shaker Maker Combo Die Set

Wink of Stella Brush - Clear

~ Copics ~
Wolf:  BG10 Y15 YR15 YR18 R14
Nose:  W00 W0 W1 W3 W5 W7 W9
Eyes:  Y11 Y15 YR23

~ Misc. ~
WOW! Ebony Embossing Powder
Cracked Pistachio Distress Ink Pad
Evergreen Distress Ink Pad
Peacock Feathers Distress Ink Pad
Broken China Distress Ink Pad
Chipped Sapphire Distress Ink Pad
Black Soot Distress Ink Pad

**I participate in Whimsy Stamp's affiliate program.  That means I receive a commission when products are purchased through links here on my blog. (At NO additional cost to you).  This allows me to be able to make more projects to share and hopefully inspire you!  From the bottom of my heart, I appreciate your support!!!

Happy Stamping!