Product Spotlight with Special Guest Kay

Hello crafty peeps!

Today we are sharing a super cute card from our talented special guest Kay Miller using our Naughty Puppies rubber stamp set. This is a set that includes 4 little puppy images and a couple of sentiments to match.

Kay has used Bristol board and stamped her image and then colored with Copic markers. The background is a bit of watercoloring. She embellished with the sentiments and some clear Nuvo drops. I love how she kept things simple and let the image shine. Her card base is gingham style patterned paper and the image layer is popped up a bit with foam tape. Adorable all around!

Be sure to pay a visit to Kay's blog, My Joyful Moments, to see more about this creation and all her other amazing work.


                                                               Naughty Puppies

Product Spotlight with Special Guest Torico


Hello Friends!

Today we are excited to share another gorgeous creation for special guest Torico, this time using our Squirrel with Flower rubber stamp and You Are clear stamps.  Torico's coloring is just stunning and the clean layout of the card makes the image pop.


Torico used Tea Dye distressed ink to stamp the image and then colored with Copic markers. After coloring, she masked the image and then added in the background using watercolor and ink blending. The bottom corners of the card have been rounded, then she added a strip of designer paper to the top and stamped the sentiment with versamark and heat embossed in white. She added enamel dots to finish off the card. Simply stunning!

We hope you enjoyed this creation from Torico. Be sure to visit her blog, Stamparadise, for more of her wonderful work.

Happy crafting friends!


                                                          Squirrel with Flower     You Are

Friendship is the Greatest Gift

Hey everyone! Jessie here today to share a little holiday inspiration with you! I am not ready for summer to be over yet and for winter to set in, but it is nice to get a jump start on these holiday and Christmas cards!


I pulled out an oldie, but a goodie! Friendship is the Greatest Gift, is such a sweet image! I left it super simple wit a mall card 4 x 4 1/4 is great for gift cards and things and I love making these CAS cards with only an image on the front!

Thanks for stopping by!
Hugz!
Jessie

Have a Sunshiney Day

Hello!  It looks like the only summer days the UK is going to get ……. again ……. are those we create ourselves, so here’s a bright and summery card for Whimsy Stamps.  With this ridiculously wretched weather we’re having this side of the pond I need all the bright I can get my hands on.

I went digi today and decided to colour up Penguin Swings – now seriously, can you get any cuter than this?!?  I used the Sunshiney Day sentiment from my Vintage Sentiments stamp set, it was perfect for the sweet image.  I finished off the card with some foamiran flowers.  The large pink and blue flowers are made from my Peony Flower Die Set.

bev-rochester-whimsy-penguin-swings


A close up of the flowers.

bev-rochester-whimsy-penguin-swings4

I finished off the flowers with some crinkled organza ribbon. 

bev-rochester-whimsy-penguin-swings1

Enjoy the rest of your week.

Penguin Baker

Hello Whimsy Friends happy Tuesday! I hope
you have all been well since I was last here.
So did you love the July release images? they are all so cute
aren't they and what about all those cute little penguins 
they are just the sweetest, thats why I'm here today
I have Penguin Baker to share with you.


I have teamed him up with Christmas Mix Sentiments
 and Christmas Tidings digital papers, Christmas Cheer enamel dots 
and the Cherry Blossom panel die.

Well my lovelies have an amazing rest of the week! until
next month take care
Hugs Bridget xx


Birthday Bears

Hello! 
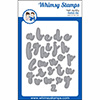
Linda here and it's my turn to post some inspiration for you on the blog, so I'm kicking it off with not 1, not 2, but all 3 of the fabulous new Lee Holland teddy bears from the July release.

I coloured all 3 bears with my Zig Clean Color Real Brush Markers, and I decided not to go with the traditional brown teddy bear colours for a change. Those of you who are familiar with my work will know that I love to colour outside the box (but not outside the lines!) when it comes to hair and critters.

First off we have my personal favourite


I made him a little white bear and gave him a pink nose.
I also added some sentiments from the Happy Sayings set.

Teddy Birthday Presents


He's looking good in Aquamarine, the die cut birthday word is from the
Sweetest Birthday Shaker Builder die set and I cut my image with one of the
Hand Stitched Nested Rectangle dies.
Some of my DT sisters made this bear into a Christmas card by using Christmas colours and adding a Christmas sentiment.

and finally

Teddy Birthday Message


who is rocking purple fur.

My daughter actually had a teddy bear this colour when she was very small, that brings back memories! As you can see I masked the bear and carefully stenciled some bricks so he had a wall to draw on, naughty graffiti bear!

Anyway I hope that this has given you some ideas on how you can think outside of the box when it comes to colouring your bears (or other images), and how a few changes can make things look quite different.

That's all from me for today, I'll see you next time!

Product Spotlight - Birdie Selfie


Hello Friends,

Special guest Vladka is back with us today sharing this adorable card using our Birdie Selfie rubber stamp from the Crissy Armstrong Collection. This is an oldie but a goodie. Vladka also used Magical Birthday Wishes clear stamps and Birthday Wishes Magical Die set of words to complete her card.

Her image was colored with watercolor paint and then framed with a photo shaped die to make it seem to pop off the card. The sky and clouds are behind the photo to help the popped effect. I love the softness and pops of yellow that draw your eye to the image.

To see more of Vladka's awesome work, be sure to visit her blog, Ustvarjalna Skringa. Vladka is also on YouTube and Instagram and Pinterest. Thanks so much for being with us this month Vladka!


                                Birdie Selfie     Magical Birthday Wishes    Word Die Set - Birthday Wishes and Magical

July Release now Available


Welcome Whimsy fans. The newest release from Whimsy Stamps is now available in the store - click here to see all the new goodies.

As always, there are some super cute rubber images and fun photopolymer stamps and dies.

Our designers will be sharing many wonderful creations over the next 3 days. We invite you to take a look at their blogs to see their wonderful projects.

Happy shopping!


Product Spotlight - You Complete Me


Hello Friends!

Today we are excited to share a super fun card with you from special guest Barbara Anders! Barbara has used our You Complete Me clear stamps and coordinating You Complete Me Puzzle Pieces Die set. I just love these cheerful rainbow colored puzzle pieces. Such a happy card!


To make this card, Barbara used rainbow patterned designer paper and cut all the puzzle pieces. Then she adhered them to the card stock base, and some by using foam tape to give dimension and the effect of pieces in front of others.  The sentiments are heat embossed with white embossing powder and the hearts are glitter embossed. Both are adhered with foam tape to make the pop off the card. A simple but fabulous creation!

Barbara has loads of amazing creations on her blog, Paper Pursuits, we hope you will visit her there and on her social media pages. Huge thanks to Barbara for joining us this month as a special guest designer!

Barbara's Pinterest
Barbara's Instagram
Barbara's YouTube


                                                 You Complete Me     Puzzle Pieces Die Set


PENGUIN BIRTHDAY


Hello everyone a little inspiration for you all using a fabulous 

Penguin Birthday stamp this card also lights up, you can buy everything you need from us at whimsy stamps, ... big hugs xx


ITEMS USED

Chibitronics

led light kits and tape

coloured with copics
C7,C5,C3,C1,R20,R11,YR27,RY24,YR21,GY67,GY17,YG03
B95,B93,B1,RV04,RV02, BLENDER


Penguin candy floss

HI, Céline here to share with you my latest Whimsy stamps card.

Today I chose Penguin candy floss, I love so much these cute penguins !!!
When i saw this one I immediately thought of a pink card
First I've cut a piece of paper at 13,5x27 cm then fold in half
I've cut a square piece of big dotted paper at 13,2x13,2 cm and a piece of white paper at 12x12 cm and finally and piece of tiny dotted paper at 11,7x11,7 cm
Then i 've cut my image using hand stitched nested rectangles
I've decorate with enamel dots and little pennant and happy word dies.
Decorated with flowers and enamel dots

I've colored  my image with copics :
Penguin : 100, C8, 7, 6, 2, YR09, 18, 16, 15,
Candy floss : R85, 83, 81, E53, 51, 50

Hugs
Céline

Making 'Flip Flop' cards using shape dies

So it's my turn to post on the Whimsy Stamps blog, and I thought I would do a quick tutorial on how to make 'flip flop' cards using any metal shape dies you have at hand.

I used the 'Hand Stitched Nested Rectangle' die for my flip flop card. My card is 5" x 5 1/2". 
I folded the card and used washing tape to secure my die into the middle of the front of the card.


The key to making flip flop cards is to NOT cut out the whole of the die. You only need to cut out half of the die. To do this, position your card so that the piece you don't want to cut is hanging off the edge of the cutting plates. You only need to cut the half of the die NEAREST the fold of your card.


Once it has been cut it should look like the photo underneath. It took me many mistakes to get this right!!


You then need to fold the card back on itself as below. Now it's time to decorate!


I used a number of stamps and dies from Whimsy Stamps for my finished card.


I used the Hand Stitched Nested Rectangle die to cut out another kraft rectangle to fit over the 'flap' - just because I wanted to make it a little more sturdy (this is not necessary - just my personal preference).
I then cut out the 'Cherry Blossom Panel' which fit perfectly on the front panel.
The flower is made using the 'Build a Poinsettia Die' - who says this flower is just for Christmas??
The sentiment is from the 'Scripty Occasions' stamp set.
I added some 'Christmas Cheer' enamel dots to finish off the flower and add a little interest to the rest of the card.

I hope these instructions make sense!!
And remember - you can use any of your shaped die's to make the 'flip flop' card!

Thanks for looking!
Happy Crafting.

Kerys x

Posivitely Green with Franken Schmutz


Hello friends,

Today we are sharing a fun card by Whimsy artist Deb, using Franken Schmutz clear stamps and coordinating Franken Schmutz dies as well as In Stitches clear stamps.


Deb stamped out Frank and then colored him with watercolor ink and a paintbrush. Then cut him out using the coordinating dies. Her background was created using the In Stitches stamps on green card stock. She layered her background on white cardstock and then black cardstock as the base. Frank is popped up using foam tape and the sentiment was stamped with black ink and a green cardstock popped up with foam to accentuate the green word.

Be sure to visit Deb's blog to see more of her work.


                                Franken Schmutz  Franken Schmutz Die Set  In Stitches


Birthdays Are...

Happy Friday friends. Alanna here and my card today features the super fun Shine Bright stamp set. I found this gorgeous paper by Ken Oliver that I am absolutely in love with. All I did was stamp the sentiment directly onto the paper and then stamp a few of the star images from the same stamp set. 

I die cut this panel with the largest A2 size of the Hand Stitched Nested Rectangles dies and then added the panel onto a top folding card base.

Thanks so much for stopping by today. Crafty hugs!


Stretch Your Stamps

Hi there, It's Ellen here today I have another card with a perfect example how to stretch your stamps.             
I used the lemonade can and glass from the "Squeezed" stamp set. You can use them perfectly for iced coffee with oranges (I guess I need to try this once). Also the letter dies makes it possible for writing down what you want and stretch the theme of your card...
 
I finished it with a perfect sentence inside the card...

I'm so happy when I stretch my stamps, because that makes your stamp so much more worth. That's why I encourage you to do that too.

https://whimsystamps.com/products/brush-script-uppercase-alphabet-dies https://whimsystamps.com/products/new-brush-script-lowercase-alphabet-dies https://whimsystamps.com/products/new-squeezed-dies-set https://whimsystamps.com/products/new-squeezed https://whimsystamps.com/products/new-need-more https://whimsystamps.com/collections/whimsy-craft-supplies/products/new-christmas-cheer-enamel-dots