The Final Digital Vault Update for July

Hey there Whimsy friends
I'm back with our final Digital Vault Update for July

I hope you saw the July Digital New Release post
that went live on the first of the month
if you missed it, click here,
it's awesome!!

We are of course gearing up for our brand new release tomorrow
but in the meantime, I'd like to share our last showcase for July
We had such amazing images in our July Digital Release
and the Digital Design Divas have created gorgeous
designs with these fabulous images.

The Whimsy Stamps Digital Design Team

We also had a special showcase of the June Cancer Mini Release
which if you missed, be sure to click here to catch up
but let's see what the Divas have been up to in July
We are focusing today on two collections...

Crissy Armstrong Digital Collection

Penguin and Bear


We will be back tomorrow with the August New Release.
Ooh I'm so excited to share this with you,
so be sure to stop back in.
One more sleep to go!


Wishing you all a wonderful day!
Hugs and happy crafting,


My Little Pony


Hello, everyone! I had a great time coloring the Horse Scene from the Whimsy July release. What a beautiful scene and then when you add color (or don't--gorgeous just by itself)--swoon.


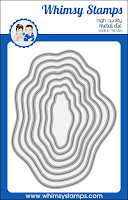
I used a Wavy Nested Frame to cut out the scene and then explored a couple of ideas for the card base. The blue is lovely but my messy girl heart loves the Brusho background.  Which do you prefer?


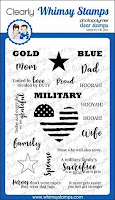
For the sentiment I stamped one from Military Family onto a Quick Strips that I trimmed down.

If you'd like to check out my other creations, you can visit my blog, Frankie Helps Craft, my Instagram, or my Pinterest Board.  Have a great rest of your week!


There's gnome one like you!...

Hello everyone,

It's Sue here to day with some gorgeous gnomes -
because you can never have too many right!?
I enjoyed colouring these cuties so much that I made two cards with them - if time permitted, I could have made a hundred and two!
I simply die cut some Kraft card with a
and stamped the gorgeous 
with black ink.

I then coloured them with an assortment of Caran d'Ache Luminance and Polychromos pencils.

I stamped a sentiment from the 
Gnomies stamp set and also used a sentiment from the 

 I mounted the images on Kraft card decorated with an embossing folder and added some twine tied with a bow at the front.

Finally I added some enamel dots.
Be sure to have a look around our
to see all the gorgeous Creative Team inspiration, and then pop straight to
to engage in some essential retail therapy!
from Sue...xxx


*NEW Gnomies Clear Stamps Hand Stitched Nested Rectangles
Gnome Matter What Clear Stamps


SHELLebrate - Shaker Card

Good morning everyone!

It's Pam here to share a shaker card that features an adorable little mermaid from the Mermaid Birthday Clear Stamp Set from the July release.


I stamped this little cutie on X-Press It Blending Card, colored her with the following Copic Sketch Markers, and fussy cut her out.

~Copics~
Skin:  E04-11/21/00/000/0000-R20/30/00
Hair:  RV55/52/02/10/00/0000-BV20
Tail:  BG09/05/02/01/000-RV00
Fish:  YR15/Y35/Y11-000, YG25/03/01/00, V04/01/00, Lips:  RV55


I started with a 4" square white card base, added a white layer that was 3 7/8" square, and a pink layer that was 3 3/4" square.

For the inside piece of the shaker element, I inked up a piece of white cardstock with Tumbled Glass Distress Oxide Ink, added the Shellebrate sentiment from the same stamp set, and cut it into a circle.


To create the outside circle frame, I taped two of the circle dies together with purple tape; and then while they were taped together, I cut the frame out of the starfish print paper.  I then cut two more of the circle frames out of white craft foam.   I cut one plain circle shape of clear acetate.  I taped the clear acetate to the back of the starfish frame with Scor-Tape 1/4 inch.  I used the same tape to adhere the two layers of foam tape to the back of the same piece.  Once I had the shaker bits in the center of the blue sentiment circle, (keeping still so I didn't lose any of the pretties), I then taped it down to the actual card.

*NEW Mermaid Birthday Clear Stamps
Pierced and Stitched Circles Die Set
Purple Tape - 1/2 inch
Purple Tape - 1/2 inch 
 Scor-Tape - 1/4 inch wide
Scor-Tape - 1/4 inch wide
**I participate in Whimsy Stamp's affiliate program.  That means I receive a small commission when products are purchased through the links on my blog at no extra cost to you.
Thank you so much for your support!
Crafty Hugs x


You're a Treasure - Double Layer Shaker Card

Hello everyone!  It's Rachel here and I have an ocean-themed Double Layer Shaker Card to share with you today that features the Mermaid Birthday Clear Stamps Set from the July Release.  I got my inspiration for this style of card from THIS video made by Jennifer McGuire a few years back when she made some gorgeous double layer shaker ornaments.  (Affiliated Links used where applicable).


I combined this stamp set with the new and gorgeous Build an Ocean Die Set to create my underwater scene.  To start, I created the background by blending some Distress Inks (Cracked Pistachio, Peacock Feathers, and Chipped Sapphire) onto a sheet of Neenah Solar White 110lb Card Stock.  I then used a #4 paintbrush to loosely splatter water over this panel and let it sit for about a minute before lightly blotting off the excess with a dry paper towel.


Once my background panel was dry, I then lightly splattered it again with some diluted Opaque White Paint and also some diluted Chipped Sapphire Distress Ink.


As my background panel was drying, I then went to work on my images.  I stamped them with Memento Tuxedo Black Ink onto another sheet of Neenah Solar White 110lb Card Stock, colored them with Copic Sketch Markers and then used my Brother ScanNCut to cut them out.


I made this shaker card two layers deep (having two separate pieces of clear acetate) to give my card some depth.  So I adhered two of the fish and the treasure box inside my first layer directly onto the ink blended panel of the card.  I then adhered the mermaid and two of the other fish to the first layer of acetate inside the card.

  
For my embellishments, I used some White Microbeads as well as some Majestic 3M Sequins from Studio Katia.  For my sentiment, I heat embossed it with Black Embossing Powder onto a sheet of Heat Resistant Acetate.  To create my frame, I used the Hand Stiched Nested Rectangle Dies to create a frame.

I hope you have enjoyed my card today!  I appreciate you stopping by!

Wishing you all a wonderful day!


https://whimsystamps.com/collections/july-2019/products/mermaid-birthday-clear-stamps?aff=53

https://whimsystamps.com/collections/july-2019/products/build-an-ocean-die-set?aff=53

https://whimsystamps.com/products/hand-stitched-nested-rectangles?_pos=1&_sid=01543d50c&_ss=r&aff=53