Fresh Friday Inspiration

Hi Whimsy fans! Fridays on the Whimsy blog are now Fresh Fridays, where we are taking a look at previously released products.

We are once again showcasing the following 6 products. If you missed last week's blog post with inspiration using these products, click here. 


You can find all of these products in our Fresh Friday section of the store, here. You can also click on each of the individual picture links below.


Alanna has two cards to share with us today. Her first features the fun balloons from the Happy Everything set. We like the touch of darker shading on the left sides of the balloons to add a bit of depth. She has used all 3 layers to the Celebrate Word & Shadow die set and the stitching detail from one of the Straight Edger dies is a nice finishing touch to the card.


Alanna's second card features some of the other fun images from the Happy Everything set. She has customized her own patterned paper by stamping those images and then stamping the large Illusions Background set over top of the stamping. This provides such a fun look.

We love how she die cut the Celebrate word die from the background and then popped it back up for a subtle look.


Andrea has an amazing card to share using several of these products. We love how she created her own cake using the Rounded Rectangle dies.  The Illusions Background was stamped lightly on the cake layers. The candles are from the Happy Everything set. The white panel is set off nicely with the use of one of the dies from the Straight Edger die collection. The Celebrate Word & Shadow die finishes off this card nicely.


Lisa is joining us with a super fun card featuring the Illusions Background, Goth Girl and the Straight Edger dies. She even snuck in the Celebrate Word & Shadow die in the background. We love the camouflaged look of it.


We hope you've been inspired with these cards and products. Fresh Friday will return next week with a whole new set of product pairings.

Special Guest - Jenny Colacicco


Hi, everyone! It's Jenny back today with my second guest post. In case you missed it, you can find my first post here. Today I'm featuring the gorgeous Flower Puffs Background stamp, and I will show you how to use it two different ways.


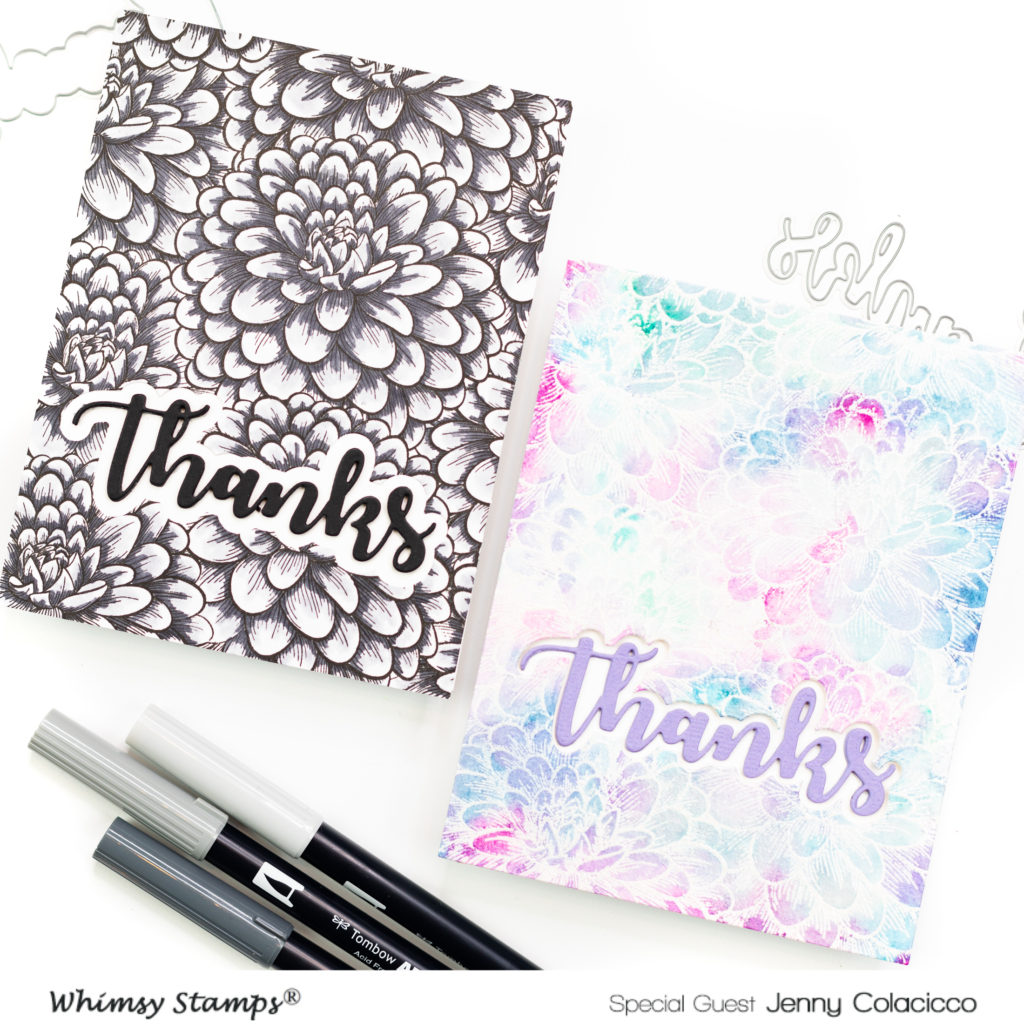
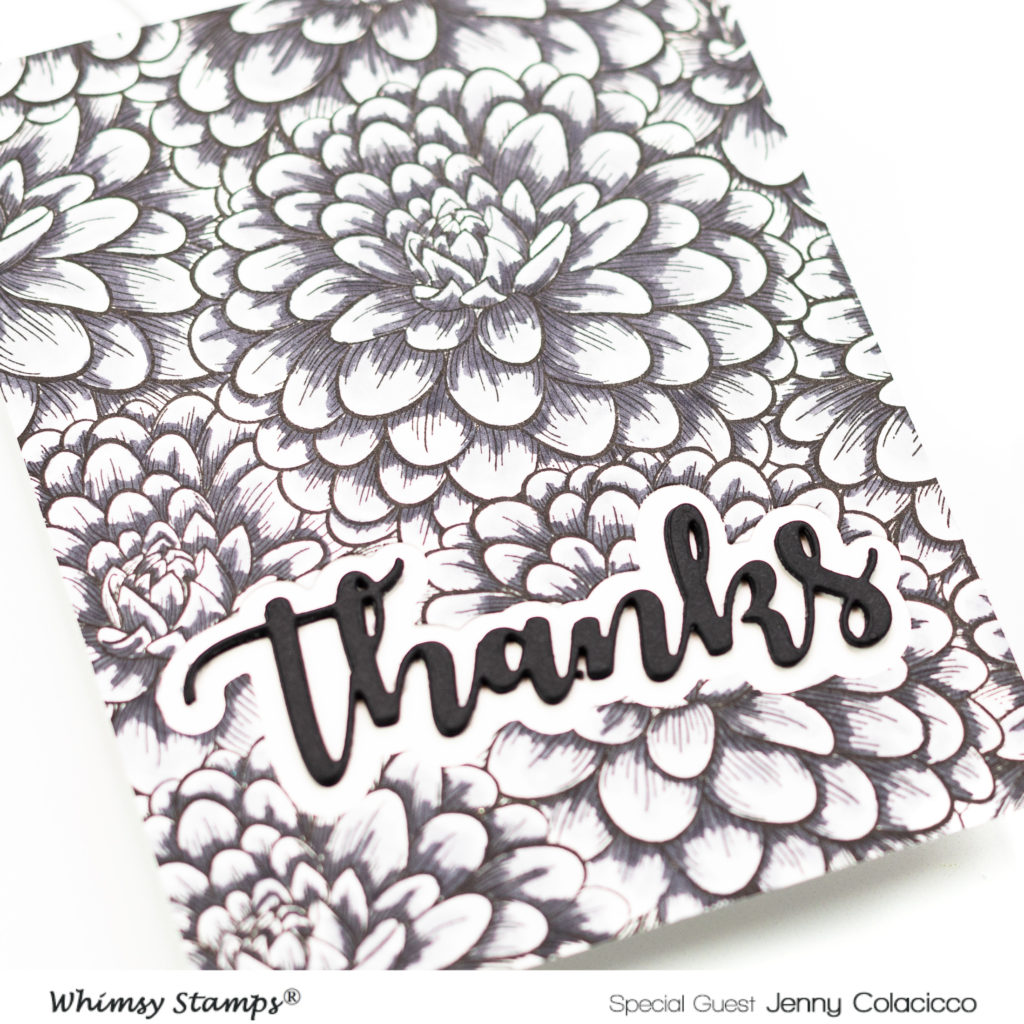
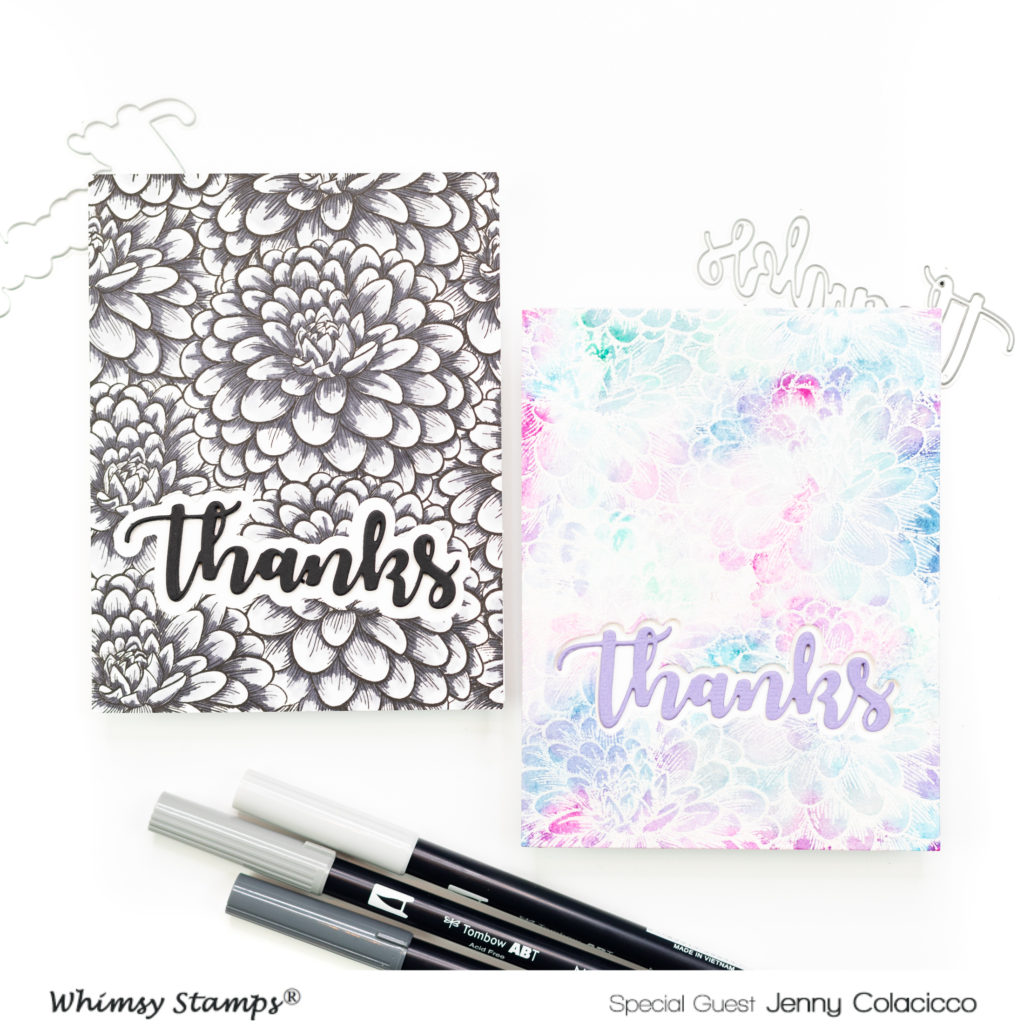
For my first card, I decided to go monochromatic. This is such a gorgeously detailed background stamp, with shading clearly marked, I decided to stamp it in black and then add shading with Tombow Dual Brush markers. I used Versafine Onyx Black Ink to stamp the image onto Solar White cardstock. The ink is great for detailed stamps like this. When dry, I came in with the darkest grey Tombow marker and added some depth in the areas with the shading already marked.


I then came in with a lighter gray and added some scribbled grey over the rest of each petal, leaving some white towards the edge. I wanted this to be slightly whimsical and roughly colored.

To create my sentiment, I used the Whimsy Thanks Word and Shadow die set. I used the larger shadow to die cut a window out of my colored panel, before adhering it to a white notecard. I then die cut the Thanks word itself four times from black cardstock, adhering them together, and aligning into the window on the notecard.


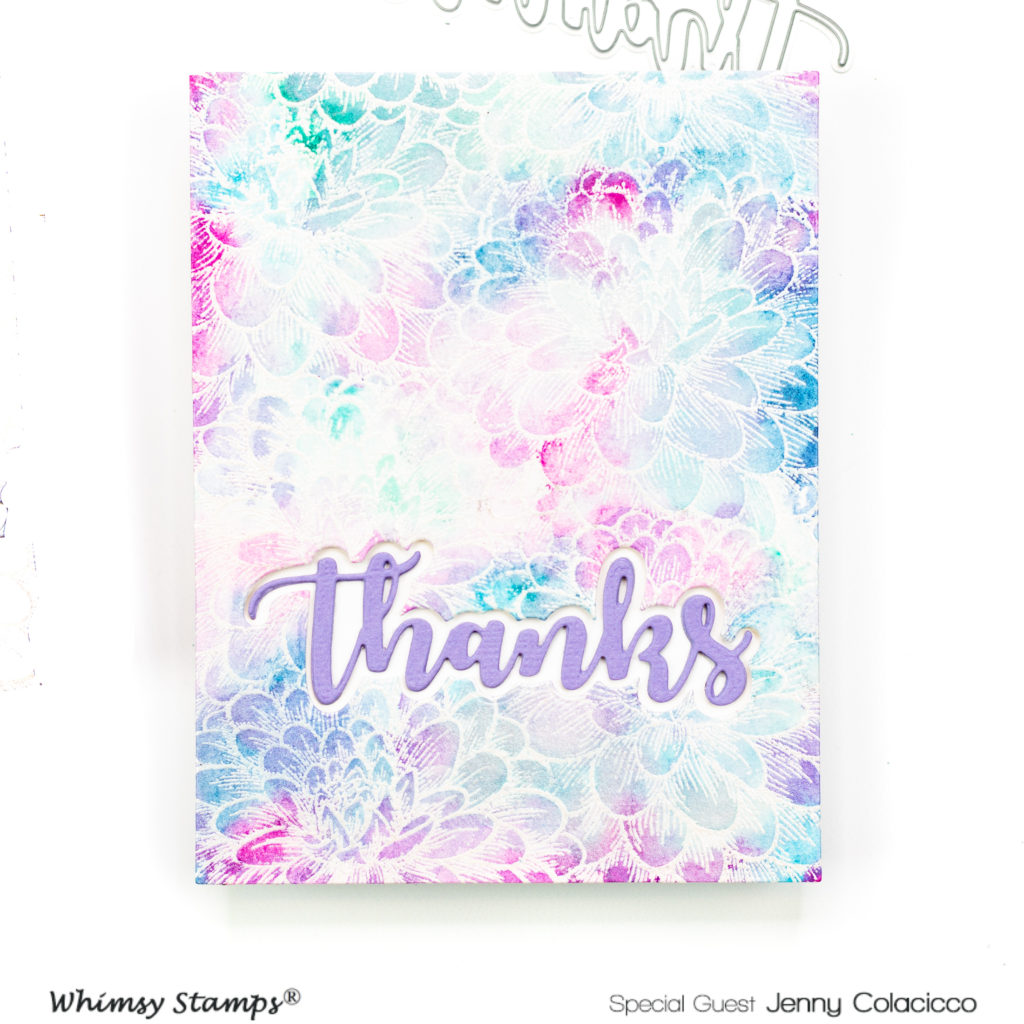
You can see in this side-by-side comparison that I tried a similar design with my second card. This time though, I heat embossed the background stamp by stamping in embossing ink onto watercolor cardstock, then heat embossing with WOW! White Pearl embossing powder. This powder has a beautiful pearly sheen to it in real life.


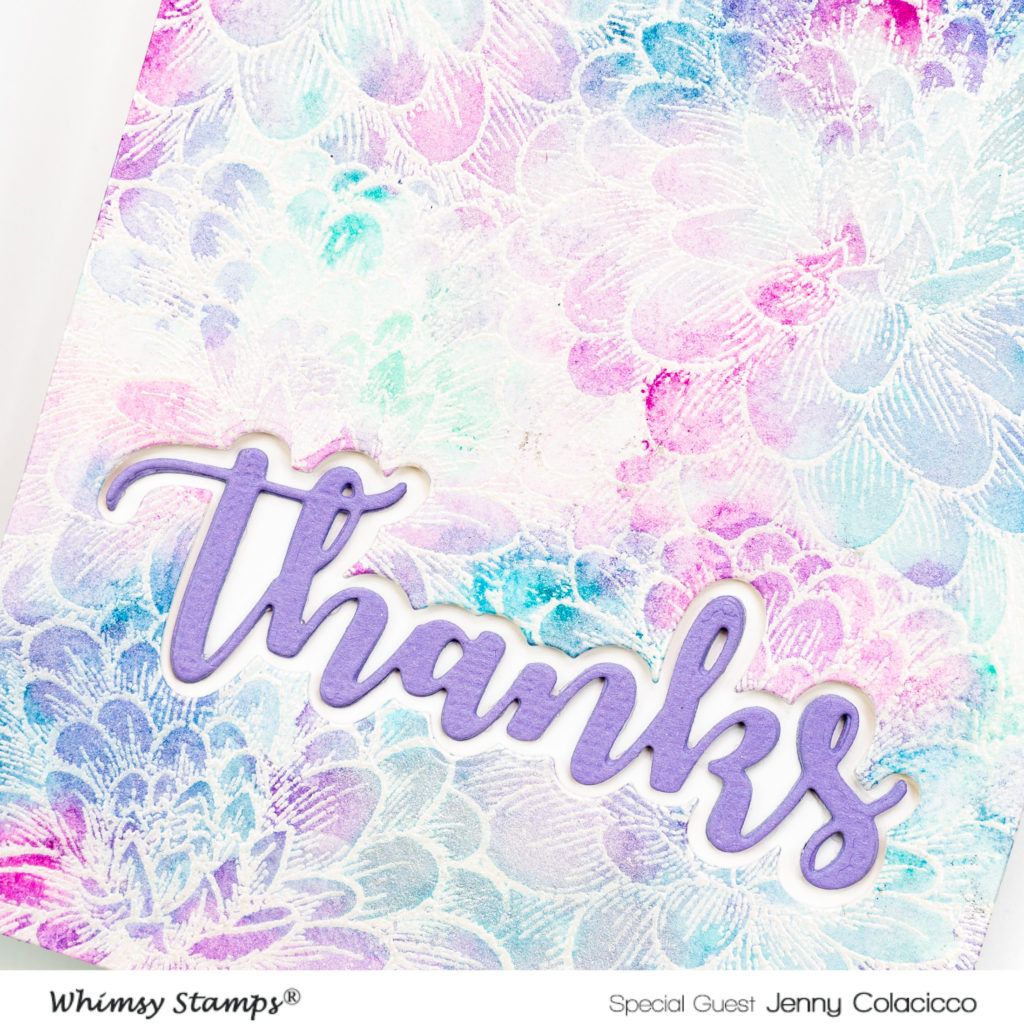
I spritzed my heat embossed panel with clear water, then proceeded to drop different paint colors into the panel - mostly blues and aquas, with a touch of pink. When they blended together, they created a gorgeous purple shade. When dry, I did this one more time (without the initial water spritz) then dried again. As a final touch, I used a pearly white translucent metallic watercolor paint and went over some of the flowers before drying one more time. The heat embossing resists the paint and you are left with these gorgeous flower outlines against the paint.


To finish the card, I once again die cut the Thanks shadow, and this time I popped the panel up using foam tape onto a white note card. The Thanks word was die cut four times from purple textured shimmer cardstock and adhered to the centre as before. A very different look using the same stamp and die!

I want to thank Whimsy Stamps for having me guest this month! I've had a fab time playing with the goodies they sent me, and I hope I've managed to inspire you.

Jenny

Supplies


Tuesday Tutorial | Dry Embossing with Stencils

Hello Whimsy Friends!

It's Lori here today with a tutorial on how to dry emboss with stencils. Today I'll be using the Giraffe stencil, Giraffe 2 stamp set,  two distressed oxide inks colors and my manual die cutting machine to create a card with dimension and texture in a different way.

To begin I used #80 Neenah cardstock with Scattered Straw Distressed Ink. I blended the Scattered Straw distressed ink in a circle fashion on the cardstock.

  
Then I placed the Giraffe stencil over the ink blended cardstock and blended the Rusty Hinge Distressed Oxide Ink.


After blending the second color I placed the Giraffe stencil back onto the cardstock, making sure to line up the pattern, and taping the back of the cardstock with Purple Tape. This is where I want my dimension to appear.  


Then I ran the cardstock and stencil through my manual die cutting machine using an embossing pad. And this is the result below. It's a little hard to see in photos, but in real life you can see the dimension.   


Here's another close up of the dimension. If you're using your phone reading this or have a touch screen monitor, tap the photo for a better view.


Here is the completed card, I love this technique, but haven't done it in a while!

I hope you enjoyed this technique tutorial and will give it a try. It's a great way to stretch our supplies!
If you try this technique using Whimsy Stamps products, be sure to tag us on social media!

Thanks so much for stopping by today!

http://whimsystamps.com?aff=108Giraffe Hello Clear Stamps


The Digital Divas February Tutorial and February Guest Designer Showcase

Welcome lovely friends!
We're so excited that you should visit today,
as we have two very gorgeous reveals for you!!

We have the second of our new monthly tutorials by the Digital Divas
and our second sensational monthly Guest Designer for 2020!

You may have seen these gorgeous creations revealed over
the month in our Whimsy Stamps Facebook Group.
We have a thriving community there, sharing
gorgeous Whimsy creations, if you've not
yet joined us, be sure you do!!

We are sharing the wonderful line up all together here by our fabulous


Madeleine did an amazing job Guest Designing with us this month
and I am beyond delighted to share all of her beautiful creations with you now.


I adore this sweet tag Madeleine created with the cute Kitty Balloon by Crissy Armstrong.
The softness of the elements and her incredible colouring on that kitty, are just the sweetest!


Madeleine's second creation used the super cute image Grant from our Pollycraft Collection.
This is just adorable and those balloons, how fabulous are they?! I just love this creation!


Madeleine's final creation is utterly swoon worthy! I just love this gorgeous design.
She has used the sweet Wee Stamps image Frog Prince to create this beautiful romantic card.


Thank you Madeleine for designing with us in February.
We really love your beautiful creations!


Now it's time to share the most wonderful tutorial,
created by our talented Digital Diva Hester,
using the Kinetic Elements Dies, so let's check it out!

Sweet Sunday Digital Team Tutorials!


Hester's tutorial is a step by step tutorial available in full here via this link.
You can download and print the tutorial and use it as a guide.
Please if you give this a go, be sure to share it with us,
on the Whimsy Stamps Facebook Page,
and be sure to tag Hester!


Hester is using an image from the beautiful charity set created recently by our talented Whimsy Stamps artist Crissy Armstrong. This set is available for a limited time and has been created to help all the animals affected by the Australian wildfires. The set consists of 5 animal images and 1 coordinating sentiment sheet. All proceeds from the sale of this digital stamp set will benefit WIRES - Emergency Fund for Wildlife. This set is only available for a limited time. When you purchase you are helping care for the animals affected by the wildfires in Australia.


Hester has created a beautiful design that echoes the famous
Ayers Rock or Uluru near Australia's Alice Springs


Here is the beautiful finished card design that Hester created which uses the Whimsy Stamps
No-See Kinetic Basics Die Set to slide the Kangaroo and her Joey back and forth across the card.


What you need:
 Cardstock - light blue, red-brown, green and yellow ochre
Whimsy Stamps No-See Kinetic Basics Die Set
Whimsy Grass and Cloud Edger Die Set
Love for Australia Set - Digital Stamp
Foam Tape
Glue
Scissors
Blade
Ruler
Score Board
Cutting Machine
Optional: Stitched Border Trio Dies or Pierced Border Trio Dies


From the light blue cardstock cut out 21 x 15.50 cm and fold it in half. Cut a red-brown mountain 4.5 x 13 cm. From the green cardstock cut a 5 x 15.5 cm piece and cut the grass edge at the top. 1.5 cm from the bottom you make the opening for the slide with the basic die set. Add the yellow ochre 5 x 15.5 cm which you’ve cut out a wave on top. You could use the Stitched Border Trio Dies for this, or the Pierced Border Trio Dies.


Glue the mountain to the grass. Cut everything out of the basic die set. Put the foam tape on the back. If you put it together you can see if you need more tape. Attention: you should not stick tape on the side where you slide. Now colour your kangaroo digital stamp.


Stick the mountain with the grass on the card. Pay attention when you put it together. Watch out that you don’t stick to the slider. Before you proceed, see if the card slides properly. I put a bigger square on it to have a smoother slide. 


You now need to cut the slider element with one hole in it. There are some folding marks on it. Fold it two times and stick the reverse side on your slider. Now stick the yellow ochre panel on top allowing the folded tap to sit over it. Glue your coloured kangaroo onto the folded tab.


Now your card is ready and your layers should look like this when you look from the side. Enjoy creating your own version of this fun slider card using the fabulous Whimsy Stamps Kinetic Die Elements


The final card again

You can check out another beautiful card of Hesters using this stunning stamp set, along with the rest of the Diva's beautiful creations in a recent post showcasing this wonderful set of stamps created to support Australia and their beautiful wildlife affected by the horrific recent fires. Click through on Hester's beautiful card below to head to that post.


We really hope you love our second Digital Team Tutorial. We will be bringing you a new tutorial every month, so be sure to come back and visit often! All the Whimsy Stamps elements Hester has used are thumbnail linked below for quick and easy reference and you can read all about Hester's creative journey with this tutorial on her personal blog which is linked via her image below. 

 Huge thanks to our amazing Digital Diva Hester for this fabulous Digital Team Tutorial

We hope you will enjoy creating with Hester's tutorial. Download a copy for easy reference and do make sure you tag her in our Whimsy Facebook page if you give this a go, she'd love to see! The next time we're here on the Inspiration Blog it will be to post the brand new March Digital Release! We have so many gorgeous creations to share, so come and check it out. Wishing you all a wonderful week and happy creating! Hugs xoxo


Fresh Friday - A new Collection and Inspiration

Hi Whimsy fans! Fridays on the Whimsy blog are now Fresh Fridays, where we are taking a look at previously released products.

For the next two weeks, we are showcasing the following Whimsy Stamps goodies.


You can find all of these products in our Fresh Friday section of the store, here. You can also click on the individual photo links below.


Bev's card has us wowed with the beautiful background using the Illusions Background stamp. We love the varying shades of green and how she incorporated the Celebrate Word & Shadow die set into the bottom third of the card. She finished off the card with some fun white die cuts which are from the Leaf Foliage 2 die collection.


Faye is treating us to a super fun card featuring the Goth Girl stamp set along with the Straight Edger Die collection  The sentiment is from the Happy Headlines set. We just love the soft orange backdrop for the little cutie in the Goth Girl set.  


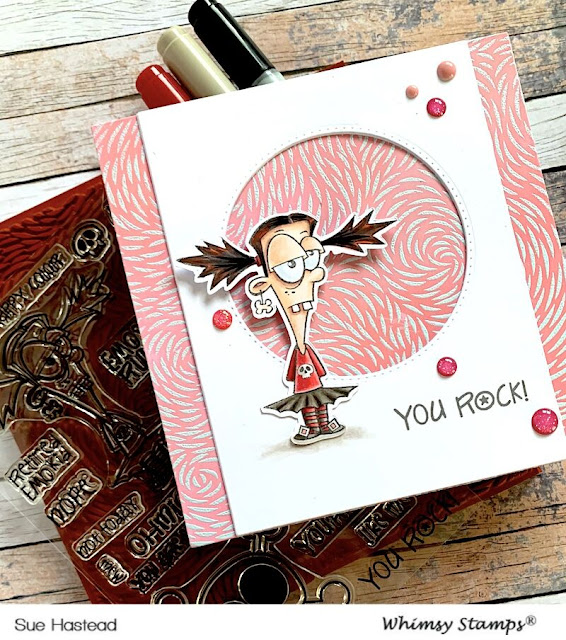
And to round out our inspiration for today, Sue has a fun card design featuring the Illusions Background heat embossed in the background paired with the cutie Goth Girl. We love the die cut panel over top of the background for added interest.

That's all we have for you today. Make sure to join us next Friday where we will have additional inspiration using these fun products.

Special Guest - Anita Madden

Good morning friends!  I'm back with another guest project for Whimsy Stamps!


Today I'm using the Tweetie Pie clear stamps and the Slimline Windows Die to make a fun birthday card.  I love how versatile this stamp set is.  Not only can you use it for holiday cards, but it's also perfect for winter cards too!  I used a blending brush to add Peacock Feathers and Blueprint Sketch Distress Oxide Inks to a piece of Bristol card.  I spattered it with water and white acrylic paint.  Once it was dry, I stamped the sentiment and musical notes with Versafine Onyx Black Ink.  I used the Slimline Windows Die to cut a frame from white cardstock and adhered the frame to the inked Bristol using foam tape.  I adhered this piece to my card base which measures 3 1/2" x 8 1/2".


I stamped all the birds on Neenah cardstock, colored them with copics, and fussy-cut them.  I used a black glaze pen on the birds' eyes and used a Wink of Stella clear glitter pen on the snow on the tree branch for a bit of sparkle.  I used 3D Foam Squares to adhere the birds to my card and then added a few clear sequins for some more sparkle.


I want to thank the Whimsy team for inviting me to be a guest this month - it was so much fun!  I hope you have a wonderful day.

Hugs, Anita