
Have you ever made a Copic marker scribble background for one of your cards? It’s exactly what it sounds like: grab a few markers and scribble over a stencil until you like the look.
The beauty of this technique is you don’t need to make a smooth blend since the streaky look is what you’re aiming for. And it’s a fast option if you need to make several cards, too.
For the card today, I needed a little something to go behind this sentiment stamp called Wish Upon A Star. It was so funny - every time I read the words, the song got stuck in my head. I would be humming it for hours afterward!

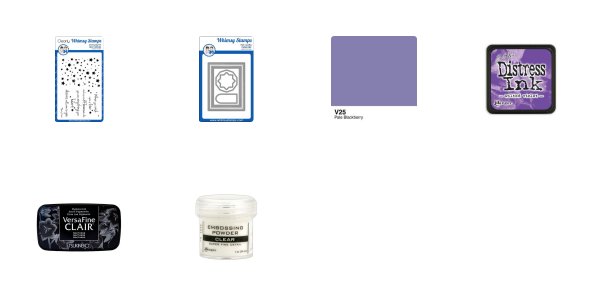
To put this together, die cut a rectangle from a scratch piece of paper, line it up over your card front, and tape it down with some low tack painter’s tape or Post-It® Tape. Grab two to three Copic markers (I used V20, V22, and V25) and scribble back and forth until you get a look you like, then lift off your rectangle stencil.
Don't worry if the ink bled around the edges, that's part of the beauty.
Stamp the stars with a light colored coordinating ink. I used Wilted Violet since it's a muted color. Then, stamp your sentiment with Versafine CLAIR in Nocturne (heat emboss with Detail Embossing Powder if you like), and trim the panel with your favorite frame die. I love the one that comes in the Card Builder Windows Die Set.

Finally, mat your card front with coordinating cardstock and adhere to your card base.
Thanks for reading today. If you liked this card, please share the love by pinning to Pinterest!
❤️ Niki • cardstoq.com • @cardstoq (on Instagram, Pinterest & Twitter)


Nice post. It is really interesting. Thanks for sharing the post!
ReplyDeleteCopic ciao marker
copic refills canada