Showing posts with label Card Builder Window Die Set. Show all posts

ThermOWeb & Whimsy Stamps Collaboration Day Four


Displaying Collaboration Graphic 3.jpg


  This week Whimsy Stamps and ThermOWeb are partnering for a fabulous week of inspiration and prizes!  All week long designers from both teams will be sharing ways to add foils and more to your projects using products from ThermOWeb and Whimsy Stamps.  Read to the end of this post to find out how you can win!

For my first card today I used Whimsy's Friend Word and Shadow die set from the February release as well as the Card Builder Windows die set


I die cut the large shadow from ThermOWeb's double sided white Foam Adhesive and applied Deco Foil in the color Lime green which has a nice satin sheen. I die cut the word friend from black cardstock and layered it on top of the lime green shadow.
The lime green cardstock panel was die cut using the Card Builder Windows die set


My marbled background was created with Alcohol Inks on YUPO paper. Where the ink is pooling together it stays wet a bit longer and gets a bit sticky. This is what I used to apply the silver Deco Foil Transfer Sheets. After I applied the foil to all sticky areas there were still some areas I wanted to have more foil. So I used a brush and the Liquid Adhesive, let it dry and applied more foil.


Here is a close-up where you can see all the beautiful shine from the silver foil in the background and the shimmer from the lime green satin transfer sheet on the words shadow.


For my second card I used Whimsy's Speckled Heart Stencil together with ThermOWeb's Deco Foil Transfer Gel  and Magenta satin Transfer Sheets on light pink cardstock. 


I used the Envelope Edger dies and the heart dies from the Sketched Elephant die set to create a border. On top I added the Smile large word die as my sentiment.


Here you can see the amazing sheen and brilliance the magenta foil gives the heart speckles. I also added a few gemstones and crystal drops from the Sparkletz - Jelly Fish mix to finish off my card.


Would you like to win a $25 gift certificate to Whimsy Stamps?  To enter, leave comments on all of the collaboration posts on the Whimsy blog this week.  One winner will be randomly chosen from all of the blog posts, so the more posts you comment on, the better your chances are of winning!  You have until Monday, February 11th at midnight CST to comment.  The winner will be announced on the Whimsy blog on Tuesday, February 12th.

ThermOWeb is also offering a gift certificate, so be sure to visit their blog each day this week for more inspiration.  Leave comments on their blog for another chance to win!

Thanks for visiting!

My blog - Paper Crafting in Cocoa


*NEW Friend Word and Shadow Die Set   Card Builder Windows Die Set   *NEW Smile Large Word Die   Speckled Heart Stencil   Sketched Elephants Dies   Envelope Edger Die Set  Sparkletz - Jelly Fish

Wish Upon a Star with Copic Markers


Have you ever made a Copic marker scribble background for one of your cards? It’s exactly what it sounds like: grab a few markers and scribble over a stencil until you like the look.

The beauty of this technique is you don’t need to make a smooth blend since the streaky look is what you’re aiming for. And it’s a fast option if you need to make several cards, too.

 For the card today, I needed a little something to go behind this sentiment stamp called Wish Upon A Star. It was so funny - every time I read the words, the song got stuck in my head. I would be humming it for hours afterward!


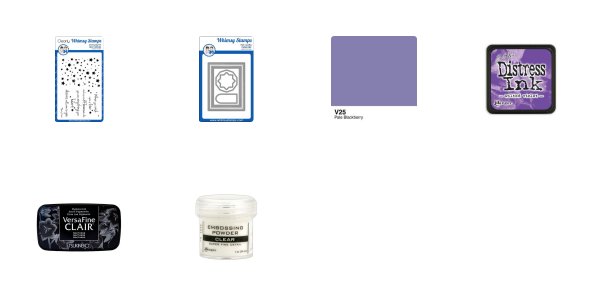
To put this together, die cut a rectangle from a scratch piece of paper, line it up over your card front, and tape it down with some low tack painter’s tape or Post-It® Tape. Grab two to three Copic markers (I used V20, V22, and V25) and scribble back and forth until you get a look you like, then lift off your rectangle stencil.

Don't worry if the ink bled around the edges, that's part of the beauty.

Stamp the stars with a light colored coordinating ink. I used Wilted Violet since it's a muted color. Then, stamp your sentiment with Versafine CLAIR in Nocturne (heat emboss with Detail Embossing Powder if you like), and trim the panel with your favorite frame die. I love the one that comes in the Card Builder Windows Die Set.


Finally, mat your card front with coordinating cardstock and adhere to your card base.

Thanks for reading today. If you liked this card, please share the love by pinning to Pinterest!

❤️  Niki • cardstoq.com • @cardstoq (on Instagram, Pinterest & Twitter)

Fun in the Sun

Good Morning. Dorinda here today to share with you.

I know you've noticed the newest artist, Elisabeth Bell, to join with Whimsy Stamps.
I am a longtime fan and so was super excited.
 This super adorable little one is called
She just makes me happy.

Other Whimsy Stamps products used:


I've colored Sunshine with Copic markers 
and cut the image out with the smaller retangle from Card Builder Windows Die Set.
Then using Bold ABC Die Set, I've cut out the word "FUN" and added the letters to 
the smallest piece of Shaker Maker Banner Die Set.


Whimsy Stamps Products Used:

*NEW Sunshine*NEW Bold ABC Die SetShaker Maker Banner Die SetCard Builder Windows Die Set

Best Friends...

Hello everyone, 
Sue here today and I hope you are having a happy Wednesday!

Phew, what a few weeks it's been here in the UK!

Exciting Football and a tropical heatwave!

Anyways, here is today's card and it is a beauty,
made with 
new release gorgeousness...
Soul Mutts
Ingredients from Whimsy Stamps
             Soul Mutts                             You're My Favorite Sentiment Set
               
     FaDoodles Clear Stamp Set by Faye Wynn-Jones
Dies - Card Builder Windows Die Set
Papers - Distressed Polka Dots Digital Paper
Other - Memento Ink pad in Tuxedo Black

Copic Markers
Heart - FB2 and Colourless Blender
Skin - E04, E11, E01, E0000
Hair - E51, E53. E55
Frock - V09, V17, V15, V12
Boots - C6, C4, C2
Soul Mutt! - C8, C6, C4, C2
Be sure to have look around our
to see the gorgeous DT creations here and then pop to 
to engage in some essential retail therapy!

Thank you for popping by,
Happy creating! 
love from
Sue...xxx

Sunflower

HI, Céline here to share with you my latest Whimsy stamps card.

Today I chose one of my favorite stamps from DoveArt
I love Sunflowers so I have to love this stamp

It's an easy card, just to keep this wonderful stamp as focus point

My card base is a  14,8 cm  square
I've cut a cardstock at 14,5 cm then gingham paper at 14,2 cm
I've stamped and colored my image with Copic Markers
and cut it with Card Builder window die mated on a black cardstock cut at 10,5 x 13,6 cm
I've stamped "Special" sentiments from Everyday Scripted Sentiments set at the bottom, on the right side
Then I placed the image on the card slightly tilted
I've added some enamel dots

Copic Colors used :
Y38, 35, 15, G07, YG09, G14, E19, 08

Hugs
Céline

Kung Fu Panda!...

Hello everyone, Happy Wednesday!

The gorgeous new releases from 
Whimsy Stamps 
have been absolutely beautiful this month haven't they!
What a fabulous month of gorgeousness we have had!

It's Sue here today
and I want to to show you a fabulous and fun stamp set
and a really useful stencil
Beaded Curtain
...and there's more! - A beautiful Die Set
New Card Builder Windows Die Set

I absolutely love this little chap and I am surely showing my age by finding that sentiment hilarious!
Ingredients from Whimsy Stamps 
Stencil - Beaded Curtain

Be sure to have look around our
to see all the gorgeous DT creations here and then to 
to engage in some essential retail therapy!
Thank you for popping by,

Happy creating!
love from
Sue...xxx

Other ingredients and Copic colours are on my blog
HERE
if you would like to pop and have look!


Take Care Panda Bear

Hello Whimsy Friends,  so how have you crafty peeps been
all well I hope. What did you all think of this months release 
wasn't it a little beauty.

I have those cute little Panda Bears from the Paper Door Kit
to share with you lovely peeps today, I created the scene
with Distress Oxide Inks and drew in the 
bamboo with polychromos, I coloured these cutie pies
with copics.


I used the Card Builder Windows Die set to frame the scene.
Have a lovely rest of the months my crafty friends 
take care ......