There might be angels...

Hello everyone!

It's Sue here today to show you one of February's fabulous new releases from wonderful

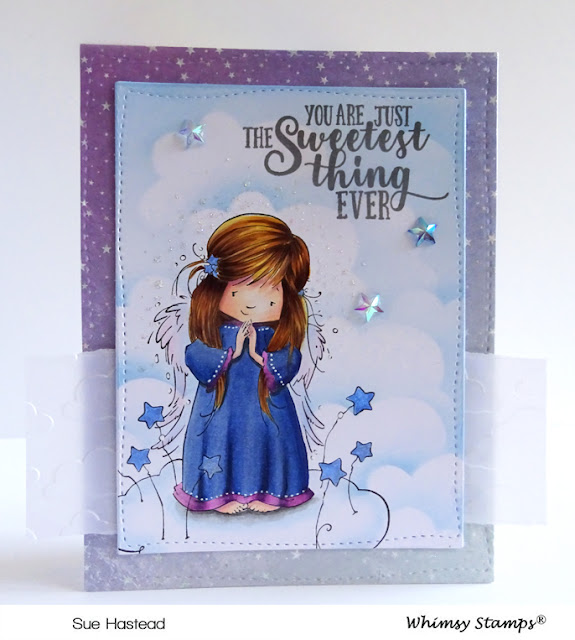
The card I am sharing with you is made with the utterly gorgeous
Angel Nevaeh Rubber Stamp
by Marina Fedotova
To make this card I stamped gorgeous Angel Nevaeh with black ink.  
I die cut her with a Hand Stitched Nested Rectangles Die slightly off setting her to the left hand side.

I coloured Angel Nevaeh with Copic Markers as shown.
Skin V12, E93, E000, R20
Hair YR23, E99, E29
Frock B39, B37, B34, V12, V15, V17 White Gel Pen
Wings BG000, V00
Stars Blue Copic Glitter Pen

Next, I die cut a Stitched Cloud and used it to mask the background and apply Tumbled Glass Distress Ink.

Then I tore a strip of vellum and embossed it with a clouds embossing folder.  I layered the strip and the coloured image onto a piece starry design paper.

I added the sentiment from the beautiful Beaucoup Bouquet Clear Stamps Sentiment Set.

Finally I embellished the background with some super sparkly
Thank you for popping by!

Be sure to pop to 
to see the gorgeous DT creations there and then to 
to engage in some essential retail therapy!

love from Sue...xxx

One Design - 3 Different Cards with Alanna

Hi Whimsy fans - Alanna here and I'm thrilled to be sharing not one but three cards with you on the Whimsy blog today. 

All 3 are the exact same design. I just switched up the backgrounds and on the last one, used a different sentiment.

For my first card, I started by taking a cloud stencil from my stash and lightly inking on some light pink clouds in the background.

I then took a couple of the adorable images from Bunny Balloons and stamped them onto my panel using my stamp positioner. I also stamped the sentiment from Bold Statements

After my stamping was done, I took out my Zig Clean Color Real Brush Markers and added a bit of simple coloring just to the balloons.  I added a few clear sequins and this card is finished.


For my second card, I again tackled my background first. This time, I did some ink smooshing with both Wilted Violet and Picked Raspberry Distress Oxide inks. I just wanted a soft background with some depth to it.

After my background was dry, I stamped the images again. They were all still left in my Misti so this was easy. I will tell you that the stamping doesn't look that great. Even though I stamped it about 4 times, I think between the water color card stock I was using and the layers of Distress inks, the stamping had a hard time coming out super clear.  

But all in all, I still really love this card.


For my last card, I started with a piece of fun patterned paper from my stash. I stamped the bunny balloon images again, in the same spot. This time, I decided to switch out the sentiment for another one from the Bold Statements set.


And here is a quick peek at all 3 cards together. I hope you've enjoyed these projects today. Crafty hugs!


Arrgg! Pirates - Box Card

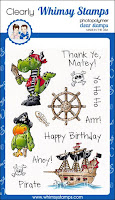
Hello everyone!  It's Rachel here today and I am so excited to share with you a fun box card that I made using the newly released Arrgg! Pirates Clear Stamp Set. (Affiliate links used)


I love how versatile this set is!  To start, I first stamped my images with Memento Tuxedo Black Ink.  I then colored them with Copic Sketch Markers. (I did some reverse stamping for the parrot so that he would be facing in the other direction.)


Reds: R02, R08, R46, R89, RV99
Browns: E30, E33, E23, E25, E27, E29
Blue Vest: B0000, B00, B04, B06
Greens: YG0000, G20, YG01, YG07, YG17, G28
Yellows: Y13, Y15, Y17, E35
Boots: E40, E41, E42, E43, E44, E47


To create the box portion of my card, I followed THIS tutorial but I usually tweak it and make a few changes in how tall the box is.  I used the Farmhouse Shiplap Background Rubber Cling Stamp to make my wooden panels to decorate the sides of my box.  I stamped it with Clear VersaMark Ink, heat embossed it with Clear Embossing Powder and then blended over top of it with both Tea Dye and Ground Espresso Distress Inks.


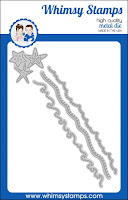
I used the Kinetic Straight Waves Die Set to make both my waves and sandy beach borders on the inside of my box card.  I LOVE these dies!  The stitching is just gorgeous.

I hope you enjoyed my card today!  Thanks so much for stopping by!
 

Arrgg! Pirates Clear Stamp SetKinetic Straight Waves Die SetFarmhouse Shiplap Background Rubber Cling Stamp


The Unpampered Stamper


~ Whimsy Stamps...You're So Special! ~

Hi Everyone....Nicolette here to share with you a fun interactive shaker card that I made using the new Penguin Poop Clear Stamp Set and Peekaboo Windows 3 Die.  These items go perfectly together!


These penguins just crack me up and I would be happy to share my last ice cream cone with any one of them!


I just love the 3-D effect you can get using this new die!

Here is what you need to make this card:

White Card Base:  5 1/2" x 8 1/2"
White Card Stock cut with Peekaboo Windows 3 Die
Stripe Paper/Paper of Choice:  2 1/8" x 5"
Heavy Weight Acetate:  2 1/8" x 5"
Sprinkle Paper/Paper of Choice:  1 5/8" x 5"
Sentiment cut from white cardstock using Quick Strips Die
Sentiment "You're so Special" trimmed 1/8" away from words
Teal Cardstock:  1 1/2" x 1/2"
Orange Cardstock:  1 5/8" x 5/8"
Foam Tape
Rhinestones


*NEW Penguin Poop Clear Stamps*NEW Peekaboo Window 3 DieQuick Strips Die Set

~ Copics ~
Penguins: C0 C1 C3 0
Beaks:  Y15 Y19 YR12
Feet:  YR65 YR68
Teal Ice Cream:  BG10 BG11 BG13
Orange Ice Cream:  YR61 YR65 YR68
Brown Ice Cream:  E57 E59
Chocolate Syrup:  E79
Cones:  Y23 E31 E35

~ Instructions ~

1.  Stamp and color penguins.  Trim around penguins and set aside. Stamp sentiments.  Cut and die cut cardstock to have ready to assemble. 

2.  Adhere acetate to rectangle part of frame.  Adhere a double layer of foam tape all the way around the window leaving no openings for shaker bits to fall out.  Lay sequins on top of stripe paper or paper of choice.  Adhere window frame on top and make sure it is adhered firmly.

3.  Adhere double layer of foam tape to the top and side edges of frame that is remaining.  Adhere to  sprinkle paper or paper of choice.

4.  Adhere this piece to card base.

5.  Add oval with sentiment to the middle of the window using foam tape.

6.  Add penguins, as shown in picture, using a double layer of foam tape.

7.  Adhere sentiment strip to small teal cardstock and then to small orange cardstock.  Adhere to card.

8.  Add rhinestones, as shown in picture.

Happy Stamping!


Hugs Bunny - special guest - Pamela Schumacher

Hello everyone! Today I am sharing with you my last guest design team post for Whimsy Stamps. I have really enjoyed playing with their super cute stamps and had a lot of fun creating with them. I thank Whimsy Stamps from the bottom of my heart for such a wonderful opportunity! 

 For today's creation I chose to work the super sweet "Hugs Bunny" clear stamp set. Who doesn't love adorable bunnies and hugs! A Momma giving love to her little one...makes my heart smile!

  bunny hugs

~Copics~ Bunnies: W2/1/0/00/BV20/R000/R00 and E42/41/40/R000/R00 White flower soft was glued to the tails Scarf: BG49/13/11/Y11/Y000, white gel pen

bunny hugs1 

 The sentiment circle was created with the Mermaid Scales Stencil and  the grass is from the No See All Seasons Tree kinetic die set.

Thanks so much for joining me today! 

 Happy crafting!! ~ Pam xx

Hugs Bunny Clear Stamps mermaid scales stencil no see all seasons tree die set

Spiral Roses Thanks So Much

For today's post I'm featuring a really pretty rubber background stamp called Spiral Roses


I first heat embossed with white embossing powder on Bristol cold pressed watercolor paper.


I wet my paper with water first then floated/dabbed on some purple inks (Tim Holtz wilted violet and dusty concord distress inks). After it was dry I went back add added darker highlights to random areas with the concord grape ink.


Once it was all dry I cut a portion of the completed Spiral Roses into a square and glued that to a black card base. For the top I cut off another portion of the background and fussy cut around the flowers then glued that down to the black card base.


I used the scallop from the Kinetic Curved Basics die for the white strip and stamped the sentiment from Everyday Scripted Sentiments.


For a final touch I added a couple of Jelly Fish Sparkletz which added just the perfect purple bling on the sentiment area. I LOVE all these Sparkletz and they're even better in real life.

  *NEW Spiral Roses Background Rubber Cling Stamp  Everyday Scripted Sentiments Clear Stamps Kinetic Curved Basics Die Set
Sparkletz - Jelly Fish
Thanks for stopping by...see you soon,


The Digital Vault Update ~ New Kinetic Stamps

A warm hello to all our crafty pals out there
We're so glad you've found your way here to the
Whimsy Stamps Inspiration Blog

Did you see our fabulous February Digital New Release?
If you missed that, you can check it out right here...


Today, we have a real treat for you!

Our awesomely talented Crissy Armstrong
has created the most amazing and fun images
to be used with the fabulous Whimsy Stamps Kinetic Dies
and the talented Digital Divas have worked a lil' magic with them!

They of course don't have to be used with the dies
they are fabulous stand alone images and two of the Divas
showed how you can work with them, without the dies.

 Click through to the Diva's blogs via their name links
to enjoy checking out their beautiful designs. 


created this fabulous 'Tiger In The Grass' scene using Sliding Tiger.
I love all the diecut elements in this gorgeous creation and her wonderful colouring.


created two really fun scenes by merging two of the images, 
I love the look on this doggie's face. So funny used together like this!
Check out the video here for this fabulous creation.


For this gorgeous card Sliding Bear and Scooter Dog were merged.
You can check out the video here of how Deni created this lovely card scene.


The following designs were created with the new
'No See Kinetic Dies' from Whimsy Stamps
These dies open up a world of fun possibilities!


used the fabulous Sliding Tiger Crissy designed to create this 'Touchdown' scene
as a hat tip to Clemson University. How fun is this?!


had such a blast creating with these fun images and dies
that she made four absolutely fabulous scenes!!

I adore the way Ute has added the balloons and flowers to Crissy's Sliding Bear here.
What a stunning snowy scene too.


The Sliding Lion chasing the butterflies here is so fun!
The ink work and big shimmery moon is so gorgeous in this scene.

I love the sentiment Ute used on this card. It's so uplifting.
Her butterflies are so fun as they come off the edge of the page chased by the Sliding Tiger!

How inspired is this magic carpet ride scene?! The look on this Scooter Dog's face is so fun.
This scene has me smiling from ear to ear! The sentiment is just so brilliant too!


Finally, a closer peek at the incredible alcohol ink work on this beautiful creation of Ute's.
I love the googly eyes on the Sliding Tiger too, so fun! Four stunning creations by our lovely Ute.


I hope you've enjoyed seeing the possibilities with these wonderful new Kinetic images.
Don't be daunted by the way they look, they're really easy and fun to use
and there's a fantastic tutorial by designer Jennifer Dove
right on the Kinetic Dies home page!

Check out the February Digital New Release via the banner below. 


The Digital Divas and I will be back with more inspiration for you again very soon.

Happy crafting,