Showing posts with label Special Guest. Show all posts

Special Guest - Doni

Hello, Whimsy friends!
Today we welcome the lovely Doni to the blog.


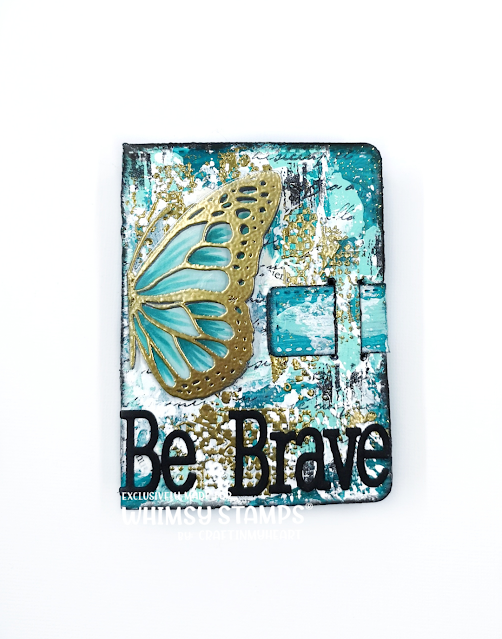
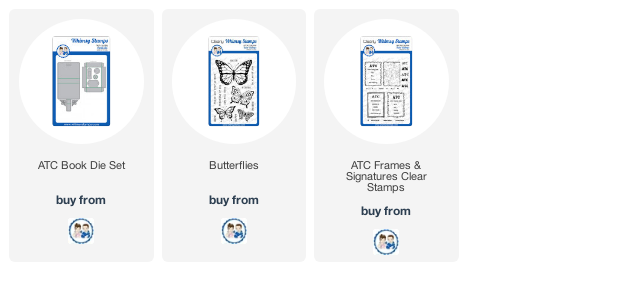
For my project I used the ATC Book Die Set, the ATC Frames and Signatures and Butterflies stamps.

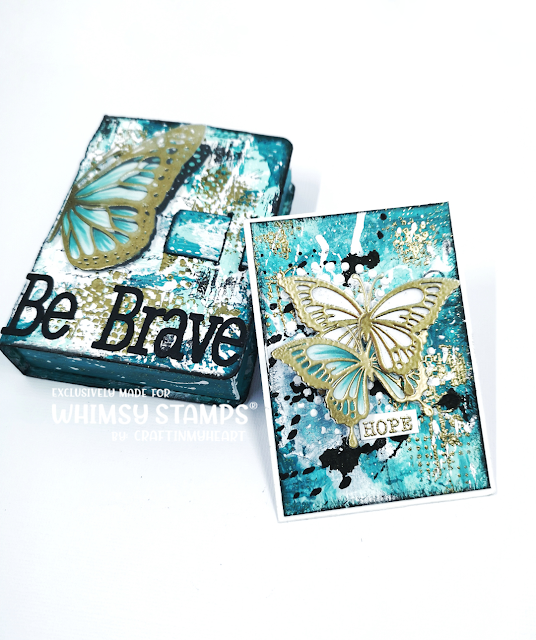
To start, I die cut the ATC Book die set on a heavy cardboard and decorated it by making a collage of monoprints made previously with gelli plate, then with my finger to make everything uniform I added a little turquoise and teal acrylic paint here and there and with the painting palette knife and white gesso I created the texture. 

To further embellish and bring out the colors, I got the edges '' dirty'' with black  Woody Stabilo and embossed with gold embossing powder. For the focal point I used the largest butterfly of the Butterflies set, first I stamped on a white sheet with a black pad and I colored the stamp with Copic colors, then I embossed the same butterfly on an acetate sheet with the gold embossing powder and I cut the butterfly in half, joining the two parts (the paper and the acetate one)and gluing, to give depth. 

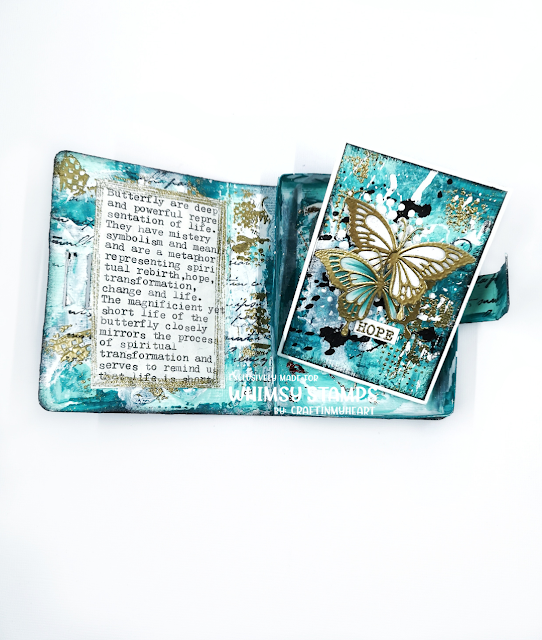
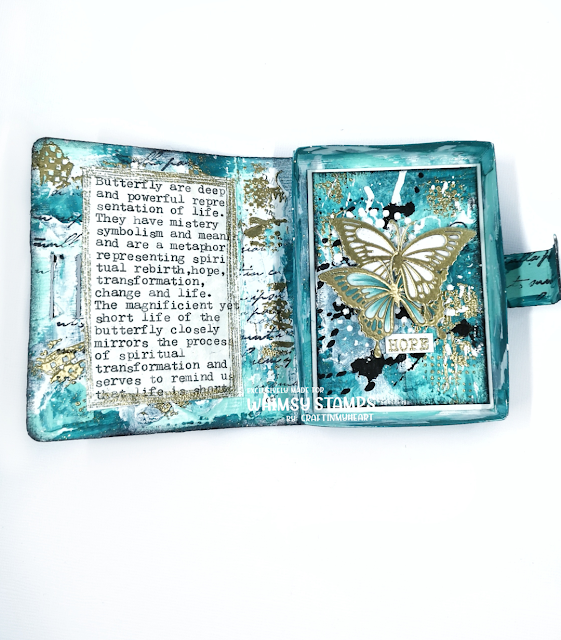
Then I glued the sentiment that is very important to me on a project. Inside the box on the left side I typed the symbolic definition of the butterfly and framed it with one of the stamps of the ATC Frames and Signatures stamp set. The ATC was created with the same procedure, but using a smaller butterfly and the sentiment of the same set.

Here is both the ATC and the book here.


And here are photos of the ATC book opened up with the ATC inside. A match made in heaven.


Thank you, Doni, for this adorable inspiration!
To see more of her work, please check out her Instagram account.


Whimsy Stamps products used:
Special Guest - Julee Tilman

Hello, Whimsy friends!
Today we welcome the lovely Julee Tilman back to the blog.
Hi crafty friends! I'm super excited to be back for another post as a Special Guest at Whimsy Stamps. I'm a huge fan of their adorable gnomes, so I just had to play with the Gnome For the Holidays and Gnome for Christmas stamp sets.


I started by coloring up the Santa hat and Christmas lights gnomes from Gnome for the Holidays with Copic colors in a traditional Christmas color combo.  I then die cut them with the coordinating Gnome for the Holidays Outline Dies, die cutting the Santa one a couple more times to layer up for dimension.


I grabbed some designer paper scraps from my Christmas stash and went to work creating some simple layouts for these sweet little gnomes. I'm usually a more is more girl, but I try to keep Christmas cards pretty tame so they don't cost a fortune to mail! Santa got a buffalo plaid print to ground him, then the sentiment stamped on a die cut circle up above. I accented with sequins and rhinestones to finish off this sweet card.


For the Christmas lights gnome, I decided to make a mini slimline card with a gift card pocket. I created some easy layers and a pocket that would fit a mini Starbucks gift card, then added the darling gnome to the front of it. The sentiment is from the Gnome for Christmas set, and I stamped it onto a die cut  from the fabulous Antique ATC Frames Die Set. My finished card size is 3.5 x 6".


My final card for today uses the adorable elf gnome from Gnome for Christmas. I die cut him with the coordinating Gnome for Christmas Outline Dies, cutting a few more die cuts two layer up for dimension.  Next I used the Antique ATC Frames Die Set to cut a sentiment panel from white cardstock and a mat from patterned paper.  I used the Twinkle Stencil with a light green ink to add a little interest to the sentiment panel, then embossed the holly jolly sentiment in a darker green ink. A few layers of paper and some rhinestones and this card was finished.


Thank you for stopping by today! I am so honored to have been a special guest and it was such a treat creating with all their wonderful products. If you love gnomes as much as I do, you don't want to miss their brand new Gnome Warm Wishes stamp set. It's the next thing on my gigantic wishlist!

Thank you, Julee, for this adorable inspiration!
To see more of her work, please check out her blog and Instagram account.

Special Guest - Julee Tilman


Happy Thursday, Whimsy friends!
Today we welcome the lovely Julee Tilman to the blog!

Hi crafty friends! I'm super excited to be a Special Guest at Whimsy Stamps this month. They have so many wonderful stamps and dies and I have had so much fun creating with them! November is one of those months where I kind of naturally flip back and forth between autumn and Christmas in my creating, so today I'm going to focus on fall cards and I'll bring you some winter inspiration in my next guest post.

Gnomes and coffee are two of my favorite things in the stamp world right now. So for today's cards I chose to use the Gnome So Thankful and Pumpkin Spice Pandas sets.


These little gnomes make me smile, so for my first card I decided to create a scene card with the mushroom house, sign, apple barrel, and leaning gnome images in Gnome So Thankful.  I started by stamping the mushroom house on a panel of cardstock, then free handing a little path coming from the door and extending the hill line as needed with a black detail pen. When this was finished, I colored in the trail with Copic markers and then stamped and colored the other images and fussy cut to determine placement. Once I decided how to lay them out, I masked off the hill area and the house and blended the autumn sky with candied apple, spiced marmalade, and  fossilized amber distress inks. To finish off, I colored in the grassy hill and added a few little details with Copic markers.  

To put it all together, I layered the gnome on top of the sign, then stamped the welcome and gnome sentiments. Then it was a matter of gluing down my additional images and popping up the gnome and  sign he's laying on with dimensional tape. I finished off with some glossy accents on the apples.


I had so much fun ink blending on that card that  I decided to do another ink blended background for my background. This time I blended squeezed lemonade, mustard seed, crackling campfire, and ground espresso distress inks, then flicked a bit of water on just the ground espresso layer to give a little texture to the "dirt". I pulled the pumpkin image from the Gnome So Thankful set and stamped directly on my blended background, then again on cardstock. I colored the stamp and leaves and fussy cut just those parts, then layered onto the stamped image on my background.


The panda and cup are separate images from the Pumpkin Spice Pandas set. I didn't want a jack-o-lantern look, so I stamped the cup image a second time in no line coloring ink then colored in the pumpkin portion with Copics and fussy cut to piece on top of the cup image. Then I colored the sweet little pumpkin head panda and layered on top of the cup, covering up any lines from the panda on the other image.  I finished by popping up the panda and cup with foam tape and then adding the Everything Pumpkin Spice sentiment to the blended background.

Thanks so much for stopping by today! I hope you've enjoyed these autumn creations as much as I enjoyed creating them! I'll be back next week with a little Whimsy Stamps winter flair.

Thank you, Julee, for this adorable inspiration!
To see more of Julee's work, visit her on Instagram and her blog.

31 Nights of Halloween - Night 30 - Special Guest Kulbir Kirkland


This image has an empty alt attribute; its file name is whimsy-blog-badge-special-guest-1.jpg

Good evening, Whimsy friends!  

Tonight we welcome back the lovely Kulbir Kirkland for some creepy inspiration.


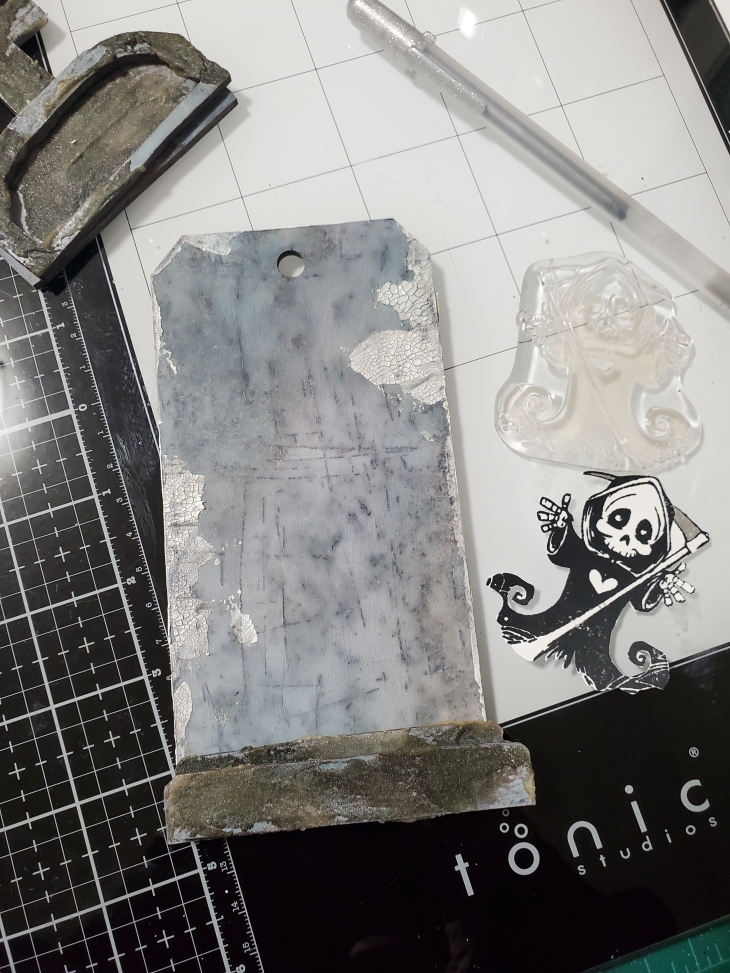
Hello friends I am so excited to back as a guest designer for Whimsy Stamps 31 Days of Halloween. I have always wanted to create a spooky tombstone ectetera tag. The Grim Reaper stamp set was so perfect for it.


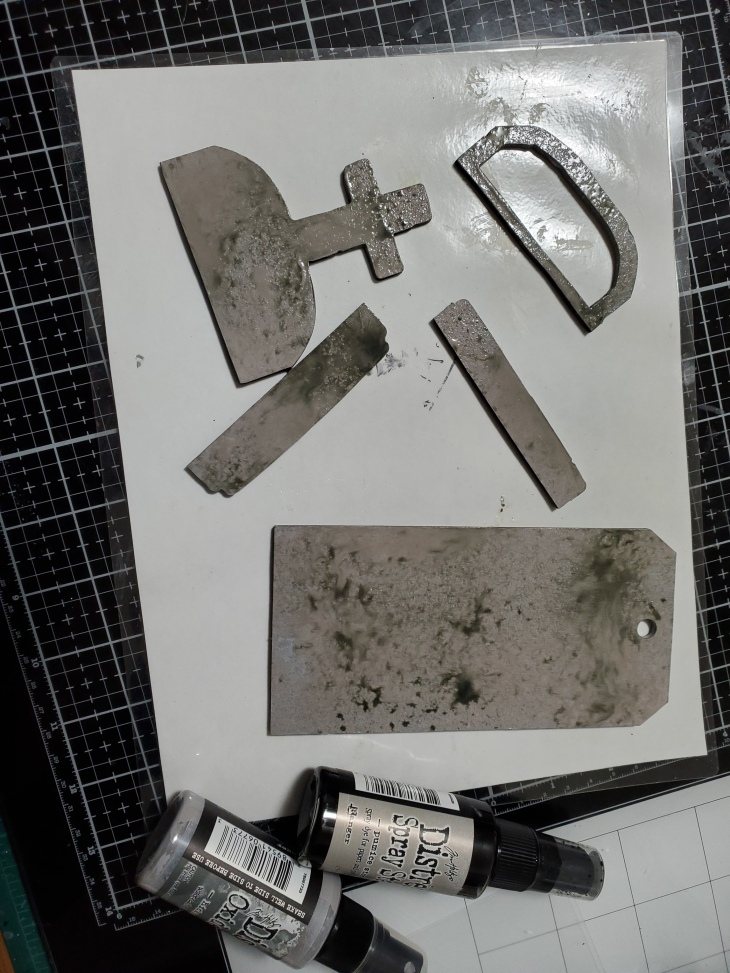
I used the small tombstone etcetera tag and covered it it with gesso. After it had dried I started layering on hickory smoke , pumice stone and a little bit of black soot. After a couple of coats I added on some translucent grit paste and some crypt grave paste.

I added on some crackle paste for added texture. Using collage medium I started gluing pieces together and clamping them in place...yes I raided my husband's workshop :) I stamped the grim reaper onto the tag only because I could cut all the cool little bits on the bottom of his robe. I stamped the image onto a piece of distress water color paperwork and fussy cut it.

I colored the grim reaper with my distress inks and layrered it on top of the one I had stamped. I don't think I really needed to stamp it onto the tag since the smoke was covering the bottom of the reaper. Always learning :) I really wanted the illusion of smoke so I got some batting and sprayed it with hickory smoke oxide spray and glued it in place. For the R.I.P I wasn't able to stamp on top of the paste so I ended up embossing it onto clear acetate and put it in between the cross and the top frame. For the sentiment I used silver cardstock and stamped it with archival ink and ran it through with Tim Holtz Foundery embossing folder.


To finish off the tag I used some moss and glued it in random spots. I had so much fun putting this tag together. Hope you liked this project and if you give it a try, please do share. Happy Halloween my crafty friends.


You can find links to the supplies I've used below: click on the picture and it will take you directly to the product. If purchased through the link provided I will receive a small commission at no extra cost to you. I truly appreciate all your amazing support. Looking forward to sharing many more projects and techniques including my favorite mixed media.

Thank you so much for taking the time to stop by today. Hope you will subscribe to my blog for future posts. See you again soon with another crafty project.


Thank you, Kulbir, for this awesome inspiration!  To see more of Kulbir's work, please check her out on Instagram.


Grim Reaper Clear Stamps


31 Nights of Halloween - Night 27 - Special Guest Vyvie Nguyen


Good evening, Whimsy friends! 
Tonight we welcome the lovely Vyvie Nguyen back for some Halloween inspiration.


Vyvie used the Halloween Postage stamp set to create this spooky bookmark.  

First, she created a mixed media background using distress inks on plain, white cardstock.  She stamped the spider web image and some sentiments from Halloween Postage and embossed them in gold.  She filled in the background by stamping the small, solid spider from the set in black.


For her focal image, she stamped the larger spider from Halloween Postage, colored it and fussy-cut it.  She stamped a sentiment from the set, trimmed it and added it to the bookmark.


She backed the panel with a patterned paper from her stash and finished with some colorful yarns and ribbons.


Thank you, Vyvie, for this fun inspiration!

To see more of Vyvie's work, please visit her on Instagram.


31 Nights of Halloween - Night 25 - Special Video Guests CaCa Crafts by Erica


Welcome back, Whimsy friends, to the 25th night of the annual Halloween Celebration! We hope you are enjoying the nightly haunts here on the blog. Tonight we are haunted by Erica from CaCaCraft by Erica.


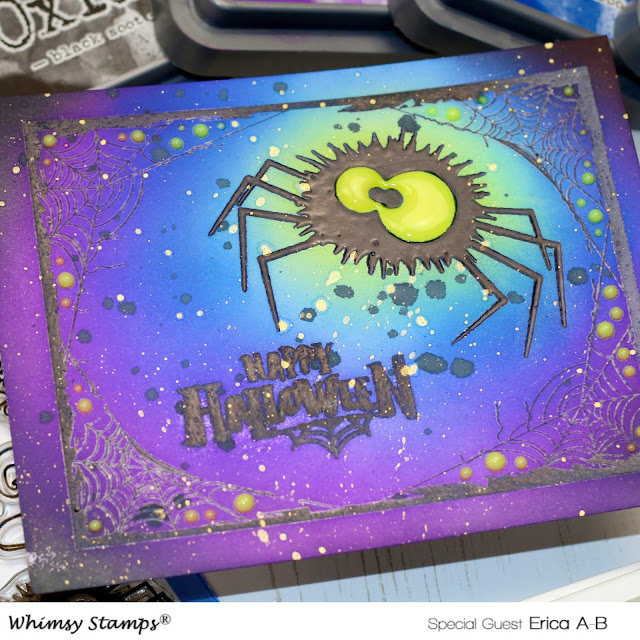
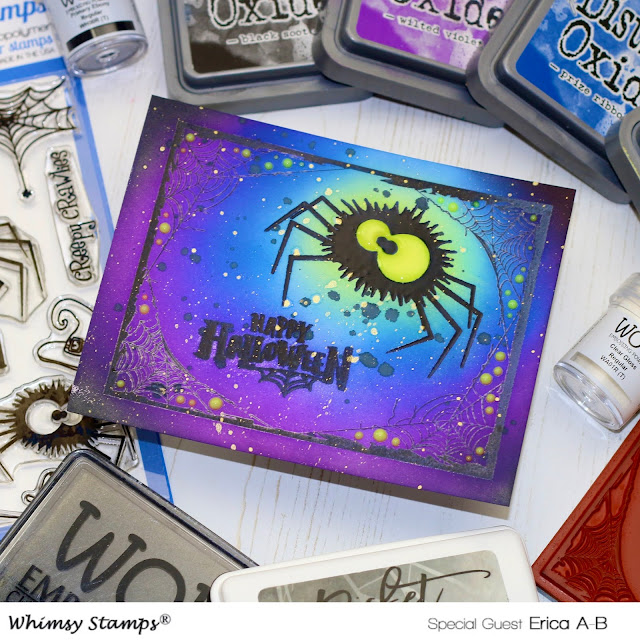
One of Whimsy Stamps' "too cute to spook" Fuzzy Spiders is appearing on Erica's Youtube Channel.
Erica's ink blended background has that little creepy crawly jumping right off her card! Want to know how she did and what she used? Then join her on YouTube for all details. 

Want to know how Erica created that awesome ink blended background? Then click here to watch her video tutorial. 


Thanks for helping us celebrate the 31 Nights of Halloween!

31 Nights of Halloween - Night 24 - Special Guest Kelly Wauters


Good evening, Whimsy friends!  
Tonight we welcome Kelly Wauters back to the blog for some fun inspiration.

Hi Whimsy fans

It's me again, Kelly W, with a second card for the 31 nights of Halloween. Halloween is right up the corner. Are you guys as excited as I am? 


This second card turned out so cool if you ask me! 

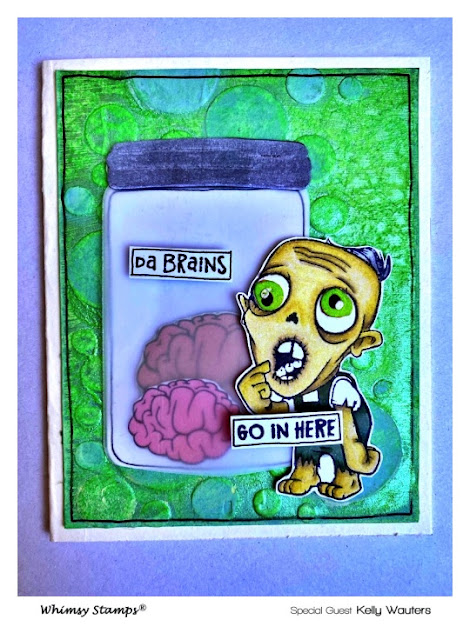
First I stamped Zombie Boy ,colored him with Copic Markers and I added his crazy eyes.


I always start with the main feature first, because I always make the colors from the main return in the background.


Then I created the background using texture paste and a bubble stencil. I painted that with green acrylic paint, and sprayed metallic paint over it to give it a cool shine.


I used the Atlas Mason Jar Die Set to create the Mason Jar and I filled it with some printed Brains. And overlapped it with Vellum paper for the glass effect.


Then I glued the Jar on the card, the Zombie on the Jar, the sentiments on the Zombie and Jar, and Zombie Boy comes to life. 


I really hope you guys love this card as much as I do, and I really hope I could inspire you.

Being a guest designer for Whimsy Stamps is a dream that came true, and I really enjoyed making these Halloween cards. 

Happy Halloween and stay creepy!