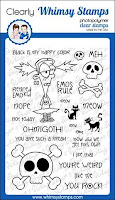
The Digital Vault ~ August Round Up

A warm hello to you all, our Whimsy friends.
It's time to reflect on the amazing month we've had
and I thought a digital round up of all the Divas
gorgeous creations with our fabulous
Crissy Armstrong Collection
was just the ticket!

The Divas are madly prepping for our September release,
but before I share that with you tomorrow
let's have a look at all their gorgeous
August creations.

Click through on the pictures to be taken to the girl's blogs.
All the details of their delicious creations can be found there
and check out Denielle's fabulous step by step colouring tutorials
at Angel Handmade Papercrafts.


A very big thank you to our lovely guest designer this month Meghan Kennihan.
If you missed her gorgeous creations, be sure to click here for a closer look at those.

If you'd like to be invited to join us as a guest designer, make sure you share your
creations with us on the Whimsy Stamps Facebook Page and on Instagram with the hashtag
#whimsystampssundayspotlight

If you feature in the Sunday Spotlight, you'll be in the running to be invited as a Guest Designer!
So keep sharing your gorgeous Whimsy creations with us, we love seeing them.
Catch you tomorrow with a very exciting showcase of our September New Release.
Squeeee, I can't wait to share!!!

Hugs and happy crafting,

Goth Princess


Toni here with you today. Now this was a FUN card to make using the new OmgiGoth set. I love getting messy! With gloves on.  Duh.  

I used Strathmore Bristol Smooth cardstock for the base and randomly smeared on Distress Ink Candied Apple, Seedless Preserves, Wilted Violet and Distress Oxide Weathered Wood. I then stamped the Goth Skulls Background using VersaFine Onyx Black.


I wanted a bit more texture so I used the Whimsy Halloween Creatures stencil with PaperArtsy Grunge Paste. Once dry, I rubbed on a bit of the Distress Oxides.  Not tooooo creepy.


Next I stamped the OmgiGoth image using Memento Tuxedo Black and colored her up using Copics.


I thought the background still lacked a bit of something so I stamped one of the OmiGoth sentiments randomly over the card base using Versamark and Ranger White Super Fine Detail Embossing Powder. I also stamped some of the Cute but Psycho spatters using VersaFine Onyx Black.


For the main card sentiment, I stamped it using Versamark and Ranger White Super Fine Detail Embossing Powder onto a strip of scrap black cardstock and cut it up. I mounted "freak" and the goth girl image on foam tape. Gotta make sure the important stuff is obvious!

If you'd like to check out my other creations, you can visit my blog, Frankie Helps Craft, my Instagram, or my Pinterest Board.  


It wobbles!...

Hello everyone,

It's Sue back today to show you another wonderful
July new release item!

This card was such good fun make because that cute birdie wobbles!!!

I die cut a piece of card with the frame from the 
and using a template from the 
Up In The Clouds die set 
I blended 
over the card to create a cloudy background.

I then added some clouds die cut from vellum with the 
Up In The Clouds die set 
and

I stamped and coloured a cute bird from the 
and fussy cut it close to the outline.

I fixed a 
to the back of the birdie and fixed him/her to the card design as shown.

I stamped a sentiment from the 
onto a cloud die cut with the
Up In The Clouds die set 
and finished the design by adding some 

Copic Markers - C00, C01, C03
YR24, Y38, Y13, Y11, YR09, YR04, YR12


Happy crafting!
from Sue...xxx

Card Builder Windows Die Set Up in the Clouds Die Set

Distress Ink Mini Pad - Tumbled Glass Grass and Cloud Edger Die Set


              *NEW Early Birds Clear Stamps Nuvo - Crystal Drops - Simply White 


Batty for You

Good morning!

How fun are these adorable bats from Whimsy Stamps new release?  These little cuties are from the Going Batty Clear Stamp set.

These handsome little dudes have been busy taking flying lessons and one of them took a wrong turn.  He is hoping his little bottle of elixir will help him feel better.


~Copics~
Bats:  C2/1/0/BV23-R20/RV000/0000-R0000
Bandage:  C2/1/E40/CB
Bottle:  YG25/03/01/0000-C2/1/00  Cork:  E55/53/33
Shadow:  Y11/00/CB
Grounding:  W2/1/0
White Gel Pen


I created this fun shaker card with the new Wonky Window 2 Die and the Messy Mesh Background Rubber Stamp.  I only used the center two windows for the actual shaker part, leaving the top and bottom portion for the image and sentiment.  The adorable little bat was attached to the card after it was finished.

As always, there is an abundance of inspiration to be found in the store here.
*NEW Going Batty Clear Stamps
 *NEW Going Batty Clear Stamps
*NEW Wonky Window 2 Die
Messy Mesh Background Rubber Cling Stamp
**I participate in Whimsy Stamp's affiliate program.  That means I receive a small commission when products are purchased through the links on my blog at no extra cost to you.
Thank you so much for your support!
Crafty Hugs x

Trick-or-Treat!

Hello everyone!  It's Rachel here and I have a Halloween card to share with you today featuring the adorable Candy Corn Dress Up Stamp Set.  I love how cute they look in all of their fun little costumes! (Affiliate links used where applicable.)


I wanted to use all of the images, so I created a slimline card to fit them all.  To start, I trimmed my card front (using Neenah Solar White 110lb Card Stock) to 8.5" x 3.5".  I then diecut a circle from masking paper and placed it in the lower center portion of my card to mask off an area for my moon. I then blended this panel with some blue and black Distress Inks (Stormy Sky, Faded Jeans, Chipped Sapphire, and Black Soot).


Keeping the masking paper on, I then splattered this piece lightly with water using a #4 paint brush.  I let this sit for a minute before blotting it dry with a paper towel.  Once dry, I then splattered this piece again with some diluted Opaque White Paint to resemble stars.  When my background was complete, I peeled off the masking paper over the "moon" area and then used some cool gray Copic markers (0, C00, C1, C2, C4) to add some craters.


I then stamped all of my candy corn images with Memento Tuxedo Black Ink and colored them with Copic Sketch Markers. (Orange: YR12, YR04, YR09, YR18, E35, Yellow: Y00, Y08, Y13, Y15, E34, Black: W4, W6, W8, 100, Purple: BV00, BV02, BV04, BV13, BV17, White: 0, C00, C1, C2, C4, Green: YG00, YG01, YG03, YG17, YG67).


Once I was finished coloring, I then cut out my images with my Brother ScanNCut.  I diecut a long strip of grass by using the straight grass die from the Grass and Cloud Edger Die Set and partially cutting a piece of black card stock twice.  I then heat embossed my sentiment with some Fine Detail White Embossing Powder.


Lastly, I adhered all of my images to the front of my card using some 3D Foam Adhesive Squares for some added dimension.

I hope you enjoyed my card today!  Thank you all so much for dropping by!

Wishing you all a wonderful day!

Rachel 

https://rachelalvaradodesigns.com/

Candy Corn Dress Up Clear Stamps

Cloud and Edger Die Set