Showing posts with label watercolor. Show all posts

Tuesday Tutorial With Sue

 Hello everyone,

Oh my word - these Tuesdays come round quickly don't they! - I swear time is speeding up! (:

It's Sue here to day to share a sweet (VERY sweet)! (; tutorial!
I'm going to keep you guessing today so if you don't read ahead you'll have a nice surprise - unless you can guess what I've made! 

If like me you adore Mer-May then Whimsy Stamps has got you covered!!
I decided to try something a little different with two of the fabulous Whimsy Stamps mermaid stamp sets.
and the 
Ingredients from Whimsy Stamps

Other Ingredients
Cling Wrap
Watercolour Card
To create the inky background for my project I used (Watercolour) Sparkle Pens but you could use any sort of watercolour pens or watercolour medium for this technique. 
Black Stazon Ink
Mini Mister or Spray Bottle
Precision Scissors
Cocktail Sticks
Glue (I used a cold glue gun) 
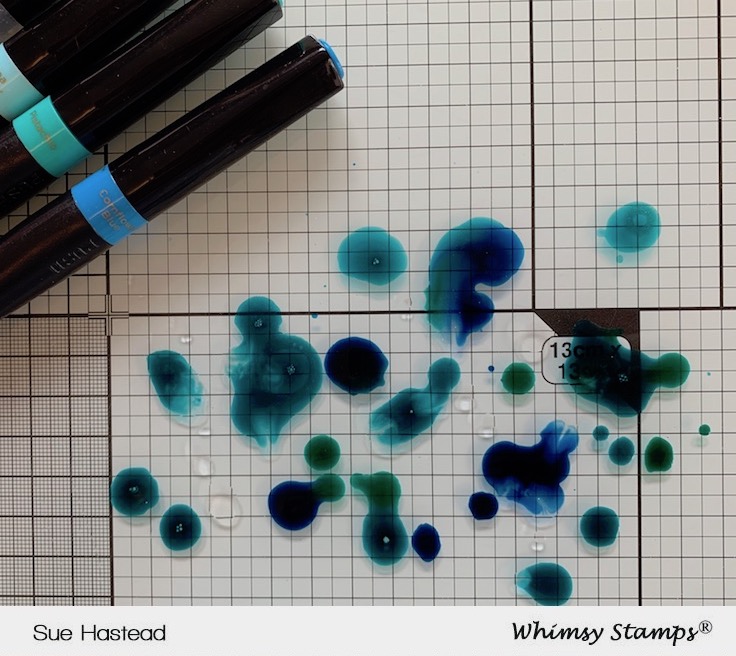
First I placed a piece of cling wrap on my glass mat and scribbled and dotted some inks in blue, turquoise and pink onto it.
I then sprayed water onto a piece of A4 watercolour card.
I then placed the inky cling wrap onto the card, pressed it down and scrunched it up slightly.
I took the cling wrap away and this was the effect...
I repeated this with a different selection of mermaid type colours!
I ended up with two inky deliciously inky backgrounds.
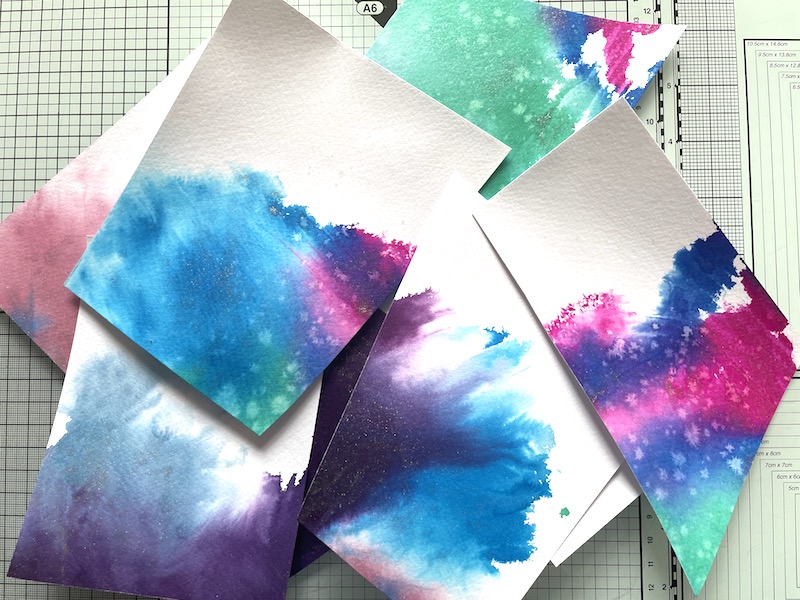
Then I randomly cut the card up into about odd shaped pieces - don't overthink this, just dive in with the scissors, random is best!  I cut the card into about eight pieces in total.
I then stamped the mermaid tail from the Mermaid Dreams  stamp set onto the inky card.
I use Stazon Ink for this as it works best on top of watercolours.  It doesn't bleed and it leaves a crisp outline.
I stamped six tails in total and the gorgeous mermaid from the Lets Be Mermaids stamp set.  (You can see I also stamped the seashells but I decided not to use them this time)
I then fussy cut the mermaid tails (not my favourite part but I'm getting better at it -( I'm a bit of a muppet because I have a Scan n Cut - I'm just too lazy to get it out and set it up)!
Make sure you keep all the off cuts - you will need them later!
I coloured the mermaid with Copic Markers
Hair - E47, E39, YR27, YR24, YR21
Skin - R20, E04, E11, E00, E000
Tail - B39, BG07, BG15, BG01, BG11, YG00, White Gel Pen
I then fussy cut her...
Here's where you need the offcuts I said to save earlier! - I used the smallest and second smallest dies from the Wavy Nested Frames Die Set to cut shapes from the tail offcuts.
I then stamped a selection of sentiments from the Mermaid Dreams and Lets Be Mermaids stamp sets onto them (again with Stazon Ink)
Here is my lovely selection of tails, sentiments and a mermaid!
I used a glue gun to fix a cocktail stick to the back of each shape.  (You could use PVA but I'm impatient and I used the glue gun because it dries so quickly)!
...so, if you have n't already read ahead, can you guess what these are for! (;  ...

...well I did say it was a sweet tutorial! (:

I had a bit of a time deciding which stamp set to use for the cupcakes!  I uuuummed and aaaaaahed over using...  
Unicorn Wishes Clear Stamps - Whimsy Stamps 
or
Over the Moon Clear Stamps - Whimsy Stamps

...and I already have a few more ideas up my sleeve for halloween! (;

Thank you so much for popping by today!  I hope you've enjoyed my tutorial, it would be great to see your projects so remember to share them with us!

look after yourselves and those you love!

Happy creating from Sue...xxx

Mermaid Dreams Clear Stamps - Whimsy Stamps Let's Be Mermaids Clear Stamps - Whimsy Stamps Wavy Nested Frames Die Set - Whimsy Stamps

Special Guest - Anika Mercier

Hello, Whimsy friends!  Today we welcome Anika Mercier back to the Whimsy blog!


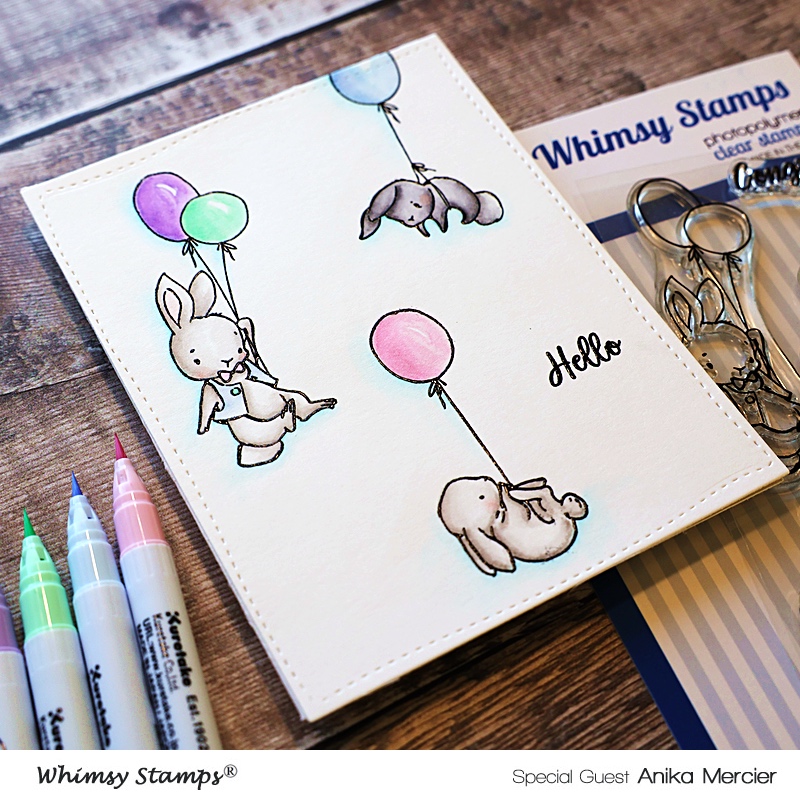
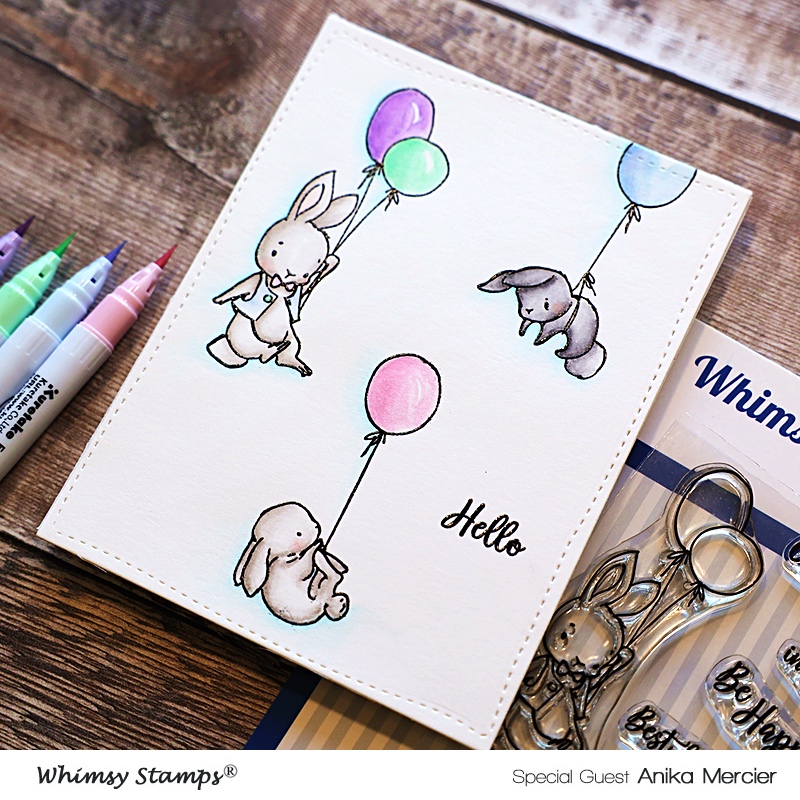
 Hi Everyone, I'm excited to be back with my second card as a guest designer for Whimsy Stamps this month. When I was asked to guest design I knew I had to use one of my favorite stamps sets of all time - Whimsy Stamps' Bunny Balloons 2. Well, I actually snuck in two of my favorite stamp sets since I also used Whimsy Stamps' Bunny Balloons. These adorable bunny images just make me so happy!

Images

To start, I stamped two of the images from Bunny Balloons 2 and one image from Bunny Balloons onto Strathmore's Bristol Smooth cardstock with VersaFine Clair's Nocturne ink and then heat embossed them with clear embossing powder. Next, I colored the images using Zig Clean Color Real Brush Markers in the following colors: Gray Brown, Gray Tint, and Pale Pink for the bunnies; Almond Pink, Lilac, Green Shadow, and Shadow Mauve for the balloons.


Background Details

For the focal panel, I wanted to create a sense of sky so I lightly went around the left and bottom sides of the bunnies with the Light Blue Zig Clean Color Real Brush Marker. I love the soft, added depth this gives the card. Once the watercoloring had dried, I ran the focal panel through my die cut machine with a stitched rectangle die.


Sentiment

To create the sentiment, I stamped one from Whimsy Stamps' Bunny Balloons 2 stamp set directly into the focal panel using VersaFine Clair's Nocturne ink and heat embossed it with clear embossing powder. There are several other really cute sentiments in both of these stamp sets. I hope you enjoyed the card. Thanks for stopping by!

Thank you, Anika, for this adorable inspiration!  
To see more of Anika's work, please visit her blog or Instagram account.


Special Guest - Mayra Duran-Hernandez


Hello everyone! 
Mayra here as a guest designer for Whimsy Stamps. 
I am super thankful to be here. 

The moment I saw the Hugs Bunny stamp set I was in love. 
The images are just so sweet and perfect for all occasions. 


I was going for a CAS look for these cards. I started the first card by stamping the image of the bear hugging the bunny, and the cluster of hearts onto watercolor paper using Antique Linen Distress Ink.  I mainly used Daniel Smith watercolors to color them.  


For the second card, I used Copic markers to color the image in. I then added a bit of blue to each of the backgrounds for the sky, and green to the ground for grassy areas. Next, I added a couple of splatters of white and black ink. I heat embossed the sweet sentiments from the set onto small strips of black cardstock. I adhered the sentiment to the card panels using foam tape. 


Copics Used: E41, E31, E55, E84, E87, E89
W5, W3, W1
R34

I am so happy to be guest designing this month. Thank you very much for stopping by. I hope you each have a wonderful and blessed day. 


Tuesday Tutorial - Splashy Watercolours!...

Hello everyone,

These wonderful Tutorial Tuesdays come round quickly don't they!

I hope you are staying safe, well and in good spirits!

It's Sue here today with a tutorial to show you how to make a simple and colourful card with wonderful
goodies!

Ingredients from Whimsy Stamps
Other Ingredients
Watercolour Card
Black Stazon Ink
White Pen (I used a white water based Sharpie)
Kraft Card

Please follow this simple tutorial to see how I made my card...

Assemble the ingredients as shown.

This is a water colouring project.  I used Sparkle Pens but you can use which ever inks you have to hand, brush markers, ink pads, acrylics, pans, tubes - what ever - the list is endless!  The inks just need to respond well to being sprayed with water!
Dab a selection of blue/green inks on your work surface 
...and spray with water.
Place a piece of watercolour card face down onto the inks and press down gently.
You should see something like this!  If you want to you can repeat spritzing and pressing the card down but I was happy with this so I didn't over do it!
Put the card to one side to dry.
Repeat the process outlined above with a selection of red and orange inks.  
I was happy with this inky piece so again, I stopped spritzing and pressing and let it dry!
With the Kinetic Wave die cut two pieces of the blue/green inky card.
With the largest circle die cut the red inky card and then die cut the blue wavy die cuts so that they fit the circle and lay along the bottom of it.  Fix together.
Using the 13cm and the 11cm circle dies together die cut a piece of Kraft card to make a frame.
Fix the frame to the card design with foam tape as shown.
Stamp the boat from the Splash Clear Stamp Set with black Stazon ink, colour it with water colours and cut it out.  (There is no need to take too much time over this - the less you fuss with watercolours the better and to be honest, I think the background is the star of the show in this design)!
Fix the boat and the clouds to the background with foam tape and and stamp the little birds in black ink.

Die cut a piece of watercolour card with a Quick Strips Die and stamp the good times sentiment onto it.  Fix it to the card design as shown.


Finish the design by adding some white dots with a white pen and some clear Sparkletz!

Thank you for popping by today!

Take care of yourselves and those you love!

Happy crafting
from Sue...xxx


Splash Clear Stamps - Whimsy Stamps Pierced and Stitched Circles Die Set - Whimsy Stamps Kinetic Straight Waves Die Set - Whimsy Stamps
Quick Strips Die Set - Whimsy Stamps Crafty Foam Tape White - Whimsy Stamps Sparkletz - Salt Water - Whimsy Stamps