Showing posts with label Pierced and Stitched Circle Die Set. Show all posts

Happy Halloweeds with Lisa


Hello, crafty friends. Lisa with you today, and I'm so excited to be back on the Whimsy Stamps Blog.

I don't know about y'all, but I'm ready for Autumn crafting, especially Halloween. And because I'm so eager to get going on Halloween, I thought this would be the perfect opportunity to give you an early start on your Halloween cards.  Directly below, I have a step-by-step tutorial with photos. 

Happy Halloweeds Card

 
Start with a 4" x 5.25" piece of white heavy-weight cardstock; using the Whimsy Stamps Cutie ABC Die Set, randomly cut out the word creepy. Be sure to hang onto the E's, P's, and R's centerpieces. 

It doesn't have to be creepy use any word that you like. 


Using Distress Ink Walnut Stain, I grunge up a piece of 4" x 5.25" Neenah Desert Storm cardstock with a blending brush. You can use any brown ink and applicator you have on hand. Just make it grungy. 

Using Distress Oxide Black Soot and Vintage Photo, I cover the white panel. (I'm going to be 100% honest here. I really just wanted to play with some of the supplies that I don't use regularly. So bare with me!)


Press Press N Seal over the die-cut background, including the centerpieces of each letter. Once the background is secure, flip it over and add mounting foam. 

You can skip the mounting foam if you don't want dimension.

Adhere to the grungy Neenah Desert Storm cardstock.

I'm using Distress Oxide Sprays in Peeled Paint, Spiced Marmalade, and Wilted Violet to spritz the background. Once I'm happy with how it looks, I add white and black splatters with my favorite cartoonist pens. 


Use any spray inks or ink refills to create splatters to your background. Set aside to dry.


 In the meantime, stamp and color the Whimsy Stamps Halloweeds image using your favorite coloring medium. I stamped onto Copic Express Blend It Cardstock using Memento Tuxedo Black ink and colored with my COPICS. Run the image through a scan n cut or fussy cut. 

Die-cut a piece of Vellum using the Whimsy Stamps Stitched/Pierced Round Nesting Dies. Adhere colored image to the vellum using glue, tape, or mounting foam.


Flip over and add mounting foam to the back of the vellum, making sure to hide it under the image.


Center over the dried background. Add glue or tape to the backside of the background and center on an 
A2 white card base. 


Thanks for spending time with me today! Leave a comment below, letting me know your favorite time of year to craft and have yourself an amazing day! 



Whimsy Stamps and Therm O Web Collaboration Day 4 - Tricia


It's Tricia here today to share with you more with Whimsy Stamps and Therm O Web Collaboration!   We have a fabulous week of inspiration and prizes! Be sure to visit both blogs all week to enter to win and be inspired by products from Whimsy Stamps and Therm O Web!

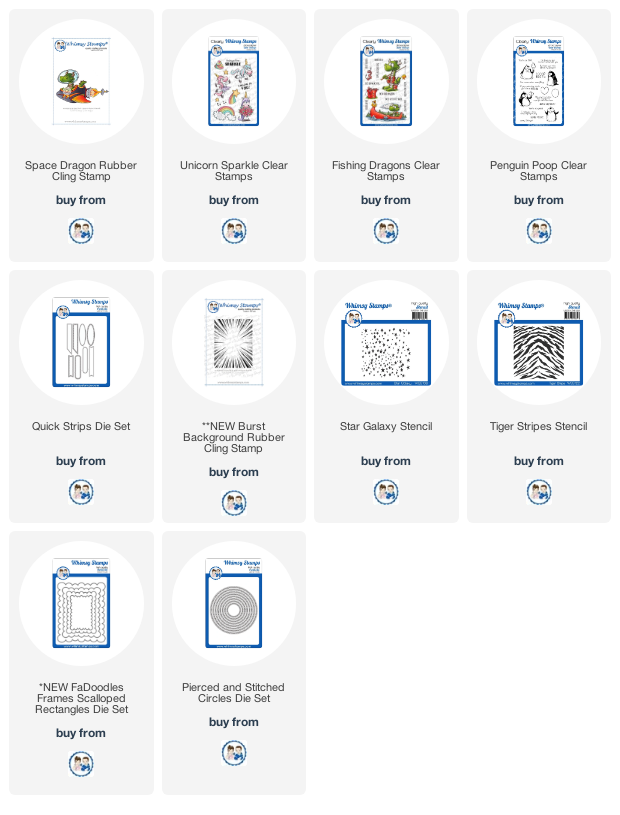
I am sharing two cards that I made with the amazing Rina K Designs Neon Pop Glitz Glitter Gels for my projects today: Hello Yellow, Screamin' Green, Orange Glow and Poppin' Pink!  I had so much fun playing with these Glitz Glitter Gels and Whimsy Stencils!  


For my first project, I used the Tiger Stripes stencil and black cardstock.   I used the Orange Glow and Hello Yellow Neon Pop Glitz Glitter Gels.   These are so cool!   They change colors depending on how the light hits the cardstock!   They also feel like they glow!  


I stamped the Space Dragon and trimmed it out with my Scan and Cut.   I then colored it with my Copic Markers.   I added details with a white gel pen and some crystal glaze around the helmet.   


 I used the Burst Background Stamp and stamped black ink onto a grey card base.   I then trimmed my stenciled panel with the Pierced and Stitched Circle Die set.   I thought it looked cool as a planet!  I added a sentiment from another stamp set called Fishing Dragon.  For a final touch, I added some crystal clear sequins. 


For my main image, I used the Unicorn Sparkle Stamp set and colored it with Copic markers and then cut it out with my Scan and Cut.   I added some crystal liquid to the centers of the flowers and then added some iridescent glitter.  You can't have too much sparkle with a card like this!  


I used the Star Galaxy Stencil from Whimsy Stamps.  Look at at sparkle!   I die cut with the FaDoodles Frames Scalloped Rectangle die set.   I die cut the panel with the Pierced and Stitched Circle die set.   to finish it off, I used the Quick Strip Die set and stamped a sentiment from Penguin Poop stamp set.    


 Now for the fun stuff!  


Each company is giving away two $25 gift certificates - 1 here on the Whimsy blog and 1 on the Therm O Web blog. To increase your chances of winning, leave a comment on each of the collaboration posts on both blogs. Comments must be left by Monday, July 19th at midnight EST, and winners will be randomly-selected and announced on Wednesday, July 21st

Be sure to visit all the blogs for more chances to win!   

I hope you have a wonderfully sparkly day!  


Tuesday Tutorial - Splashy Watercolours!...

Hello everyone,

These wonderful Tutorial Tuesdays come round quickly don't they!

I hope you are staying safe, well and in good spirits!

It's Sue here today with a tutorial to show you how to make a simple and colourful card with wonderful
goodies!

Ingredients from Whimsy Stamps
Other Ingredients
Watercolour Card
Black Stazon Ink
White Pen (I used a white water based Sharpie)
Kraft Card

Please follow this simple tutorial to see how I made my card...

Assemble the ingredients as shown.

This is a water colouring project.  I used Sparkle Pens but you can use which ever inks you have to hand, brush markers, ink pads, acrylics, pans, tubes - what ever - the list is endless!  The inks just need to respond well to being sprayed with water!
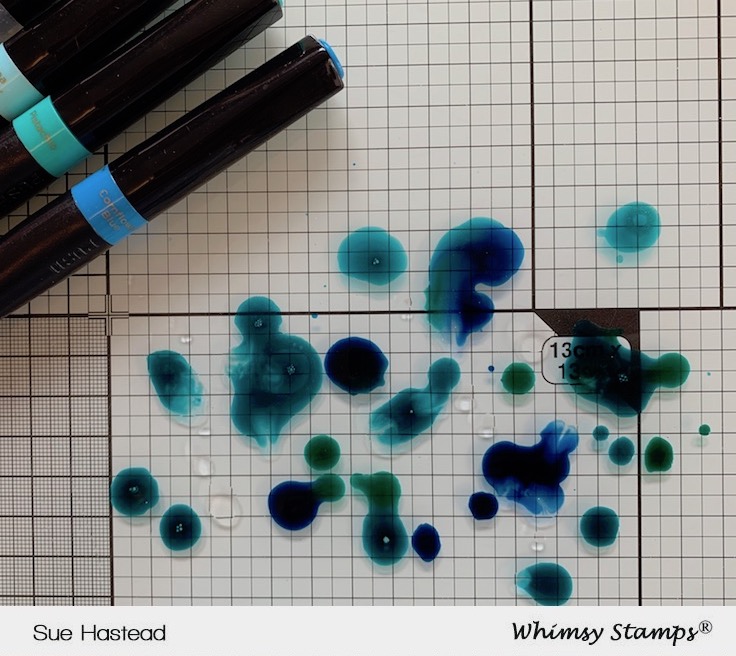
Dab a selection of blue/green inks on your work surface 
...and spray with water.
Place a piece of watercolour card face down onto the inks and press down gently.
You should see something like this!  If you want to you can repeat spritzing and pressing the card down but I was happy with this so I didn't over do it!
Put the card to one side to dry.
Repeat the process outlined above with a selection of red and orange inks.  
I was happy with this inky piece so again, I stopped spritzing and pressing and let it dry!
With the Kinetic Wave die cut two pieces of the blue/green inky card.
With the largest circle die cut the red inky card and then die cut the blue wavy die cuts so that they fit the circle and lay along the bottom of it.  Fix together.
Using the 13cm and the 11cm circle dies together die cut a piece of Kraft card to make a frame.
Fix the frame to the card design with foam tape as shown.
Stamp the boat from the Splash Clear Stamp Set with black Stazon ink, colour it with water colours and cut it out.  (There is no need to take too much time over this - the less you fuss with watercolours the better and to be honest, I think the background is the star of the show in this design)!
Fix the boat and the clouds to the background with foam tape and and stamp the little birds in black ink.

Die cut a piece of watercolour card with a Quick Strips Die and stamp the good times sentiment onto it.  Fix it to the card design as shown.


Finish the design by adding some white dots with a white pen and some clear Sparkletz!

Thank you for popping by today!

Take care of yourselves and those you love!

Happy crafting
from Sue...xxx


Splash Clear Stamps - Whimsy Stamps Pierced and Stitched Circles Die Set - Whimsy Stamps Kinetic Straight Waves Die Set - Whimsy Stamps
Quick Strips Die Set - Whimsy Stamps Crafty Foam Tape White - Whimsy Stamps Sparkletz - Salt Water - Whimsy Stamps