Showing posts with label A Boy's Dream. Show all posts

Special Guest - Maria Willis


Hello, Whimsy friends!  Today we welcome the talented Maria Willis to the blog!

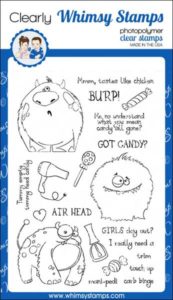
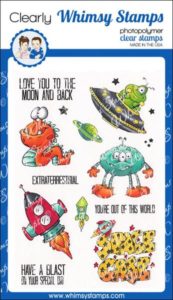
Hi everybody it's Maria here and I'm excited to be sharing my first post as a guest designer for Whimsy Stamps. From stamps, to stencils, to interactive dies, Whimsy has got such a great variety of product for card making and I had a ton of fun picking out what I wanted to use today. I decided to pair the A Boy's Dream stamp set, the Moon Background and the Star Galaxy Stencil to put this card together. 


Cardbomb, Maria Willis, Whimsy Stamps, cards, cardmaking, stamps, stamping, ink, paper, papercraft, create, craft, art, diy, color, ink blend, nuvo,ranger ink,tonic studios, galaxy, moon, birthday,

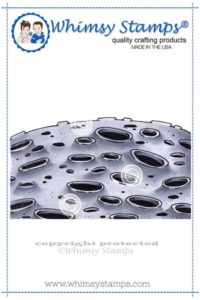
I started out by stamping my little alien onto Hammermill cardstock using copic friendly black ink. Then I masked it off with masking paper so that I could easily stamp and inkblend on top of it. Next, I placed the Moon Background stamp so that it would look like the alien was slinking along the surface of the moon and stamped that using my Misti. I stamped the moon again onto masking paper, cut it out and adhered it on top of my moon. That left me with both of my images completely masked off. 


I ink-blended the background using Distress Oxides in Wilted Violet, Blueprint Sketch, Broken China and Tumbled Glass. Then I used the Star Galaxy Stencil to apply some Nuvo Glacier Paste in Winter White. I love Glacier Paste because it stencils on so easily, allows the background color to show through, and catches the light in such a magical way. In other words, this starry background shimmers like something else!

Cardbomb, Maria Willis, Whimsy Stamps, cards, cardmaking, stamps, stamping, ink, paper, papercraft, create, craft, art, diy, color, ink blend, nuvo,ranger ink,tonic studios, galaxy, moon, birthday,

Once my background was finished I peeled off the masking paper to reveal my stamped images. I colored both the slithery, little alien and the moon using copic markers. I'll list the colors at the end of the post for you. I also added some highlights using a white gel pen.

When my card face was finished, I selected a sentiment from the A Boy's Dream stamp set and heat embossed it in white onto black cardstock to make it pop. Then I trimmed just a smidge off of the left and right sides of my background so that I could mount my card face onto a black cardbase using foam tape. The last step was to attach my sentiment with foam tape and add a few sequins.

Cardbomb, Maria Willis, Whimsy Stamps, cards, cardmaking, stamps, stamping, ink, paper, papercraft, create, craft, art, diy, color, ink blend, nuvo,ranger ink,tonic studios, galaxy, moon, birthday,

That's it for today you guys. I hope you've enjoyed reading about how I made this card and hope it might inspire you to have a little fun of your own. As promised I am adding all of the copic marker colors that I've used below. I'm also adding links to all of the products that I've used today in case you want to have a little look-see. 

Have an amazing day you all!

COPIC COLORS:
ALIEN:
-R21, R22, R24, R27, R29, R39
-Y04. Y06, Y08, Y38, YR09

MOON:
-C0, C01, C02, C03, C04, C05, C06, C07



Whimsy Stamps and Therm O Web Collaboration Day 3 - Kerys


Whimsy Stamps and Therm O Web are teaming up once again for a fabulous week of inspiration and prizes! Be sure to visit both blogs all week long for some amazing ideas and to enter to win!

Here are the cards I created.


I began by using Rina K Design Glitz Glitter Gels from Thermoweb onto some matching colored cardstock from my stash. I used the Hello Yellow and the Screamin Green Glitz Glitter Gels on yellow and green cardstock - I then set them aside to dry.

I used Whimsy Stamps Shaker Maker Rectangles die set to create the white frame and inside piece, cutting it from a piece of white cardstock measuring 4" x 5.25". 

I used Rina K Designs Electro Pop Ink in Blaring Blue, along with Whimsy Stamps Swish stencil, to create a wave effect on some blue cardstock from my stash. I also used the same Blaring Blue ink to create a cloud background, using the Whimsy Stamps Grass and Cloud Edger Dies to create a stencil.

I stamped the hippo and sentiment from the Hippo Beach Fun stamp set. I colored in the image with my Prismacolor pencils, added white gel pen detailing and fussy cut him out. I used Whimsy Stamps Quick Strips die to cut out the sentiment banner.

Once the glitter gel was dry, I used the Build-an-Island die set to cut out the palm tree and beach from the yellow and green glitter cardstocks and a piece of white cardstock. I colored in the tree trunk and pieced together the island. I added this behind the white frame. I popped up the hippo and frame on foam tape.


For my second card, I used Rina K Designs Neon Flock sheets in Hello Yellow. I started with stamping Whimsy Stamps Galaxy Galore background stamp in VersaMark Watermark ink onto some black cardstock. I then used Ranger's sticky embossing powder. Once heat set, this is a sticky print that allows you to adhere foil and flock to it - I ran it through my Gemini Jr to ensure it stuck properly. I love how it turned out!

I used Whimsy Stamps Film Strip die and cut it out of white cardstock. I adhered the galaxy background behind it.

I stamped out the images using Whimsy Stamps A Boy's Dream stamp set and colored them in with my Prismacolor pencils. I then fussy cut them out.

I stamped the sentiment from A Boy's Dream stamp set, using the Rina K Designs Electro Pop Ink in Blaring Blue, onto one of the windows that came out of the film strip die. I popped this panel up on foam tape and added some enamel dots from my stash.  I added the film strip panel onto a white slimline card base and added all the images to finish it off.

Two super fun cards using products from Therm-o-web and Whimsy Stamps - a great combination.

Each company is giving away two $25 gift certificates - 1 on the Whimsy blog and 1 on the Therm O Web blog. To increase your chances of winning, leave a comment on each of the collaboration posts on both blogs. Comments must be left by Monday, July 19th at midnight EST, and winners will be randomly-selected and announced on Wednesday, July 21st.
 Thanks for looking and happy crafting x

   Swish Stencil - Whimsy Stamps Grass and Cloud Edger Die Set Hippo Beach Fun Clear Stamps Quick Strips Die Set Build-an-Island Die Set  Galaxy Galore Background Rubber Cling Stamp *NEW Slimline Film Strip Die - Whimsy Stamps A Boy's Dream Clear Stamps - Whimsy StampsShaker Maker Rectangle Die Set - Whimsy Stamps

Special Guest - Katie Brooks


Happy Monday friends!  I am super excited to share with you that I am Guest Designing with Whimsy Stamps this month!  I am so thrilled and honored; they have adorable images!  Here is my first of two posts.


Aren't these images cute?!  I love them so.  And I thought this would make the perfect guy birthday card.

Here is how I made it:
  • I stamped my images from A Boy's Dream onto Copic-friendly paper and colored them with my Copics. 
  • I used my ScanNCut to cut them out and set them aside. 
  • Next, I used distress inks to create the sky.  I used mostly blues (Faded Jeans, Chipped Sapphire, and a bit of Blueprint Sketch), but put just a bit of purple in the center (Wilted Violet) so I could pull out the color later. 
  • Using a white re-inker and paintbrush, I added a few flecks to the background to make it look a bit like the Milky Way. 
  • I die cut a basic circle and used distress inks to color it yellow with a bit of orange (Mustard and Spiced Marmalade).  Then I added in some craters using my Copic marker and used my fingernail to distress the edges.
  • I mounted that in the corner using foam tape.  
  • Then I mounted all the other ships and planets as well.  I used an enamel dot for the end of the antenna on the larger ship. 
  • I added these Itty Bitty Black Star embellishments just for a little extra sparkle. 
  • After I mounted the panel onto some navy cardstock, I pulled out a scrap of purple to stamp the sentiment on.  I added the strip to the top with foam tape. 


This view gives you a better look at some of the finer details.  Also, I originally picked blue for my alien because my daughter likes blue.  But in the end, I decided that I wouldn't give her this card, but would save it for my brother because space isn't her thing.  I have other stamps for her! :)


One last look at the final product, I hope you like it!  Big HUGE thanks to Whimsy for letting me be a part of the show today, so exciting!  

Thank you for visiting me today! 


31 Nights of Halloween - Night 20 - Special Guest Bobbi Hart


Hello! Bobbi here and I'm guest designing this month for Whimsy Stamps during its "31 Nights of Halloween!" I'm sharing some Halloween madness today with an out-of-this-world look using the following Whimsy Stamps sets:


Card Details

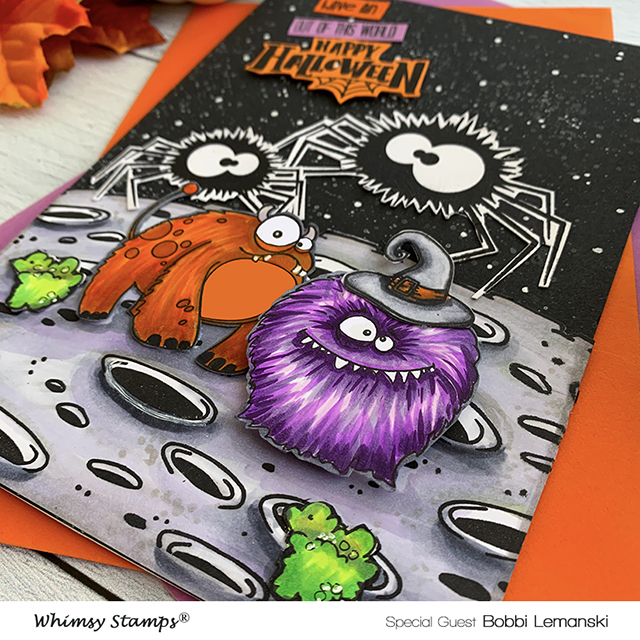
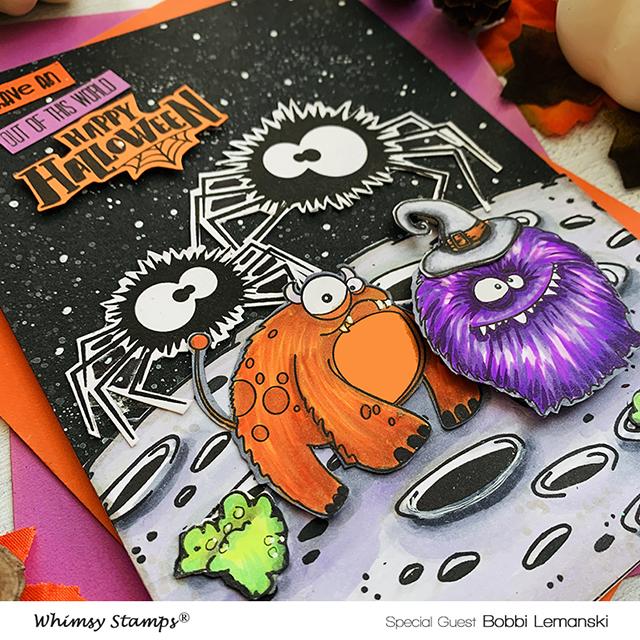
What would Halloween night look like in outer space? Perhaps there are gigantic spiders ready to attack from behind. Monsters everywhere you look and green goo...lots of goo just oozing out of the craters. Well, that's my take anyway! Let's take a closer look at this out-of-this world Halloween Night.

 
To make this card, I started by splattering white ink on a 5" X 7" black card front. I added a few additional larger dots of white using a Uniball Signo White Gel Pen. I stamped, Copic-colored and fussy cut the spiders, witch hat, monsters, goo and the moon. The moon was adhered to the background and the spiders and monsters were layered on it. The purple monster was "popped up" by adding foam tape to the back of the image for a little dimension.  

 
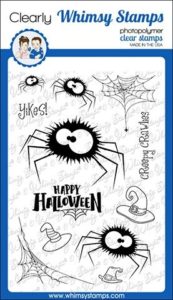
Finally, I stamped, cut and adhered the phrase, "Have an out of this world HAPPY HALLOWEEN" by piecing phrases from various sets. I used the "have a" phrase from the Going Catty stamp set and simply added an "n" to the "a." The phrase "out of this world" is from A Boy's Dream, and the "Happy Halloween" is from the Fuzzy Spiders stamp set. The finished card front was adhered to a 5" X 7" card base to complete it.

Want to see more ideas and inspiration from me? Subscribe to my blog, BobbiHartDesign.com.
I’ll send you updates on new posts!
You can also find me on Instagram as @BobbiHartDesign and on Facebook as BobbiHartDesign.
Bobbi Hartmann Lemanski, Bobbi Hart♥ Design,
Adding h♥art into every design

Thank you, Bobbi, for this amazing inspiration!  Come back tomorrow night for more Halloween fun and maybe even a giveaway!


ThermOWeb & Whimsy Stamps Collaboration Day Five


This week Whimsy Stamps and ThermOWeb are partnering for a fabulous week of inspiration and prizes!  All week long designers from both teams will be sharing ways to add foils and more to your projects using products from ThermOWeb and Whimsy Stamps.  Read to the end of this post to find out how you can win!

Hi, friends!  It's Andrea with you for the last day of this fun collaboration.  Do you have a favorite project or product from this week?!  I hope you've enjoyed this week even half as much as we designers have!


My first project features the A Boy's Dream and Moon Background stamp sets.  I stamped my images with Memento Tuxedo Black ink, colored them with Copics, and trimmed them out.


I created my galaxy background by ink-blending Twisted Citron, Picked Raspberry, Peacock Feathers, and Black Soot distress inks.  After blending, I flicked on some watered-down white paint and allowed the panel to dry fully.  Next, I placed the Star Galaxy Stencil over the panel and spread on some Deco Foil Transfer Gel.  After the gel was completely dry, I placed pieces of a Silver Deco Foil Transfer Sheet over the stenciling and ran the panel through my laminator.  Ta da!  Gorgeous, shining stars!


I knew I wanted to make a slider card with these fun images, which is where the Kinetic Curved Basics Die Set and No-See Kinetic Straight Basics Die Set came into play.  For a video of these dies in action, visit here.  After assembling my slider, I adhered the background to a white card.  Using the new Friend Word and Shadow Dies, I die-cut "friend" from a Deco Foil Toner Sheet, covered it with a Red Deco Foil Transfer Sheet, and ran the word through my laminator.  I die-cut the shadows from black cardstock and vellum, layered the die-cuts together, and adhered them to my card.  I white heat-embossed a sentiment from A Boy's Dream onto black cardstock, die-cut it with the Quick Strips Die Set, and popped it up onto my card.


My next card features an image from Hugs Bunny.  This set is great all year, but I used it to make a Valentine's Day card.  I stamped the image with Memento Tuxedo Black ink and colored it with Copics.


I just love the Deco Foil Transfer Gel so much that I had to use it again!  This time I used it with the Speckled Heart Stencil and a Wild Cherry Deco Foil Transfer Sheet.  It's difficult to photograph, but the shine is AMAZING!  The Shaker Maker Rectangle Die Set makes creating a shaker card easy-peasy.  I die-cut the largest die from pink cardstock and backed it with clear acetate and two layers of foam tape.  I trimmed my foiled background to the same dimensions as my frame, added a bunch of sequins to the frame, and covered them with my background.


I adhered my shaker to a white cardbase and popped up my colored image with foam tape.  With Versafine Onyx Black ink, I stamped a sentiment from Hugs Bunny onto white cardstock.  I also stamped a trio of hearts from the set, which I "colored" with the Deco Foil Adhesive Pen and more Wild Cherry Deco Foil Transfer Sheet.  This pen is so cool, as it lets you add foil anywhere!  After trimming my sentiment into a banner, I adhered it to my card with foam tape.

Would you like to win a $25 gift certificate to Whimsy Stamps?  To enter, leave comments on all of the collaboration posts on the Whimsy blog this week.  One winner will be randomly chosen from all of the blog posts, so the more posts you comment on, the better your chances are of winning!  You have until Monday, February 11th at midnight CST to comment.  The winner will be announced on the Whimsy blog on Tuesday, February 12th.

ThermOWeb is also offering a gift certificate, so be sure to visit their blog each day this week for more inspiration.  Leave comments on their blog for another chance to win!


A Boy's Dream Clear Stamps Moon Background Rubber Cling StampStar Galaxy Stencil Kinetic Curved Basics Die Set No-See Kinetic Basics Die Set *NEW Friend Word and Shadow Die Set Quick Strips Die Set Hugs Bunny Clear Stamps Speckled Heart Stencil Shaker Maker Rectangle Die Set