Showing posts with label alcohol ink. Show all posts

31 Nights of Halloween - Night 8 - Special Guest Tami Bastiaans


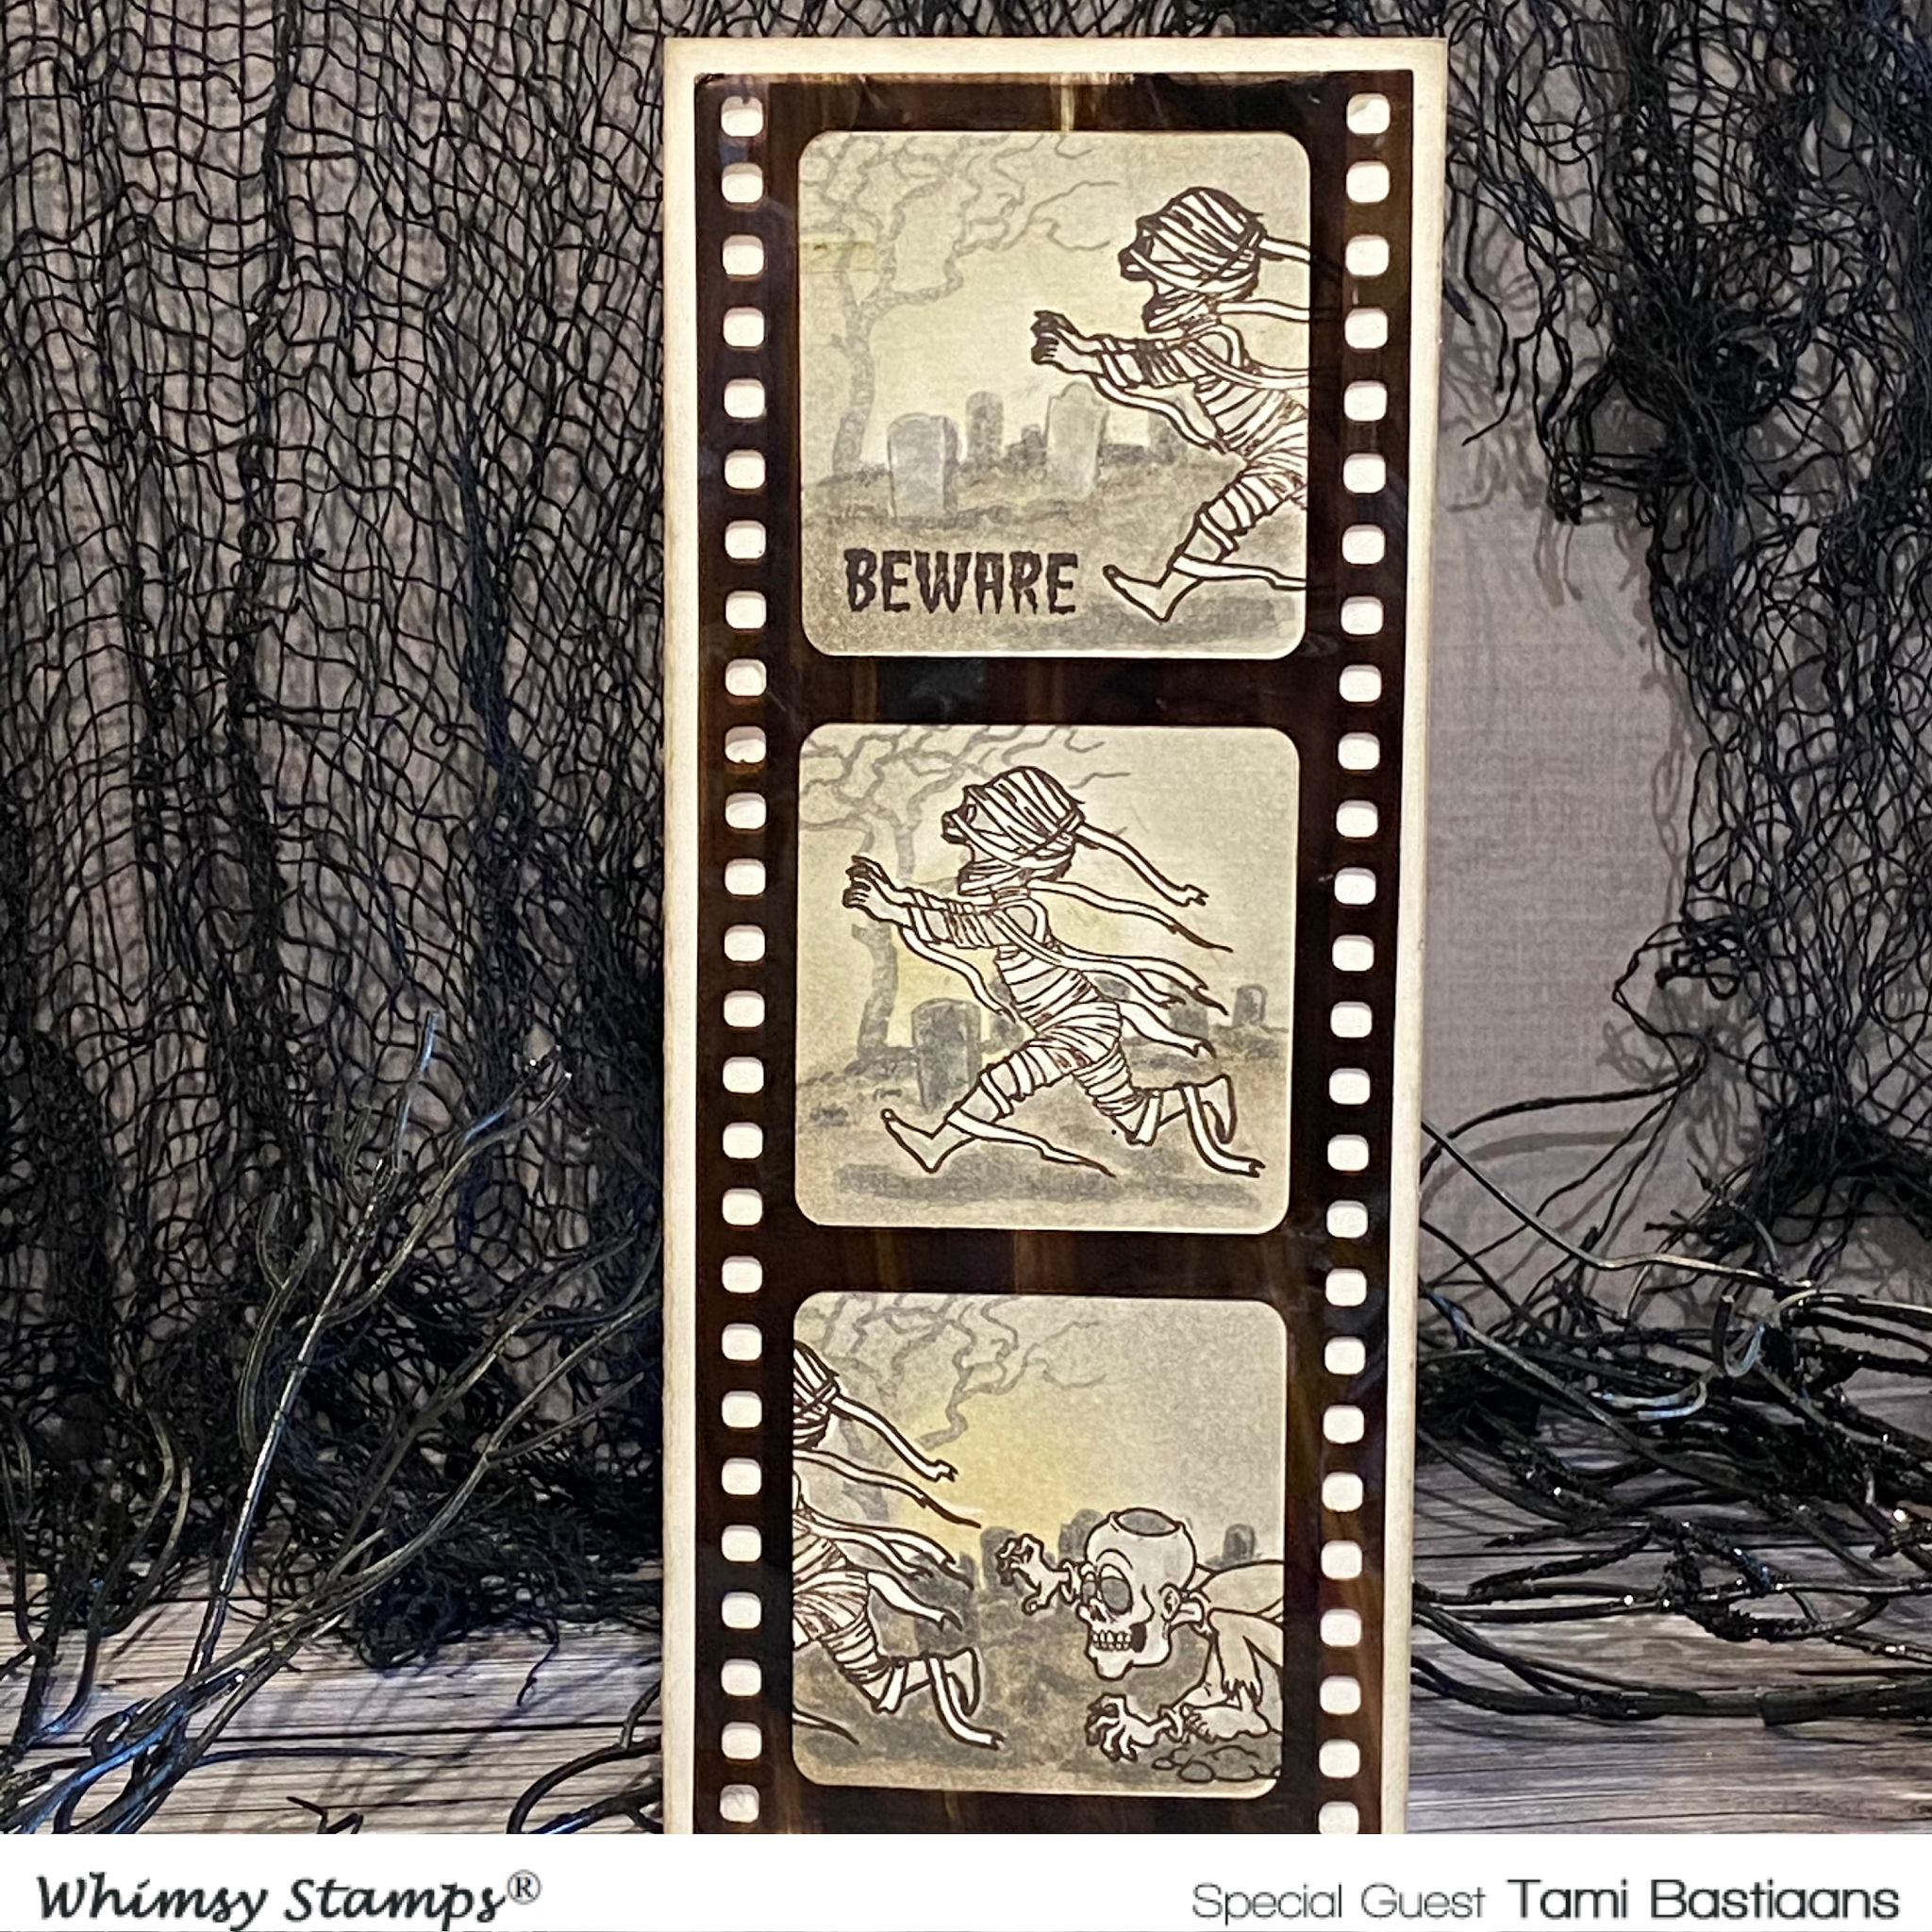
Hello! My name is Tami and I am so happy to have been invited to be a guest designer for Whimsy Stamps 31 Days of Halloween. I made a card today with a technique I enjoy. I used the Slimline Filmstrip Die, some masking paper and the Halloween Scream stamp to make a progressive scene in the film strip.


I thought it would make it fun if it was a scene from an old time scary movie.  Let's get started with how to do this. 


First, use the filmstrip die to cut a mask. For my mask, I cut some Judikins Masking Paper out of the filmstrip. 


I colored two pieces of acetate with alcohol inks.


There is no technique to this, just squeeze some ink on the felt and rub it on one side of the acetate, then let dry.


While I had the die out, I also cut two filmstrips from the acetate that had been colored with Alcohol Ink. Set the filmstrips aside. This gives you a choice and you can use the extra for a second card if you want.


Cut a piece of Distress Watercolor Cardstock that is the size of your slimline card - 3.5x8.5. Center the filmstrip mask over the piece of Heavystock and adhere.


Position the mummy stamp along the right side of the top frame and stamp with Distress Archival Ink in Ground Espresso and Black Soot. Then stamp it in the middle of the middle filmstrip frame, and along the left edge in the bottom frame. 


Lastly, cut a mask of the mummy out of masking paper by stamping it and fussy cutting around it. 


Then stamp the zombie from Halloween Scream along the right side of the bottom frame. In addition, stamp and cut a mask of the zombie on the right side of the bottom frame.


Mask off the mummy in the first frame, then stamp the graveyard background across the first frame. Masking off the mummy will make it look like it is in the background of the film strip. Then ink around the masked off mummy with Distress Ink. I used Old Paper, Hickory Smoke, and Pumice Stone.


Repeat the process with scene in the second frame. In the third scene, you need to mask off both the mummy and the zombie before you stamp the background.

Before adding color, stamp the BEWARE sentiment in the bottom left corner of the first frame.


Once the stamping is done, watercolor all the scenes with Distress inks. I used Black Soot, Pumice Stone and Hickory Smoke.  


When you are finished,  trim the piece to fit under the filmstrip and adhere the stamped piece to the front of the cardbase. 


Finish by adhering the Acetate Filmstip that was cut earlier.


Thank you so much to Whimsy Stamps for the opportunity to be a gest designer with for their 31 Nights of Halloween event! I had fun making this old Scary movie card. 

Tami


 Thanks, Tami, for this fabulous tutorial and awesome inspiration!

Don't forget to visit this post for giveaway information!


Special Guest - Rebecca Rapanaro

Hello!  It's Rebecca here with my last post as a guest designer for Whimsy Stamps.  Thank you again for having me.  It’s been fun. I love your products and stamps; you are an amazing company! 

We all must have hope, and I found just that in these beautiful butterflies from the Butterflies stamp set created by Deb Davis (she is an amazing designer).  Butterflies represent life, but they also represent hope and change. There is something so beautiful and innocent in seeing a butterfly playfully dancing in a garden on a warm summers day. 

I chose this stamp set because I love to create cards that are inspirational.  (There is only one other type of card that I am as passionate about and that’s Halloween, but that’s a different blog post!)  I really enjoyed creating this card.  It’s always fun when you allow the colors to do their job and create something as free as the butterfly dancing in the garden.

This card is an A2 size card measuring 4 1/4 x 5 1/2. The card panel, which is Yupo paper designed for alcohol ink, is trimmed just a bit smaller, leaving a black boarder. I prepared the panel with the alcohol ink, and just before it was dry, I applied foil by hand and then peeled to get the shimmery effect you see on the card. I chose the large butterfly from the set and heat embossed it using black pigment ink and black embossing powder. I then colored using my alcohol markers and pencil crayons. I adhered the butterfly using a little glue along the back of his body; I did not touch the wings as I wanted them to be fluffed up. I debated as to whether or not to heat emboss the sentiment “hope”, but simplicity won out and I stamped it in a pigment ink. I added enamel dots and a little black thread for interest and my card was finished.

Thank you so much for stopping by.  Please stay safe and well.  I can’t thank Whimsy stamps enough for having me as guest designer this month.

Tuesday Tutorial | Alcohol Ink Cards


Hello friends and happy Tuesday!  This is Crystal here, one of the new 2020 Whimsy Stamps Creative Team members, and today I am sharing my very first "Tuesday Tutorial" post with you!  I have created three colorful cards made using the fun new Shamrock Top Hat stamp set designed by Whimsy's own Deb Davis.  And, what goes better with shamrocks than rainbows!?  So, I have also created a video tutorial for you sharing how I created all of these vibrant alcohol ink colored backgrounds too! 

I hope you will enjoy today's "Tuesday Tutorial." 


This first A2 sized card was made from Neenah Solar White Smooth cardstock.  I lined the card with one of the alcohol ink backgrounds I created (see video below).  On a separate sheet of Neenah Solar White smooth cardstock, I stamped the sentiment in Memento Tuxedo Black ink and the shamrocks in Green Apple ink.  I matted this piece onto a scalloped piece of Jolly Green cardstock and I adhered this image to the center of the card using 3M foam adhesive for added dimension. 


For the second card, I also used Neenah Solar White Smooth cardstock as my base and again, I mounted the alcohol ink background directly to the card base.  In the lower right corner I stamped the sentiment in Versamark ink and heat embossed it with black embossing powder.  On a separate sheet of Jolly Green cardstock, I stamped the Shamrock Top Hat in Versamark ink and heat embossed it with white embossing powder.  I fussy cut the hat out and adhered it to the card at a slight angle using 3M foam adhesive.


For the third and final card, the base was created from Jolly Green cardstock. I matted the base with a 5 1/4" x 4" piece of Neenah Solar White smooth cardstock.  In the lower right hand corner of the white cardstock, I stamped the sentiment in Green Apple ink.  I adhered the alcohol ink frame to the center of the card (again please see the video below to see how I created the alcohol ink backgrounds).  On a separate sheet of Jolly Green cardstock, I stamped the Shamrock Top Hat in Versamark ink and heat embossed it with white embossing powder.  I fussy cut the hat out and adhered it to the card at a slight angle using 3M foam adhesive. 


 Here is a step-by-step video showing how I created each of these three cards:


Thank you for visiting and I hope you have a wonderfully creative day!

XO, Crystal

Special Guest - Stephanie Davis


Hello everyone!  I'm so excited to be guest designing with Whimsy Stamps this month!  
Today I'm sharing a fun shaker card using the super cute Whimsy Candy Corn Dress Up stamp set.  


First I made an alcohol ink background.  Then I stamped the Spider Web Frame stamp set onto acetate with black ink and heat embossed it with clear embossing powder.  I adhered it to an A2 Rectangle Shaker Pouch, then I punched a hole in the pouch.  I colored the witch from Candy Corn Dress Up with Copic markers, fussy-cut it, and adhered it to a spinner/slider mechanism.  


I assembled the shaker card and added clear sequins.  Now when you shake the card, the candy corn witch moves up and down and spins and turns.  Lastly I stamped and heat embossed the sentiment from the You're My Boo stamp set in gold onto black cardstock and fussy cut it.  


Be sure to check out the Whimsy Facebook Group, if you haven't already.  They have tons of great inspiration, and I will be sharing projects this month as well.  Also, if you love giveaways, be sure to mark your calendar for the 31 Nights of Halloween!


Thanks for joining me!  Have a great week!

Candy Corn Dress Up Clear Stamps*NEW Spider Web Frame Rubber Cling Stamp You're My Boo Clear Stamps

Spooky Night Web Card


Hi Everyone, and welcome back! Today I'm sharing this Spooky Night Web card using an alcohol ink lift and transfer technique. This was one of those,  "Oops! Well let's see where this goes," cards that actually worked in the end.

After lifting the ink on the Yupo panel, I decided to see how it would look if I re-stamped the image in black Archival Ink.

Technique: Alcohol Lift-Ink and transfer stamp


I began by creating an alcohol ink background on Yupo paper, and then tried to lift the ink with Ranger Alcohol Lift-Ink, but I didn't like the results. So I transferred the lifted ink image by stamping it onto white Neenah cardstock, and that is how the magic happened! Oh my! I think this Web Background Stamp looks so pretty. Look at those blues, greens, and purples. What do you think?


Next I stamped the tree branches and crows from Attempted Murder, stamped the little bats from Howling Night, and lightly blended Hickory Smoke and Black Soot Distress Inks around the panel. Then I added the distressed idea-ology "Beware" token (See a step-by-step tutorial HERE), wrapped black twine, and sentiments from the You're My Boo stamp set. Finally, I layered with purple and black cardstock onto a black card base.

So, what do you think? I am obsessed with alcohol inks right now. Have you tried the new Alcohol Lift-Ink? I can't wait to see what you create! Love and crafty hugs!

Erin