Showing posts with label Tricia Barber. Show all posts

31 Nights of Halloween - Night 4


Hello!  Tricia here with you tonight to share a spooky cute card using the Candy Corn Dress Up!  I started off by taking a black card panel and embossed with the Bats Galore Slimline Embossing Folder.  I love the spooky details that it adds to the card.   


I stamped the images from Candy Corn Dress Up onto Neenah cardstock and colored with my Copic markers.  I added some details with a white gel pen to the images.  I used the following Copics for my coloring: 

W00, W1, W3, W5, W7, C1, C3, C5, 0, YR04, YR07, YR09, Y11, Y13, Y15, Y19, BG11, BG53, BG13, R20, YG03, YG23, YG17, E41, E42, E44


I die cut the panel with the Build-a-Graveyard die set.   I used Distress Inks of Prized Ribbon, Peacock Feathers and Twisted Citron and placed behind the die cut panel.  I then stamped the Grave Epitaphs with several of the images from the stamp set.   I then die cut some of the extra images: grave, fence, bats and skull using the Build-a-Graveyard die set to spook up my card. 


I love Halloween and just love that Whimsy Stamps celebrates with a month long of inspiration through the 31 Nights of Halloween!  So much fun to be had each day - be sure to watch for the posts every night!  Play along with us and link up your Halloween creations - see the post here for the link up and details. 


In celebration of our annual 31 Nights of Halloween event, Whimsy Stamps will be giving away $300 in Whimsy Stamps gift cards throughout the month of October!  Please be sure to check out this post here for more details! 

Happy Halloween to you all! 


Tuesday Tutorial - Tropical Floral Trio

 Hello!  It's Tricia here today!  I just love the new Tropical Flowers 6x6 paper pack.  There are some beautiful patterns in this pack.  I wanted to share how easy it is to mix up your papers with a few dies and stamps to create a quick set of cards!  I started out by laying out some of the patterns in the paper pack and picked three different patterns to match together.   


For my first card, I kept this pretty simple.  I used one of the patterned papers from Tropical Florals and die cut with the Zig Zag Stitched Rectangle die.  I added a die cut Pierced and Stitched Circle die and off set onto the panel.  I die cut the Hugs from the Big Hugs Word Die set and added a sentiment from the Butterflies stamp set.  I die cut the sentiment using the Simple Sentiment Strips die set.  


For my second card, I mixed up some of the patterned papers.  I die cut two of the patterned papers with the Zig Zag Stitched Rectangles die and then trimmed one down for a small strip on the bottom of the panel.  I die cut two Pierced and Stitched Circles and layered them onto the panel.   I stamped and colored a butterfly from the Butterflies stamp set and die cut it out with the new Butterflies dies!  


For my last card, I die cut a circle from the patterned paper panel and then layered onto aqua cardstock that is trimmed just slightly larger than my Zig Zag Stitched Rectangle panel.   I added a smaller die cut circle that had been stamped with a butterfly and colored with my Copic markers.   I added some additional details with my white gel pen.   All of my sentiments are from the Butterflies stamp set and were die cut with the Simple Sentiment Strips die set.  


These were so quick and easy to make and would be great to give as a set!  The papers in this new Tropical Flowers paper pack are just gorgeous!   


Thank you so much for stopping by!  


Tuesday Tutorial - Let's Get a Little Spooky

 Hey there!  It's Tricia here with you today sharing a Halloween card made with the new Spooktacular stamp set along with the new Spooky Large Word die.   We are going to do a die cut inlay with the Spooky Large Word Die and will create a sparkly background to go behind it!   Let's get started!


Die cut the Spooky Large Word Die from orange and black cardstock.   Be sure to center it in the orange cardstock and then inlay the black Spooky.   Be sure to save the inside of the "o" with the spider from the orange.   


I used Scotch tape on the back of the orange and black panel to keep the panel together.  We will layer this on top of our ink blended panel.   


Next, ink blend with Distress Oxide Mustard Seed and Squeezed Lemonade onto a white panel.  Check and see if inking will be large enough for the orange and black panel.   Cover the panel with Moonstone Nuvo glitter paste and set aside to dry completely. 


Stamp the orange and black panel with the Buffalo Plaid Background stamp with orange ink.  I forgot to do this step first with my orange panel but once the ink dries you don't see it on the black cardstock - wink, wink!  I stamped three of the ghosts from Spooktacular onto white cardstock and colored with my Copic markers.   

Next, stamp your sentiment and white heat emboss it.   I decided to leave off one of the stamped ghosts and added some star die cuts from the Primitive Shakers Shapes die and added fine black glitters to the die cut pieces.  


For a final touch, I added some crystal glaze to the ghosts eyes!  Hope you have a wonderful day!   

Tuesday Tutorial - Creating Soft Backgrounds with Dies

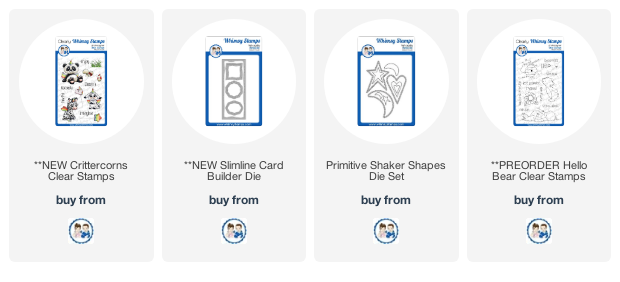
Hey there! Tricia here with you today, I am sharing with you today how to create a soft background for a Slimline card.   I created a homemade stencil using the Primitive Shaker die.  


First, I started by using some Post It Note Tape to create my grassy area.   I lightly inked an area with Twisted Citron ink.   


Next, I created a stencil with vellum cardstock and the Primitive Shaker Die set.  I move the vellum around to add soft pink hearts across the Slimline Card Builder panel using Spun Sugar Distress Oxide ink.  Using vellum allows you to see underneath when placing the hearts randomly around the panel. 


Next, I colored my stamped images from Crittercorns with my Copic Markers: 

W8, W6, W5, YG17, YG03, YG01
 RV25, RV13, RV09,
 YR04, YR09, Y11, Y18, BG11, BG53,
 RV10, RV00, E40, E41, E42, E43

I stamped a sentiment from Hello Bear and stacked them on top of one another.  I added my images to the panel with some foam tape.   I added some final details with a white gel pen.  I layered the panel onto a kraft card base.   


Take a look at your dies and see what you can use to create a stencil!   Thanks for stopping by! 


Tuesday Tutorial - Step Up Your Stenciling

Happy Tuesday!   It is so easy to create a new look with your supplies by combining  them in different ways.   I will show you today how to ink blend underneath your glimmer paste to give you a whole new look.   This is one of my favorite things to do and really very easy.   I have a video below to take you through the process and then create two cards using the Penguin Poop stamp set along with the Sun Rays Stencil. 


It's really easy to create multiples of this design to quickly stock up on your birthday card stash.   I used the Paws and Bones Border Die along with the Grass and Cloud Edger Die to create my snowy bank for these cute penguins! 


I share some quick Copic coloring these very cute images.  Ink blending first and then adding glimmer paste changes the whole look of the card.   I have another card on my blog here where I ink blended with the stencil and then layered glimmer paste on top.   
I hope you enjoy the video!  Thanks for stopping by! 


Penguin Poop Clear Stamps - Whimsy StampsGrass and Cloud Edger Die Set*NEW Paws and Bones Border Die Set - Whimsy StampsSun Rays Stencil - Whimsy Stamps