Showing posts with label Bev Rochester. Show all posts

Tuesday Tutorial - Fancy Fish Shaker


Hello friends, I'm on the Whimsy Inspirations blog today to share how I put this quick shaker card together.  You don't need much to put this card together, and thanks to the gorgeous new Under The Sea Slimline Paper Pack and Fish Fancy Stamp Set, it's super quick to do too!


I die cut the Wonky Window 4 die 4 times to make the frame for the shaker.  The, because the paper is narrower than the Wonky Window die and the print I chose is landscape rather than portrait and I REALLY wanted to use that sheet, I cut up the sheet to fit behind the frame and it fitted perfect!

I filled the windows with some sequins and those cute Fish Tank Sprinkletz (though fuss pot here had to weed out all the green ones to use for the shaker!) = love how they pop off the blue of the paper.


I stamped the fish and coloured them with copic markers - I used V17, 15,12 and B04, 02, 00 then fussy cut them out and adhered them in place.  I added touches of Stickles to the ends of the fins.

I finished off with a sentiment from the Simple Sentiment Strips Clear Stamps and die cut that out with the Simple Sentiments Die Set.

And there you have it, an easy shaker card with a bold pop of colour.


Whimsy Stamps supply list


Thanks so much for dropping in for a visit


Tuesday Tutorial - Elegant Ornaments


Hi Friends, Bev here with a little tutorial on how I put these cards together using the fab-u-las Elegant Ornament Clear Stamps and Elegant Ornament Die.  


For the blue card, I inked up a panel of smooth white card with Distress Oxides in Tumbled Glass, Stormy Sky, Faded Jeans and Chipped Sapphire.  I then splattered the card with water and left it to dry.  I added some splatters with the distress oxides that I diluted with water and again left it to dry.  

I followed the same method for the red card, and used Tattered Rose, Worn Lipstick, Festive Berries and Aged Mahogany.

I mounted these panels on to a top folding card base.


I stamped and heat embossed the ornaments on to white card and trimmed so it fit the front of the panels, leaving a small border top and bottom.  I stamped and die cut the ornaments again, this time removing the connected side panel so I could pop these up next to the other stamped baubles.  I stamped and heat embossed sentiments then popped the panel on to the inked panels with foam tape for some dimension, and finished off with some jewels for a bit of bling.


I hope you enjoyed seeing the process of how I put these cards together.


Thanks for stopping by


31 Nights of Halloween - Night 11


Hey there, Bev here today with my card for the Whimsy Stamps Annual Halloween event.


I started off by masking a moon on a panel of Bristol Smooth card before inking up with Distress Oxides.  I used Old Paper, Evergreen Bough, chipped Sapphire and a touch of Black Soot.  Once the ink was dry I inked some spooky clouds over it with white pigment ink.  I added some black paint splatters then allowed it to dry then die cut the panel with the  Zig Zag Stitched Rectangles 

I die cut the  Slimline Hill House die from black card stock and chopped off the bottom so it would fit a standard A2 sized card.  I decided to use gold glitter card to back the windows  to keep the look muted.  I die cut a couple of grassy borders from the  Grass and Cloud Edger Set, and inked the edges with white pigment ink so add a bit of dimension.


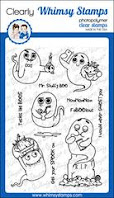
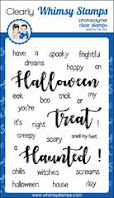
I finished off with a wee ghostie from the  Spooktacular Clear Stamp set and a couple of sentiments from the  You're My Boo stamp set


Thanks so much for dropping by today, and don't forget there are PRIZES to be hand, so check out THIS POST for all the details for your chance to win the $300 in prizes that will be given away throughout the month!


Whimsy Stamps products used:


Tuesday Tutorial - Simple Paper Poppy Flower Video Tutorial


Hello!!  I really hope you are all well and staying safe in these scary and trying times. 

Whimsy Stamps have a March Special Release and this Poppy Flower Die Set and Lattice A2 Die is part of the release.  


I managed to squeeze in some time ....  after 2 years of no video making ....  and filmed a quick video to show just how quick and easy it is to make these paper flowers.  I used 160gsm (60lb)paper for the blue poppies, and 300gsm (110lb) card for the red poppies.  I did try and film the tutorial with the red card but the lighting and the video were not having a bit of it.  After umpteen attempts I went with the blue.  You'll see how much more life-like and crinkled the red flowers are, that's down to using the thicker card so do experiment with scraps, you'll get a different result with different card/paper thicknesses as you can see from the two pictures below (click to enlarge)


I used the Lattice die as the background for both cards, and adhered 3 die cuts together to give more depth to the background and finished off both cards with a sentiment from the Adopt don't Shop Dogs clear stamp set and Nuvo drops in black.


That's it from me today.  Please stay safe and keep your distance!


Ellie and her Snowman


Hello Whimsy Friends, I hope you all had the most fabulous Christmas!

I'm back with my last Christmas card for the year and back to my frilly and foo-foo cards with this cute new Ellie's Snowman stamp from the latest release by Whimsy Stamps.  Isn't it just too skinking cute?

I used the delish papers from the 6 x 6 Cozy Winter Paper Pack and coloured the image with copic markers, picking out some of the colours in the papers.

Ellie: C3, 1, 0, 00; R30
Snowman and snow: BG10, 0000
Red: R37, 35, 83
Green: YG67, 63, 03
Hat: C9, 7, 5


I added a sentiment from the Christmas Ellie-ments clear stamp set and finished off with some poinsettias that I made from a piece of the aqua cardstock and the Lily Flower Die Set.  I used a copic marker to draw in the veining on the flowers before wetting and shaping them.  I also tried something different with the holly leaves from the Christmas Branch Die Set, I die cut them from white cardstock and coloured/shaded them with my copic markers to give a more realistic effect.  I LOVE how these turned out, well worth the extra few minutes they took.


Products used from Whimsy Stamps:


I hope 2020 brings you all health, peace and happiness.


Stained Glass Ornaments


Hi Whimsy Friends.  Wow, where has this year gone?  It's the last release from Whimsy Stamps for 2019, starting with this phenomenal Stained Glass Ornaments Rubber Stamp.  Oh man, I loved every second I spent colouring this beauty, I really did!

I stamped the panel in my Misti with antique linen ink, then coloured the card using my copic markers.  I started with the background, and kept that in warm grey tones so the baubles would really pop.  Once I'd finished colouring I popped the panel back into the Misti and over stamped with embossing ink then applied gold detail embossing powder and heat embossed.  That way I didn't spoil the gold embossing with my copics when I got carried away (and I definitely do haha).

Copic colours used:
Background: W3, W1, W0, W00
Red: R59, RV25, R35
Copper: E37, E08, E97, E21 (Colour combo from Jennifer Dove's Color of the Day) 
Gold: Y28, YR23, Y15, Y11
Green: YG67, YG63, YG03


Products used from Whimsy Stamps:


Thanks for stopping by


31 Nights of Halloween - Night 17


Hi everyone, Bev here with my card for the fun 31 Nights of Halloween event that Whimsy Stamps are running during October.

I have used the so so sweet Pumpkin Patch for my contribution to the event, because .... those penguins!!  I die cut some pumpkins from the Build a Pumpkin Patch Die Set and coloured the largest one with my copic markers.  I finished off with a sentiment from the Sleepy Hollow clear stamp set.


I used copic markers to colour the image:

Penguins: C9, 7, 5, 3, 1, 0, 00; YR27, 24, Y11
Wooly hat: E74, 71, 70
Scarf: E43, 42, 40
Pumpkin: YR18, 16, YR27, 24,, 04, 01: E87, 84

I die cut around the image with the Zig Zag Stitched Rectangles Die Set.


Make sure you pop back each night this month at 6 pm to join in the 31 Nights of Halloween fun and have a chance to win some prizes! 

Products used from Whimsy Stamps