
Hello there! Tricia here with you today to share a really quick and easy way to add details to plain cardstock.

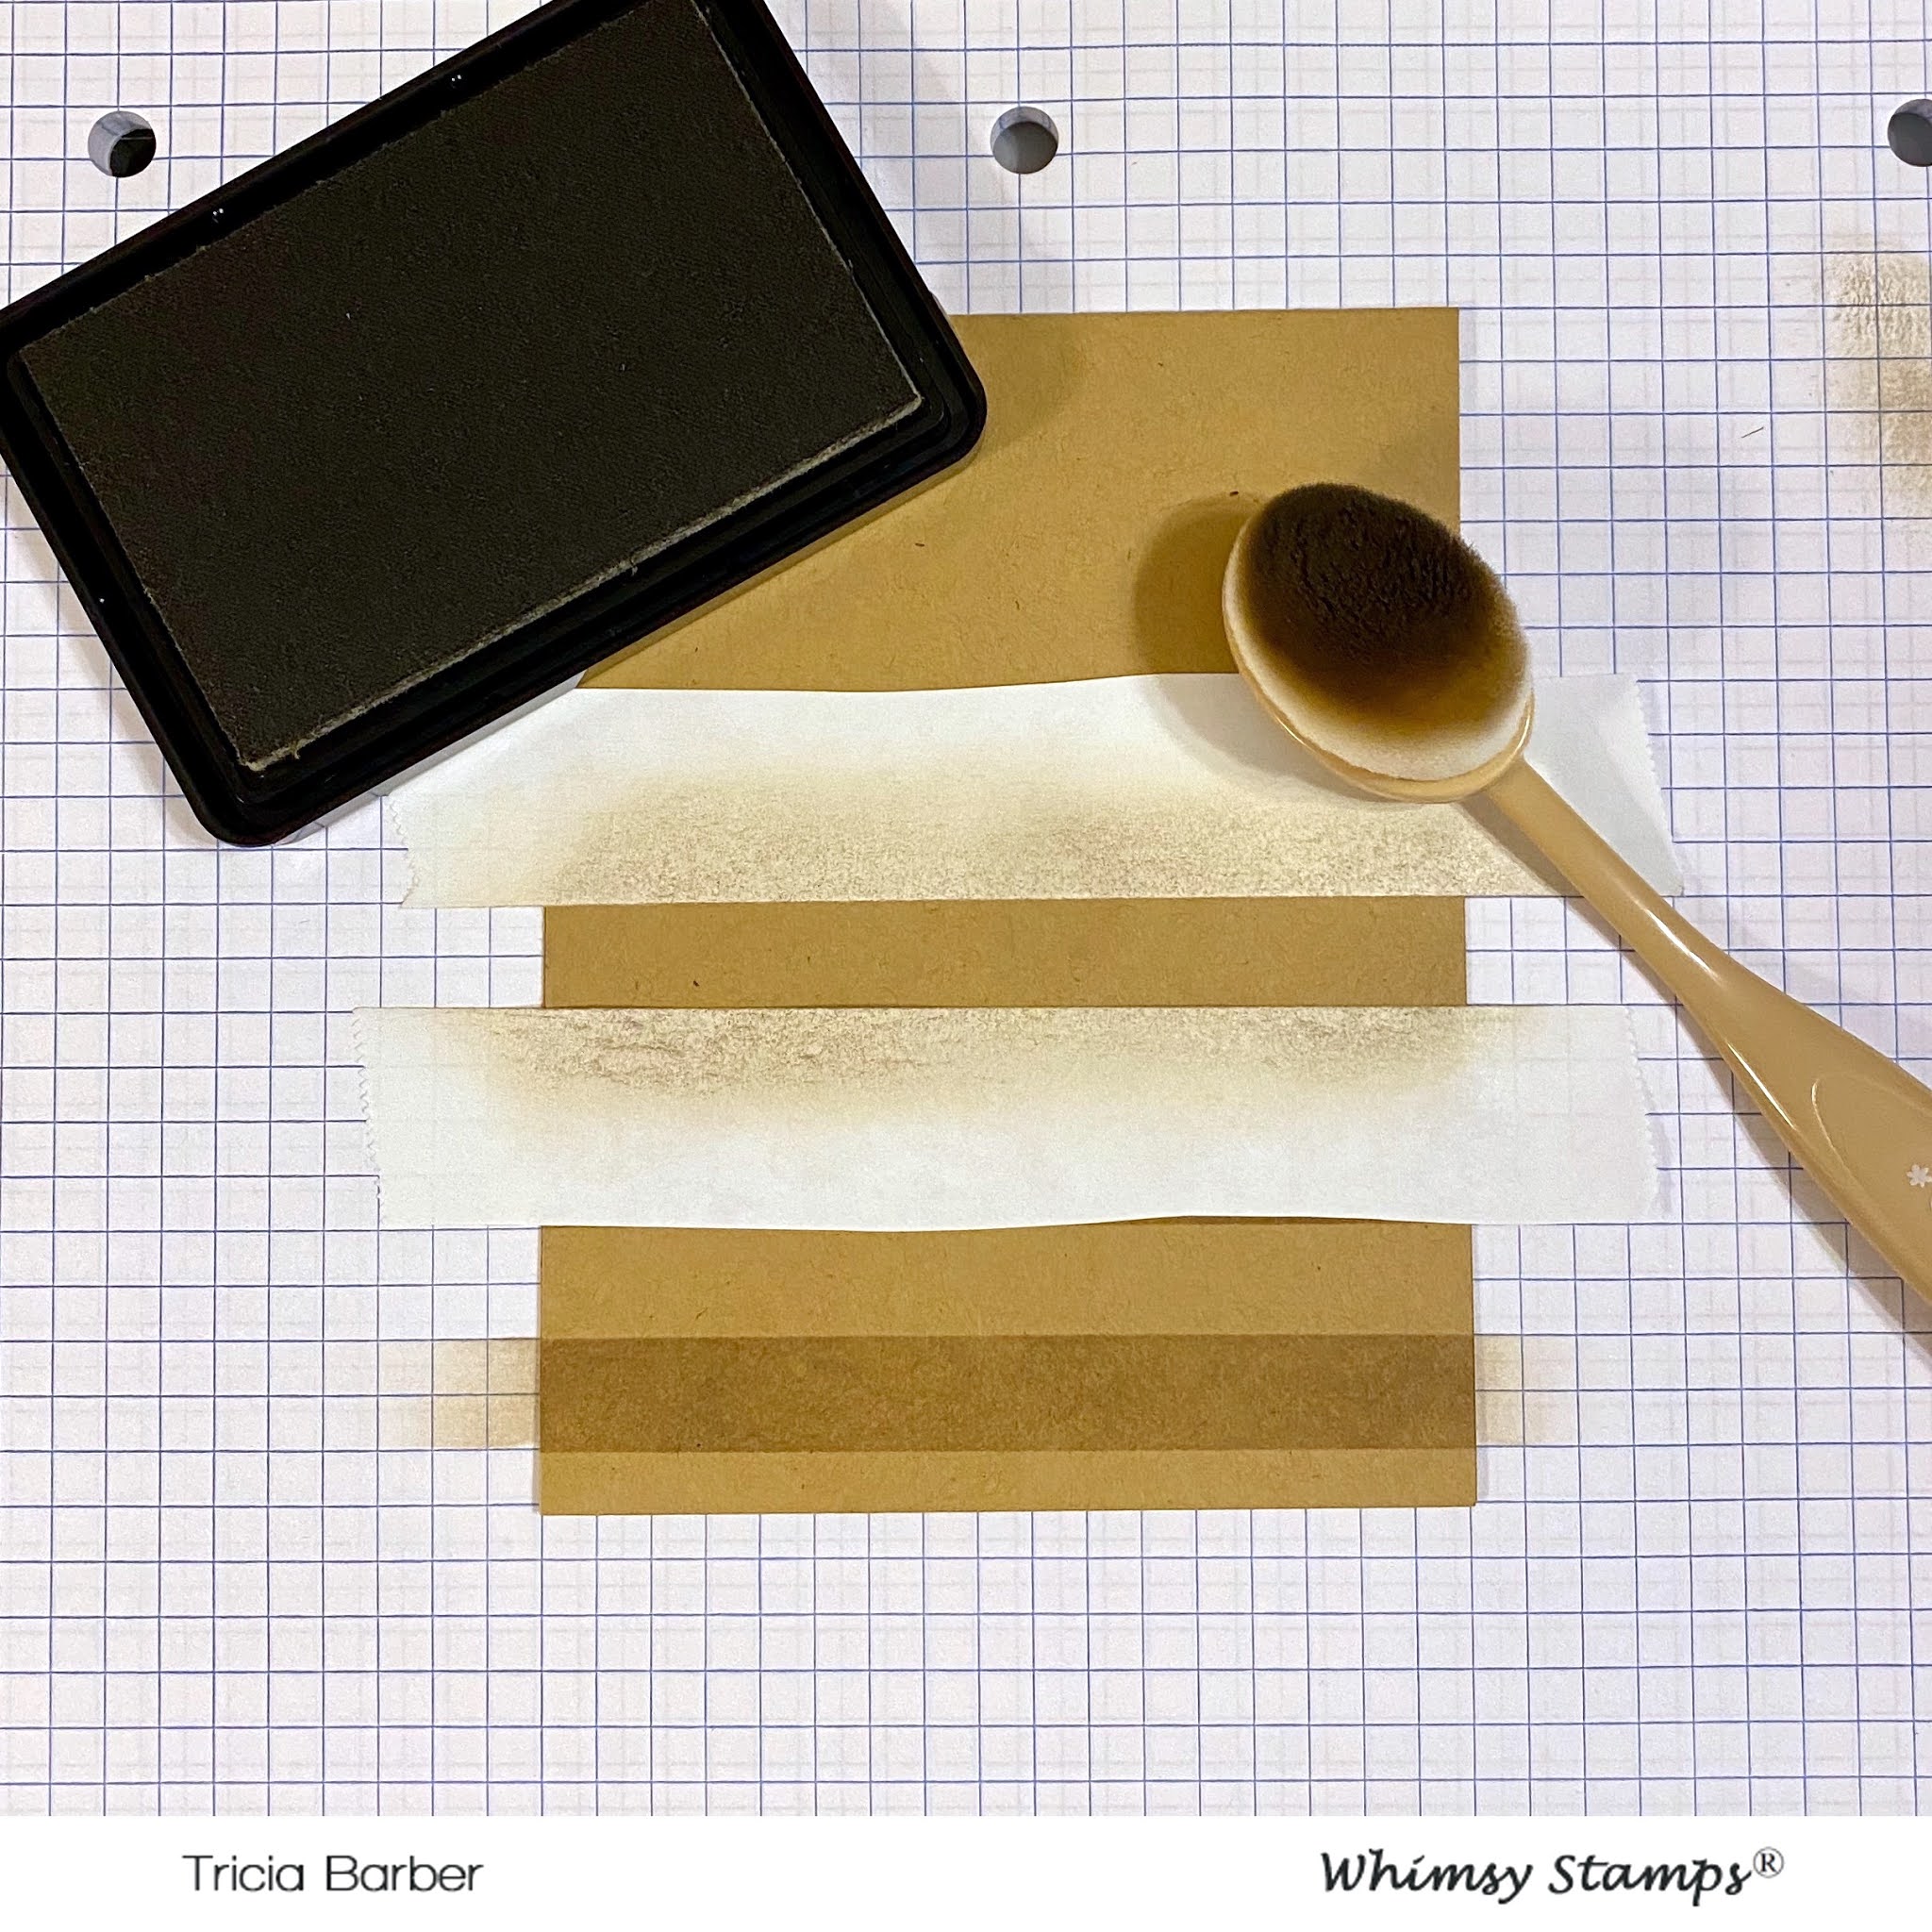
I started off by using Post It tape and matching kraft ink to add some detail to my kraft base. You can use a grid mat or grid paper and use the lines to help count off the spaces between the stripes.
Another way to add details to your plain cardstock is to use a background stamp. Background stamps are great to add details to cut out die cut shapes. I love this new Tree Ring Background stamp from the February release. I just love hot pink ink with the plain pink cardstock. This was then die cut with the new Slimline Scalloped Edge Pocket die set. Perfect to tuck a little surprise message or gift card.

I used Post It Tape again to create the grassy border for the interior die cut that comes with the Slimline Scalloped Edge Pocket die. I stamped a bunny from the Spring Bunnies stamp set. I colored this in with my Copic markers:
W3, W1, W00, Y11, Y13, Y15, R81, R83, R85, YG03, YG01, RV09, RV25, BG10, BG11, BG53, RV00, C1

For the final details, I die cut the butterflies from the Slimline Scalloped Edge Pocket die and added a glue dot that had been rolled and applied to the center of each butterfly. I curved up the wings to add some dimension. I stamped a sentiment from Spring Bunnies. I stamped the sentiment onto a Quick Strip die sentiment strip.
Thank you for stopping by! Have a great day!


This is beautiful Tricia.
ReplyDeleteSue...xxx