Showing posts with label Copic Coloring. Show all posts

31 Nights of Halloween - Night 20 and don't forget it's release day!


Hi Everyone, it's Faye here today :)

Have you been enjoying all the spooky creations so far this month? They've been absolutely gorgeous haven't they? Before I start telling you about my card, I just wanted to remind you we've had another fab release today, if you haven't seen it yet, be sure to pop over to the store. It's cute, you won't want to miss it!


Alrighty then! Let's talk pumpkins. This row of cuties are from the FaDoodle Fall Set. I coloured them up with copics and then stamped the faces on top. Sorted.


Using the largest die from the Frame Doodles Scallop Rectangle Die Set and another die from the Wonky Stitched Rectangles, I've created a frame for the pumpkins. I used tape to hold the two dies in position so I could cut three, identical frames. I've stacked and stuck them together, to add some depth to the card. 

All I needed then, was a sweet little spider, a sentiment and this pumpkin paper from the Vintage Halloween Paper Pack and the job was done. I love it when a plan comes together.


Thanks so much for stopping by, have a great day...

Spring Copic Coloration

 Happy Tuesday! This is Jeanette and I wanted to share this Springtime creation with you.  I made a coloration video that shares how I used Copic Markers to color up this very sweet digital image. You will find it lower down in this post.


I was inspired by the length of the papers in the Slimline Buttercup Paper pack to create a paper folder/wallet.  I then decorated it with the very sweet Love Me Not Mae Digital image as my focal image and a die cut using the Slimline Woodland Cottage Die.  This layout would also make an awesome slimline card.

I printed the image using my Epson printer onto Copic X-Pressit paper.


Here is the coloration video:


Supplies


Thanks so much for stopping by today!


Tuesday Tutorial with Sue...

Hello everyone...

It's Sue here today with a set of 'one layer' coffee themed cards I designed as a gift for a coffee loving friend.  I have also made a little card pouch to put them in.

I thought that the coffee themed stamps we have in store were perfect for this project!
This tutorial shows how I made the cards including straightforward masking techniques which don't involve lots of fussy cutting! (Which I personally find tedious and am terrible at)!

I have used Copics to colour over Distress Inks.  As the inks are water based it is totally safe to do this but please do your own swatch tests first if you aren't sure!  I also coloured onto watercolour card, the card soaks up a lot of ink and I love the effect it gives - you can really lay down a lot of ink and I love that!
I dabbed the Tumbled Glass ink pad onto my glass mat and sprayed it with water.
...then I pressed water colour card onto the wet ink and swooshed the card about a bit until I was happy with the result.
I repeated this with all the colours, Tumbled Glass, Dried Marigold, Pumice Stone and Ground Expresso.
I cut the cards into rectangles measuring 9cm x 11.5cm
I then stamped the coffee themed stamps Hot Sip and Coffee Break onto the inky backgrounds with black ink.
 
I placed acetate over my design to 'test stamp' the add ons to make sure they were in the correct position.
I then coloured each image with Copic Markers - E18, E17, YR27, YR14
...BG57, BG34, BG11
...R27, R05, R02
Y26, Y15, Y11
Next I mixed up a strongish wash of each ink (using the same ink I had used for the background except for this card where I chose the darker ink - Hickory Smoke).  I scrunched up a piece of kitchen towel to cover the coffee cup up and splattered the ink over the design with a fan brush which gives a really fine effect of small dots instead of splodges!
I stamped a sentiment from the Coffee Time Set onto each card in black ink.
I was really happy with how these turned out!
I could get used to making one layer cards - they look so stylish!

I decided to make a little wallet for the cards thinking that they make such a lovely little gift for a coffee loving friend.
This card holder is a doddle to make and was inspired by a visit to Pinterest!
All you have to do is score a piece of A4 card in half vertically and horizontally and burnish the folds with a bone folder tool.
Then mark the folds and cut as shown above.
No glue is required, the card just folds up into a little wallet!
Finally I added some ribbon and a tag...
Ingredients from Whimsy Stamps
I used a tag die which is retired - I'm sorry about that!  However, you could use the fabulous 
Bookmark and Tags Die Set instead by cutting the long bookmark die shorter to fit the stamped sentiment.

Thank you so much for popping by today!
I hope life has treated you well since that last time I posted here!
Look after yourselves and those you love
from Sue


Hot Sip Rubber Cling Stamp - Whimsy Stamps Coffee Break Clear Stamps - Whimsy Stamps 
Bookmark and Tags Die Set - Whimsy Stamps

Other Ingredients
Watercolour Card
Distress Inks in Dried Marigold, Tumbled Glass, Pumice Stone, Hickory Smoke, Ground Expresso
Spray Bottle or Mini Mister
Paint Brush
Black Ink
Copic Markers - 
Browns - E18, E17, YR27, YR14
Reds - R27, R05, R02
Yellows - Y26, Y15, Y11
Blues - BG57, BG34, BG11
Kraft Card
Brown Ribbon and Twine
Craft Box Basics

31 Nights of Halloween- Night 12


Hello there! Michelle here for the 12th Night of Halloween Extravaganza, Whimsy-Style!!! 
In celebration of our annual 31 Nights of Halloween event, we will be giving away $300 in Whimsy Stamps gift cards throughout the month of October! 
Check out the first post for all challenge details.
Today I am sharing one of my favorite Whimsy Stamps Set, Going Batty!! These bat images just crack me up!! They look goofy, like me, after I've had some homemade Limoncello😜😏


I stamped the bats with Memento black ink on X-Press Blending Paper and colored them with Copic Markers. For the teal bat I used shades BG11, BG13, BG18 and BG78. For the green bat I used shades YG21, YG25, YG17 and YG97. For the purple bat I used shades V12, V15, V17 and BV08. For their eyes and mouth I used shades C1, C3, C6, C8, C10. 
I fussy cut the bats and added some white gel accents.


Next, I trimmed a piece of Bristol Smooth Cardstock slightly smaller than an A2 card base. I masked off a crescent shape for the moon and inked up the background with distress oxide inks in shades tumbled glass, peacock feathers, blueprint sketch and black soot. I colored the moon with Copic Markers in shades N0, N1, N2, N3.


I created the cemetery scene using some of the most fun dies, Tree Assortment Die Set and Build A Graveyard Die Set. The tree, gates, tombstones, skulls and tiny bats were cut with X-Press Blending Paper and colored with Copic Markers. I used shades C2, C4, C6, C8, C10. I used the stamp set Grave Epitaphs  and embossed the tombstones. I also embossed the sentiment, 'Happy Halloween'. 
I added a few finishing touches, stickles clear glitter glue for shimmer and iridescent gems. 

Thanks for stopping by tonight!
Check back with us again tomorrow night @6pm, EST for more inspiration!

Michelle


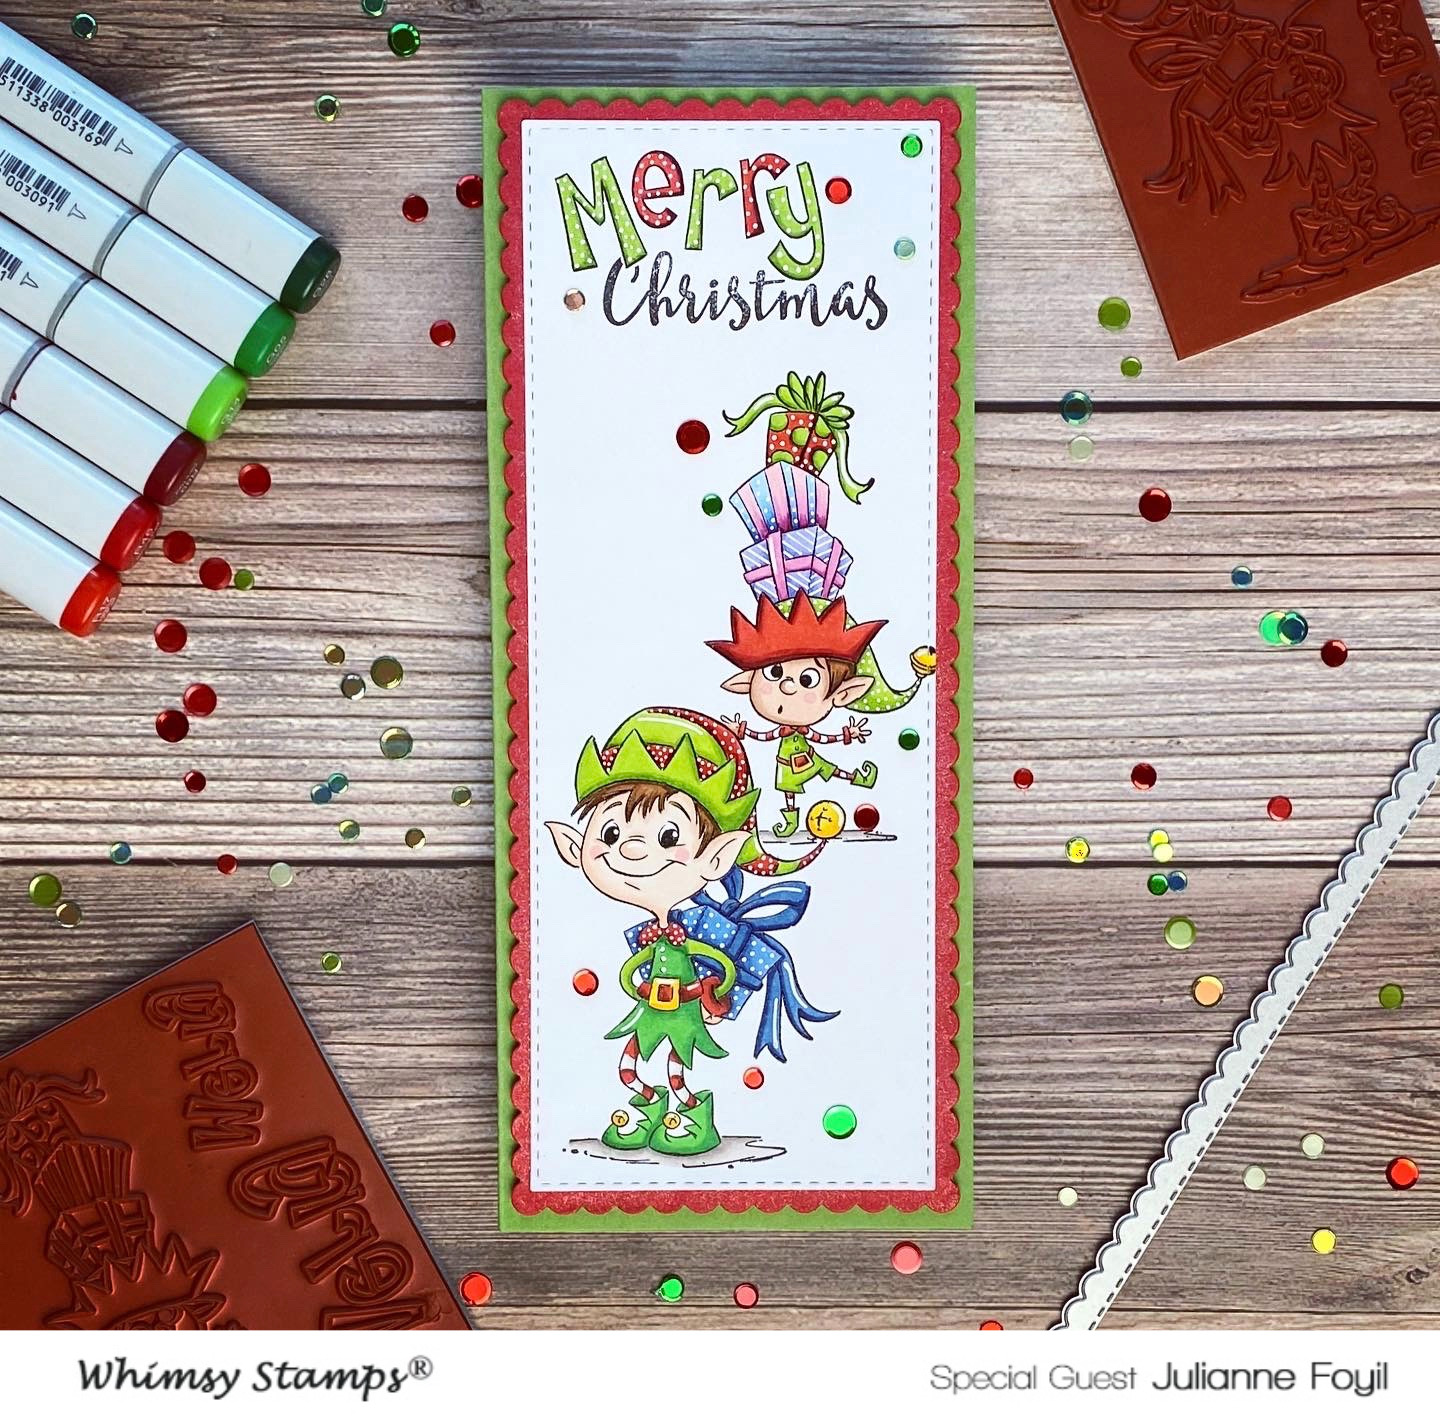
Special Guest - Julianne Foyil

Special Guest Julianne Foyil is back with more "Christmas in July" inspiration!

To see how this card was created, please watch the video below or over on Julianne's YouTube Channel.


Thank you, Julianne, for the fabulous inspiration!

Cookies for Santa Rubber Cling StampEveryday Scripted Sentiments Clear Stamps - Whimsy Stamps


Special Guest - Julianne Foyil

Please join me in welcoming Julianne Foyil to the Whimsy Stamps blog this month!  She has some wonderful "Christmas in July" inspiration in store for us.


How adorable are these elves?!  To see how this card came together, watch the video below or over on Julianne's YouTube channel.

https://youtu.be/aPhDkAFTVTo


Don't Peek Elf Rubber Cling StampBalancing Elf Rubber Cling StampEveryday Scripted Sentiments Clear Stamps

Technique Tuesday - Cute Cacti Colour Along

Hi Everyone, it's Faye here today :)

Did you see the Cute Cactus Stamp Set, matching dies and papers released last week? Like you, I get excited about new stuff, so I thought I would share my colouring process as I play with one of the images from this set today. 

Ready? Let's go then!

My light source is coming from the top left, and, because I know I am going to die cut the image when I have finished with it, I have stamped it in black ink on a scrap of paper. I love using something from my bag of scrap card, but it has made a naughty little line at the top of all my scans, sorry about that. Most of the time when I colour, I lay down my medium tone first, to plan where my shading will be. But sometimes, I pull up my pants and just go for it...

YG23 

YG17

YG23

YG21

 G07

G21

G24

G21

YG11

G46

YG13

YG23

YG13

YG11

G94

R30

R00

R000

C3, C1

R30

R00

FBG2, BG49

FBG2

B00

Multiliner and White Gel Pen

And that's it, all done. Simples, right? I can't just leave a pot of cacti lying around though...


There, that's better :)

Whimsy Goodies Used...
**NEW Cute Cacti Clear Stamps - Whimsy Stamps**NEW Cute Cacti Outline Die Set - Whimsy Stamps**NEW Festive Edger Die Set - Whimsy Stamps**NEW 6x6 Paper Pack - Festive Desert - Whimsy Stamps

Copics Used...
Green; YG21, YG23, YG17, G07/ YG11, G21, G24, G46/ YG11, YG13, YG23, G94
White; C0, C1
Pink; R000, R00, R30
Turquoise; B00, FBG2, BG49

 Thanks so much for stopping by, have a great day and stay safe...