

Hi Folks! I'm excited to be guest designing for Whimsy Stamps this month. Today is my first post, and I'm focusing on those super cute Bunny Balloons!
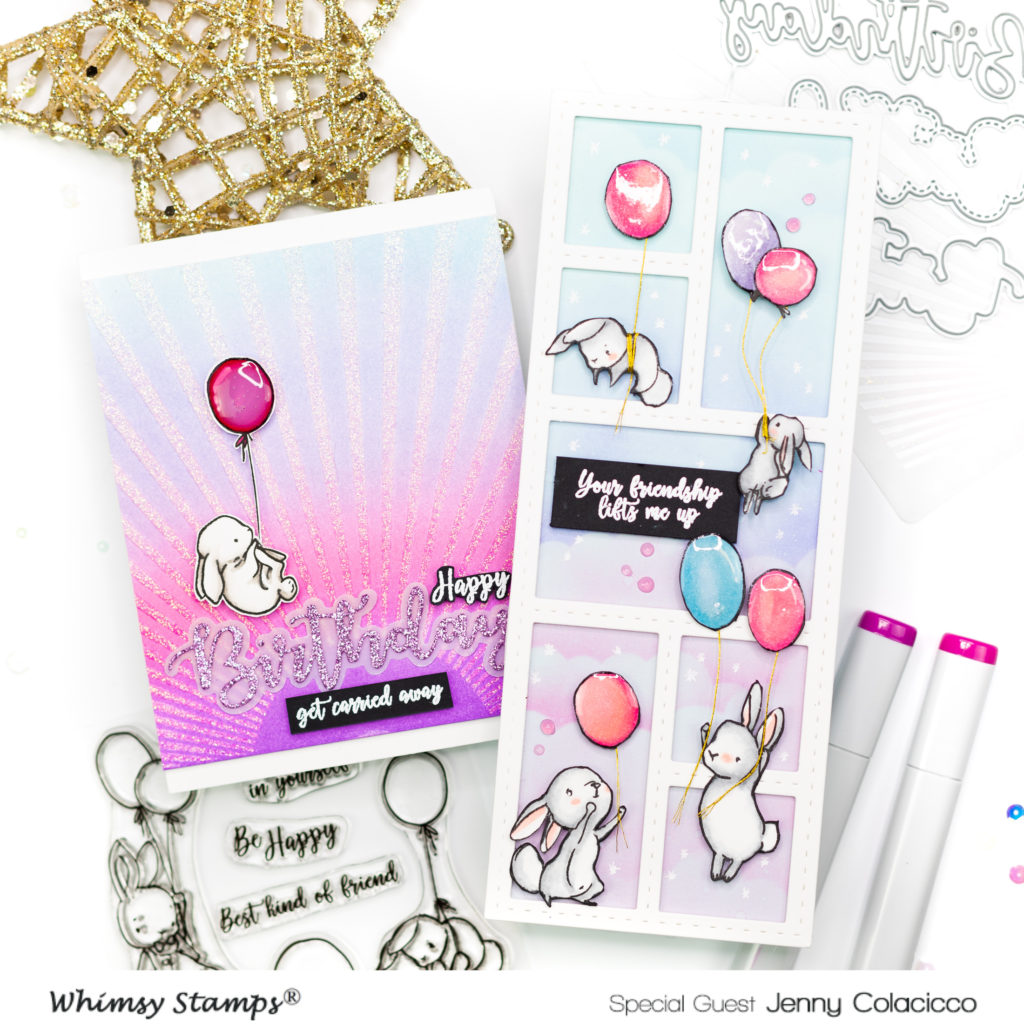
Whimsy Stamps has two stamp sets featuring balloon bunnies - I couldn't choose between them so I'm featuring both on my cards today. I've linked all of the supplies used today at the end of this post - I challenge you to choose between them!
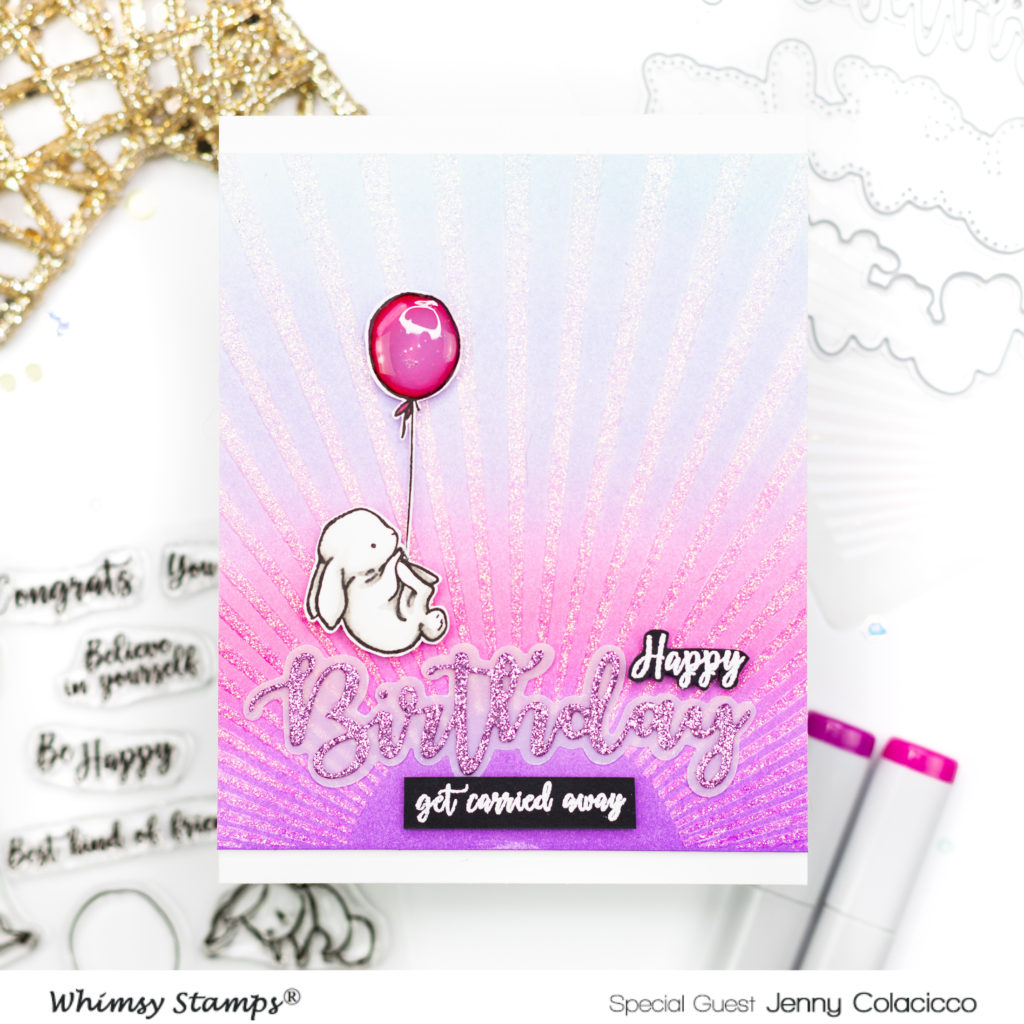
For my first card, I decided to feature the Sun Rays Stencil. I first created an ink blended background to mimic a sunset (taking some liberties with the colors) using Bristol Smooth cardstock. I used Distress Oxides and blended (from the bottom) Wilted Violet, Picked Raspberry, Shaded Lilac and Tumbled Glass. I then overlaid the the stencil and added super sparkly Nuvo Moonstone Glimmer Paste and set it aside to dry.

I stamped one of the cute balloon bunnies (this one is from the first Bunny Balloons) and colored it with my Copics using Warm Grays W1, W3, W5, just adding the colors in the creases and shadow areas and blending out into the white area. I used RV colors for the balloon. I then fussy cut out the image, leaving a small border.
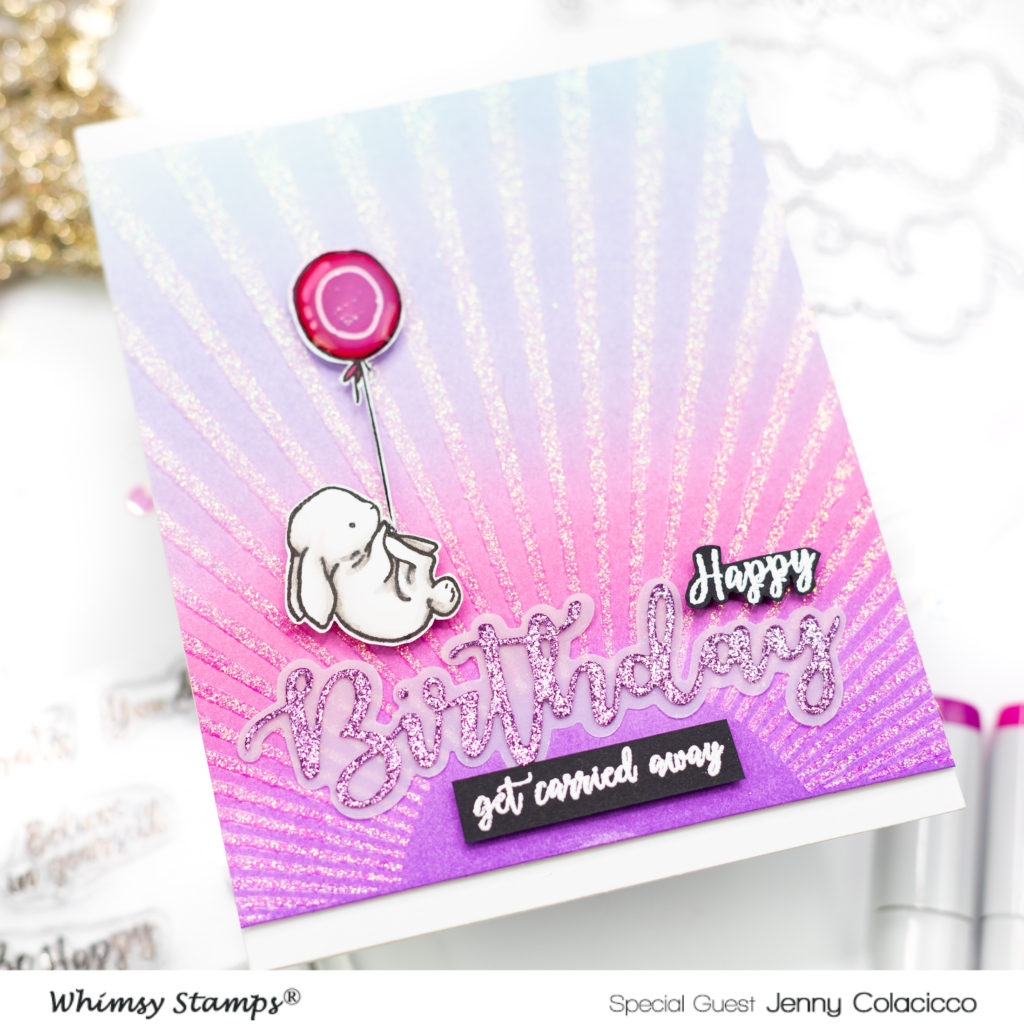
For my sentiment, I used the Whimsy Stamps Birthday Word and Shadow die set. This has three layers, but I just used two for my card today, die cutting the main word from purple glitter cardstock and the second layer from vellum, then adhered them together. I also heat embossed sentiments from the Bunny Balloons stamp set in white embossing powder on black cardstock and trimmed them out.
To put the card together, I first trimmed the panel down to 4.25" x 5" tall and adhered to a white note card, leaving white strips top and bottom. I adhered the 'Birthday' directly to the panel with liquid adhesive and then mounted the bunny and sub-sentiments on foam tape. As a finishing touch, I added some Clear Wink of Stella and Nuvo Crystal Glaze to the balloon.
My next card features almost all of the other bunnies from Bunny Balloons along with some from Bunny Balloons 2. I also used the Whimsy Stamps Slimline Windows die. This die cuts a perfect stitched window for a tall thin card (8.25x3.25"), and I die cut mine from Neenah Solar White 110lb cardstock.
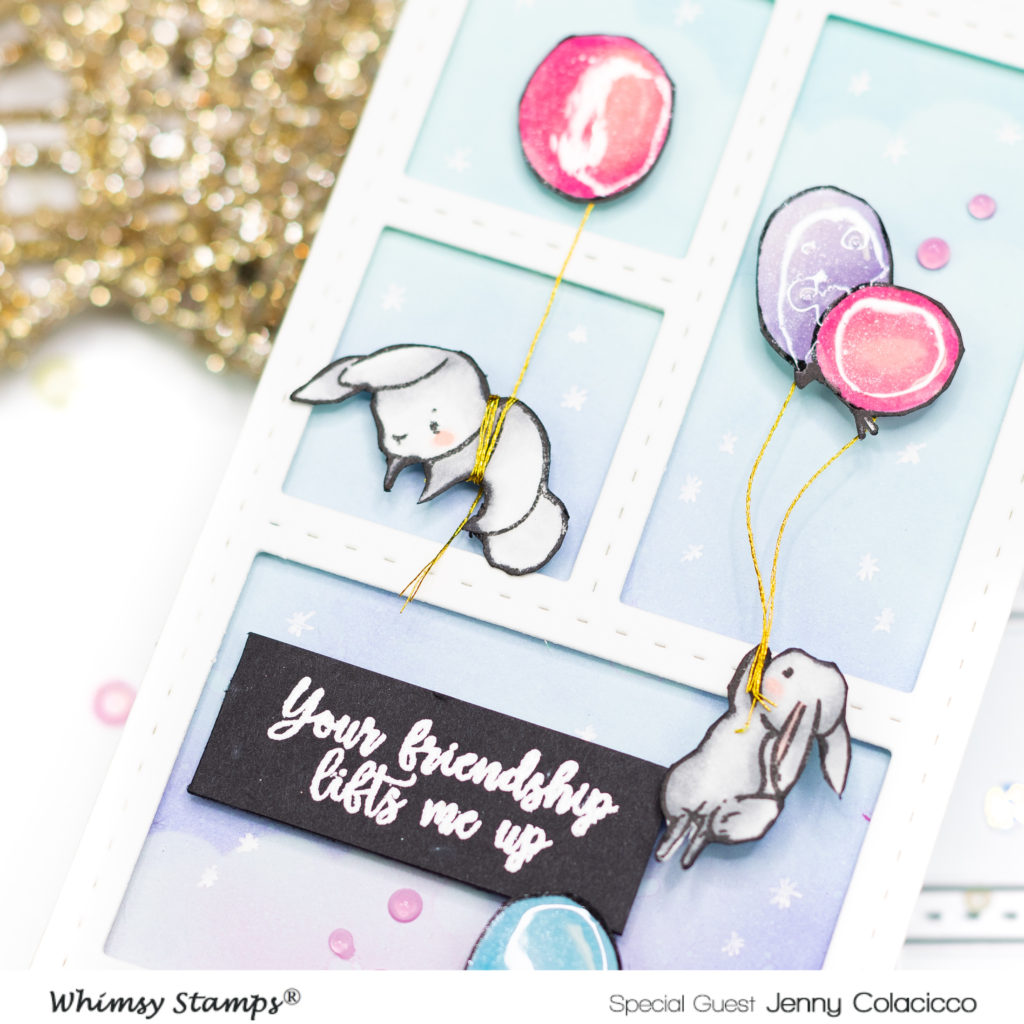
I wanted to carry on with the sky theme, and this time created a cloudy background by trimming a panel of pale blue cardstock to just slightly smaller than the window die cut. I then blended Distress Oxides in Picked Raspberry, Shaded Lilac and Tumbled glass up the panel using a cloud stencil from my stash. You could create a DIY stencil using this die set from Whimsy. I added some fine water splatters, then adhered the window die cut onto the panel using thin strips of foam tape to add dimension.
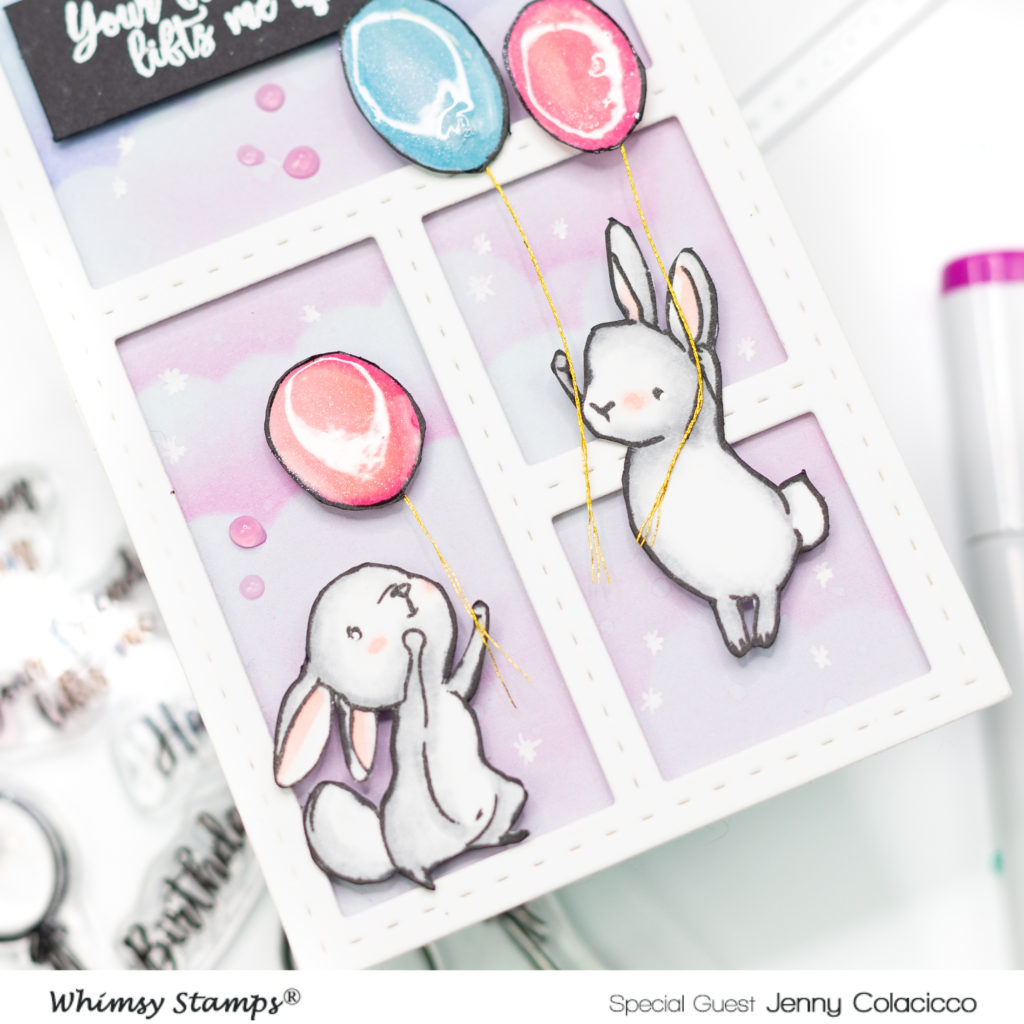
I stamped all of the bunnies onto 110lb Neenah Solar White in Copic friendly black ink, then colored them in with neutral gray (N) copics. I also used R20 for the ears and cheeks along with a blender 0. I then fussy cut them out. I colored the balloons in violets (V) and RV colors to match the background. Fussy cutting out the balloon string is tricky, so for this card I decided to dispense with that and replace it with DMC gold thread.

I adhered my bunnies down with foam squares. For the balloons, I added the thread to the back with double-sided adhesive, then the foam squares, and adhered them to the panel, and then added a dab of liquid glue to the bunny and held the end of the thread in place until it dried. For one of the bunnies, I wrapped the thread around his body a few times.
To finish, I added a white heat embossed sentiment, white gel pen stars, and a few drops of Nuvo Jewel Drops in Honeysuckle. I also added Clear Wink of Stella and Nuvo Crystal Glaze to the balloons again.
That finishes the cards - aren't they cute!? I'll be back again later this month with some more projects featuring goodies from Whimsy Stamps.
~Jenny
Supplies
All of the supplies I used are listed below. If you purchase through my links (here or on YouTube) I receive a small amount of compensation which helps me run my blog and channel to bring you more crafty creations! Thank you for your support.
Whimsy Stamps


Both of these are totally adorable Jenny! Thank you for being a wonderful special guest for us :)
ReplyDeleteSo super cute!
ReplyDelete