
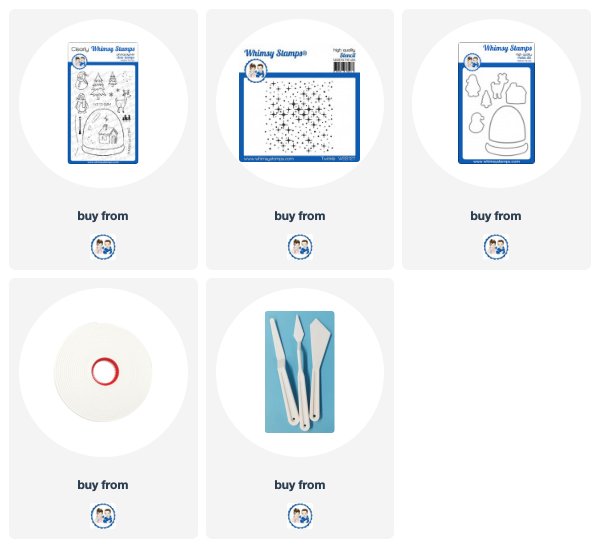
Hi Whimsy friends. One of my favorite products from the December release at Whimsy Stamps is the Glitter Globe stamp set.
I thought it would be fun to create a snowy scene inside the globe. I first decided to create my background so it could dry. I took the Twinkle stencil and added some Moonstone Glimmer Paste over top of it. I made sure to wash my pallete knife and stencil right away so that the paste would clean right off.

After my background was done, I stamped the globe image and then a couple of the trees and the deer. I did some simple masking, as you can see below, to create my scene.


After all of my stamping was done, I colored in my scene with a few Copic markers. For my sky, I took a light blue marker and colored the whole thing. I then took a white gel pen and added in my snow.
I also stamped and trimmed out the bottom portion of the globe sot hat I could create a snowy hill and add some dimension. But mostly to disguise the fact that I didn't get my images stamped down enough, as you can see in the photo above. :). I then stamped the sentiment onto the base portion, which is from the same Glitter Globe stamp set.
I then trimmed out my stamped and colored image. I made sure to take my Memento Tuxedo Black marker and draw it on the outer edges of my snow globe to help disguise the fact that I am not a great fussy cutter.
Note that this stamp set does have coordinating dies, if you should choose. However, I didn't use them on my card today as I didn't want the white border around the image.
I adhered the globe with some thin foam tape to my panel and the card is complete.

I hope you've been inspired today. Crafty hugs! ~ Alanna


I love this card! Thanks for inspiring us to keep using our Christmas stamps!
ReplyDelete