
Hello everyone! I'm back with my final guest post this month for Whimsy Stamps. I have had a fun time using their fabulous products and I am so grateful to Whimsy Stamps for this wonderful opportunity! You can check out the variety of amazing stamps and dies that they have available HERE. Affiliate
links used.


I actually created two projects to share with you today. When I first saw the Merry Moose-mas Rubber Cling Stamp, I was itching to color it, lol. He's just the cutest! This is a single-layer card, stamped with Black Ink onto a piece of Neenah Solar White 110lb Card Stock and colored with Copics.


After I colored my image, I diecut the entire image with the largest of the Hand
Stitched Nested Rectangle Dies. I then stamped my sentiment (from the Bundled
Up Clear Stamp Set) with Black Ink and then adhered this entire panel to a vertical, top-folding A2 sized card base.

Copic Colors Used:
- Reds: R14, R27, R46, R59, RV99
- Blues for the Scarf and Hat: B0000, B01, B02, B05
- Blue Sky: B91 & B93
- Browns: E30, E31, E23, E25, E29
- Whites: 0, C00, C1, C2, C4

Lastly, I added some snow on top of both the sky and the moose with a White Gel Pen.


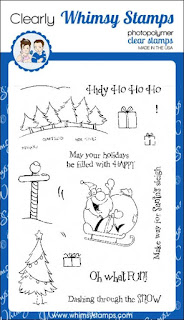
For my second project, I used the fun and festive Santa from the Oh What Fun Clear Stamp Set. I love how Santa already looks like he's cruising along. To give him some more movement, I created a hidden reverse-slider panel.

When you pull on the tab, Santa goes flying across the snow to go deliver his bag full of goodies! (I've included a short video at the end of this post to show how Santa moves across the snow).

To create this type of a card, you only need a craft knife (or slot punch), a ruler, a plastic bag, 3D foam tape and some 1.4" tape runner. I apologize that I didn't create a video for this process but if you google "Creating a Card with a Hidden Slider Channel", you will find a lot of good tutorials out there! The fun part is that you can use this technique on so many of the Whimsy Stamps that you already own! OR you can makes things even easier and check out the new line of kinetic dies that Whimsy has just introduced this month...see them all HERE.

For the sky, I blended some Distress Inks (Faded Jeans and Tumbled Glass) and then added some snow using some Opaque Crackle Texture Paste and the Polka Dots Stencil. I also added a few more dots of snow with a White Gel Pen. I used the Stitched Border Die Trio for the snowy hill.
I hope you enjoyed my cards today! Here are the rest of the cards (below) that I created this past month for my Whimsy Stamps Guest Design Posts.

Thank you all so much for dropping by! If you liked this card and want some more crafty inspiration, don't forget to check out my INSTAGRAM
feed!
Wishing you all the most wonderful day!
♥ Rachel
Wishing you all the most wonderful day!
♥ Rachel


