Featured Stamper - Nadine

Happy Saturday everyone!

Today is featured stamper day here at the Whimsy Inspirations blog, but before I introduce her, I would like to give you the heads up about Monday July 19th.  What's so special about Monday?  Well, Whimsy Stamps are releasing a whole pile of brand new rubber stamps - YAY!  We're having a fab blog hop to celebrate with a mega prize, so you definitely don't want to miss it! 

Some of the Whimsy gals are showing sneak peeks of these fantastic new stamps in the run up to new release day, so be sure to hop on over to their blogs to take a look!  Bev has created a gorgeous card using one stamp and Crystal, Debbie and myself (Simonne) have created fabby cards using another stamp.  (I'm not going to tell you what these stamps are called - you'll have to visit our blogs to find out, hee hee!)
- - - - - - - - - - - - - - - - - - - - - - - - - - - - - - - - - - - - - - - - - - - - -

I am so pleased to introduce you to the wonderful Nadine, all the way from Germany, as today's Whimsy featured stamper!  Do pop on over to Nadine's blog and have a nosey around, as it is packed full of wonderful creations!

Nadine recently purchased some of our wonderful Whimsy Meljen Designs digi stamps, and here are some of the cards she has created...

First is this lovely card using Cutie Crab digi stamp. Isn't he just the sweetest crab ever? I love the colours Nadine has picked for this card and that wonderful brown 'seaweed' is the perfect finishing touch!


Next is a card using the cute Turtle's Little Star digi stamp.  I love how the backing paper picks up the stars and dotted trails of the stamp, and of course those starfish flower centres are perfect!


Finally here is a card Nadine has made using the very special FREE donkey digi stamp which was created by Meljen Designs in honor of our stamping friend Michelle Oatman who recently had a life changing accident which left her with the loss of her right eye. You can download this image and read all about the very special card drive that is currently going on for Michelle HERE.

I adore the sweetest of this card - the pretty papers, beautiful flower embellishments and pearls go perfectly with that cute donkey!  I'm sure Michelle will love this card!

Thank you for sharing your beautiful Whimsy creations with us, Nadine!

We'd love to share YOUR Whimsy creations here on this blog.  So if you would like to be featured stamper just like Nadine, please send us an email with links to your blog.

Woodland Fairy....

Hello everyone today I have a card to share with you using this Fun Digital image from Meljen's Designs "Woodland Fairy" available here at Whimsy Stamps...


I really enjoyed coloring this cute image with my Copic Markers, I added some glitter to my flowers for an extra sparkle.I hope you enjoyed my card and have a fun safe weekend!!

Two cards to share in honor of Michelle and Bella!!

Hi Everyone!! I just wanted to share a couple of cards with you that I made for two special events over at Whimsy where Denise and the rest of the team are trying to share the love with those in need.

The first is a card I created for Michelle Oatman who recently suffered a tragic accident which has left her with the loss of her right eye. The stamping community is once again coming together to show support for Michelle by sending her well wishes and cards. The Whimsy team is proud to support the card drive being held by our Senior Designer Debbie Eastman and the Spoon Full of Sugar Challenge blog for Michelle.

The donkey image on my card is created by owner and artist for Meljen's Designs. The sentiment is created by Ann Vento of Raindrop Echo Designs to coordinate with this image. Both are available to download for FREE. You can download this freebie set now by visiting the main store page at Whimsy. You can find more information about Michelle, her mailing info, and this card drive on the Spoon Full of Sugar Blog. We would love to flood Michelle's mailbox with happy mail!!


My second creation is one I made for Bella.
Bella is a member of the same gymnastics group as Whimsy's Senior Designer Erin's daughter, and is a very brave little girl, eight years old, who has been through a horrific experience that will change her life forever. She has been through so much. You can read all about Bella and her story HERE


For Bella's card I used the Hang in There Digital image and sentiments from Whimsy as well as the rubber sentiment Whimsy Circle Postmarks. The image is completely paper pieced. The image panel is a pocket where the ticket sticks can pulled out of.

Erin is hoping that we can all shower Bella with cards for the rest of the month. We all are crafting anyway....So, please, if you have the time, send a card to Bella!! It does not have to be a new card. It can be one from your stash. We want that PO Box stuffed to the brim everyday with cards from around the world! Let's send Bella wishes and smiles!!! How many cards do you think we can get?????

The mailing address is:

The Bella Tucker Fund
P.O. Box199
Londonderry NH
03053 USA

Thanks for stopping by today!! Have a great day!

Chris


Paper Flower Tutorial

Hello!

Today I'm going to share with you my paper flower tutorial. It's simple, but I think the flowers look nice and effective.

You can see the flower in the card below.


(I posted this card here on the Whimsy Inspirations blog on Friday, but as I made the tutorial along with this card, I’m posting it again. )

The image is Trimming the Tree, designed by Crissy Armstrong; the sentiment is from theTrimming the Tree sentiment set designed by Ann Vento.

And now, the tutorial - I will try to explain it step by step, but I think the photos show it well enough, too. It will be photos first and then a short explanation. :)


All you need for this flower is a piece of cardstock, or paper in any colour you wish, distress ink pad, I prefer Vintage Photo, a brad and a pen.


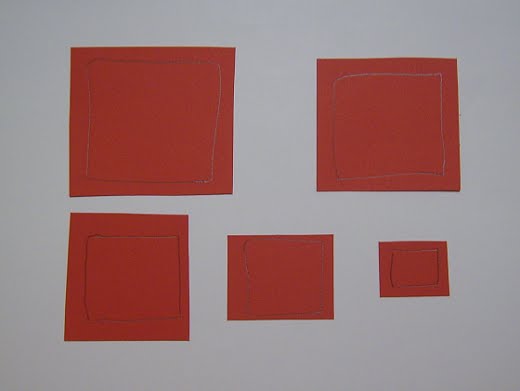
First step is to draw rectangles, yes rectangles, not circles. I always draw five of them, I start from the biggest one and go to the smallest, last one.


Next step is to tear the paper rectangles like in the photo, make sure you tear close to the line you drew.


Now you take each rectangle, one by one and fold it in the middle like in the photo, to get a triangle and after you've done that, you just tear it from the top, but just a little, not to the bottom line.


Then you unfold it and fold it again using two other corners of the rectangle tearing them in the same way. You repeat that with every rectangle.


When you're done with that, this is what you should get.


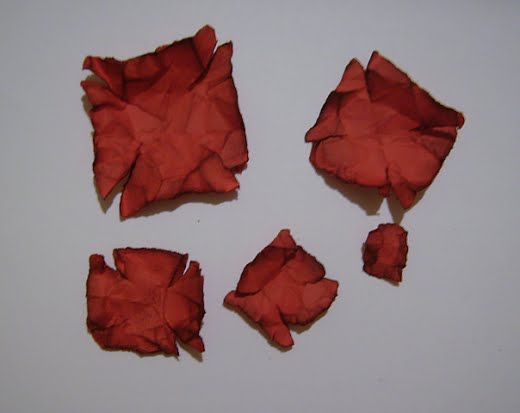
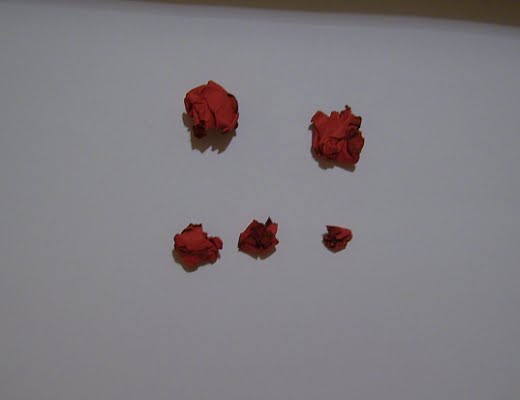
Now just crumple all five rectangles like in the photo.


Uncrumple them and use your distress ink pad to distress all of them. Make sure you distress well all the edges and you can distress the surface, too.


And this is what you should get (the photo above)


Now crumple all the rectangles again and uncrumple them. You can repeat it for the third time, too.


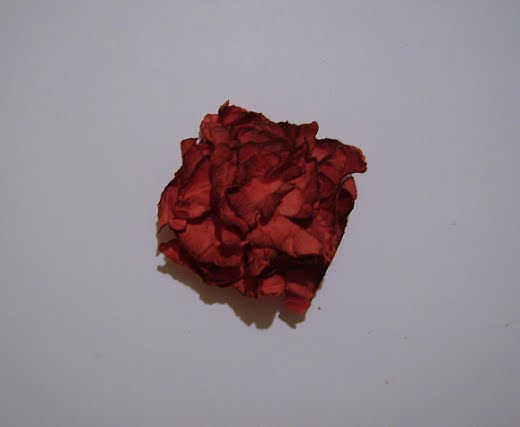
Put rectangles one over the other, starting with the biggest one, the smallest one should be on top. Just make sure that torn parts of one rectangle don’t go over the torn parts of the other rectangle.


Put a brad in the centre of the rectangles.


Now it's time to make a pretty flower out of the thing you got.

I must say that I always attach flower to my card first and then start arranging it, it's much easier that way.

First, crumple it a little, move some of the parts of the flower forward so it doesn't look flat and then start rolling the torn edges like in the photo. It really doesn't matter if you roll one side on the inside and another one on the outside, for me it looks prettier when it's kind of messy.


And this is what you should get at the end!

I hope you liked my tutorial, let me know what you think and also if you have some questions, suggestions or corrections, don't hesitate to speak. :)

You can find the image and the sentiment I used on this card and also many other beautiful images and sentiments in the Whimsy Stamps Store.

Thank you for reading this tutorial and have a great day!

Hugs,
Vanja