
Coloring Pleats With Alcohol Markers

The cute little girl image I'm using for this tutorial is from Whimsy's Wee
Stamps collection and called 'Wee Suzi' . I stamped it
using Memento Tuxedo Black ink onto X-Press it! paper.

I'm using the following colors for my sample RV00 - RV36 - RV66 - RV69
and the colorless blender.
and the colorless blender.

First
imagine where your light is coming from.
In my sample the light is coming from the left.
My first color to use is RV69, it's also the darkest color.
In my sample the light is coming from the left.
My first color to use is RV69, it's also the darkest color.

With RV69 I mark where I want my pleats to be on the skirt. I drew some
coming from the bottom as well as from the top and keep them offset
so it looks like they intertwine.
coming from the bottom as well as from the top and keep them offset
so it looks like they intertwine.

Again with RV69 make the folds wider on the bottom/top.
Always work with a light hand and keep in mind where your light
is coming from! On my sample I have the light coming from the left
so my folds will be lighter on the left side and darker on the right.


Take
the next lighter color, RV66 and expand the pleats to the right.


Now take RV63 and do the same, expand the pleats to the
right.
Still keep some white areas where the lightest parts will be.

Go in again with all the markers (RV69, RV66, RV63) to blend
and deepen the pleats. Always keep the light source in mind and
do not color over the lightest parts yet. We will do this in the next step.


With the lightest color I go over the lightest parts of the folds.
Do
not color too far into the dark parts as the lightest color will lift
the darker colors. If I want some areas lighter again I use my
colorless blender. Very slightly I color over the parts of the pleats
I want to be the lightest.
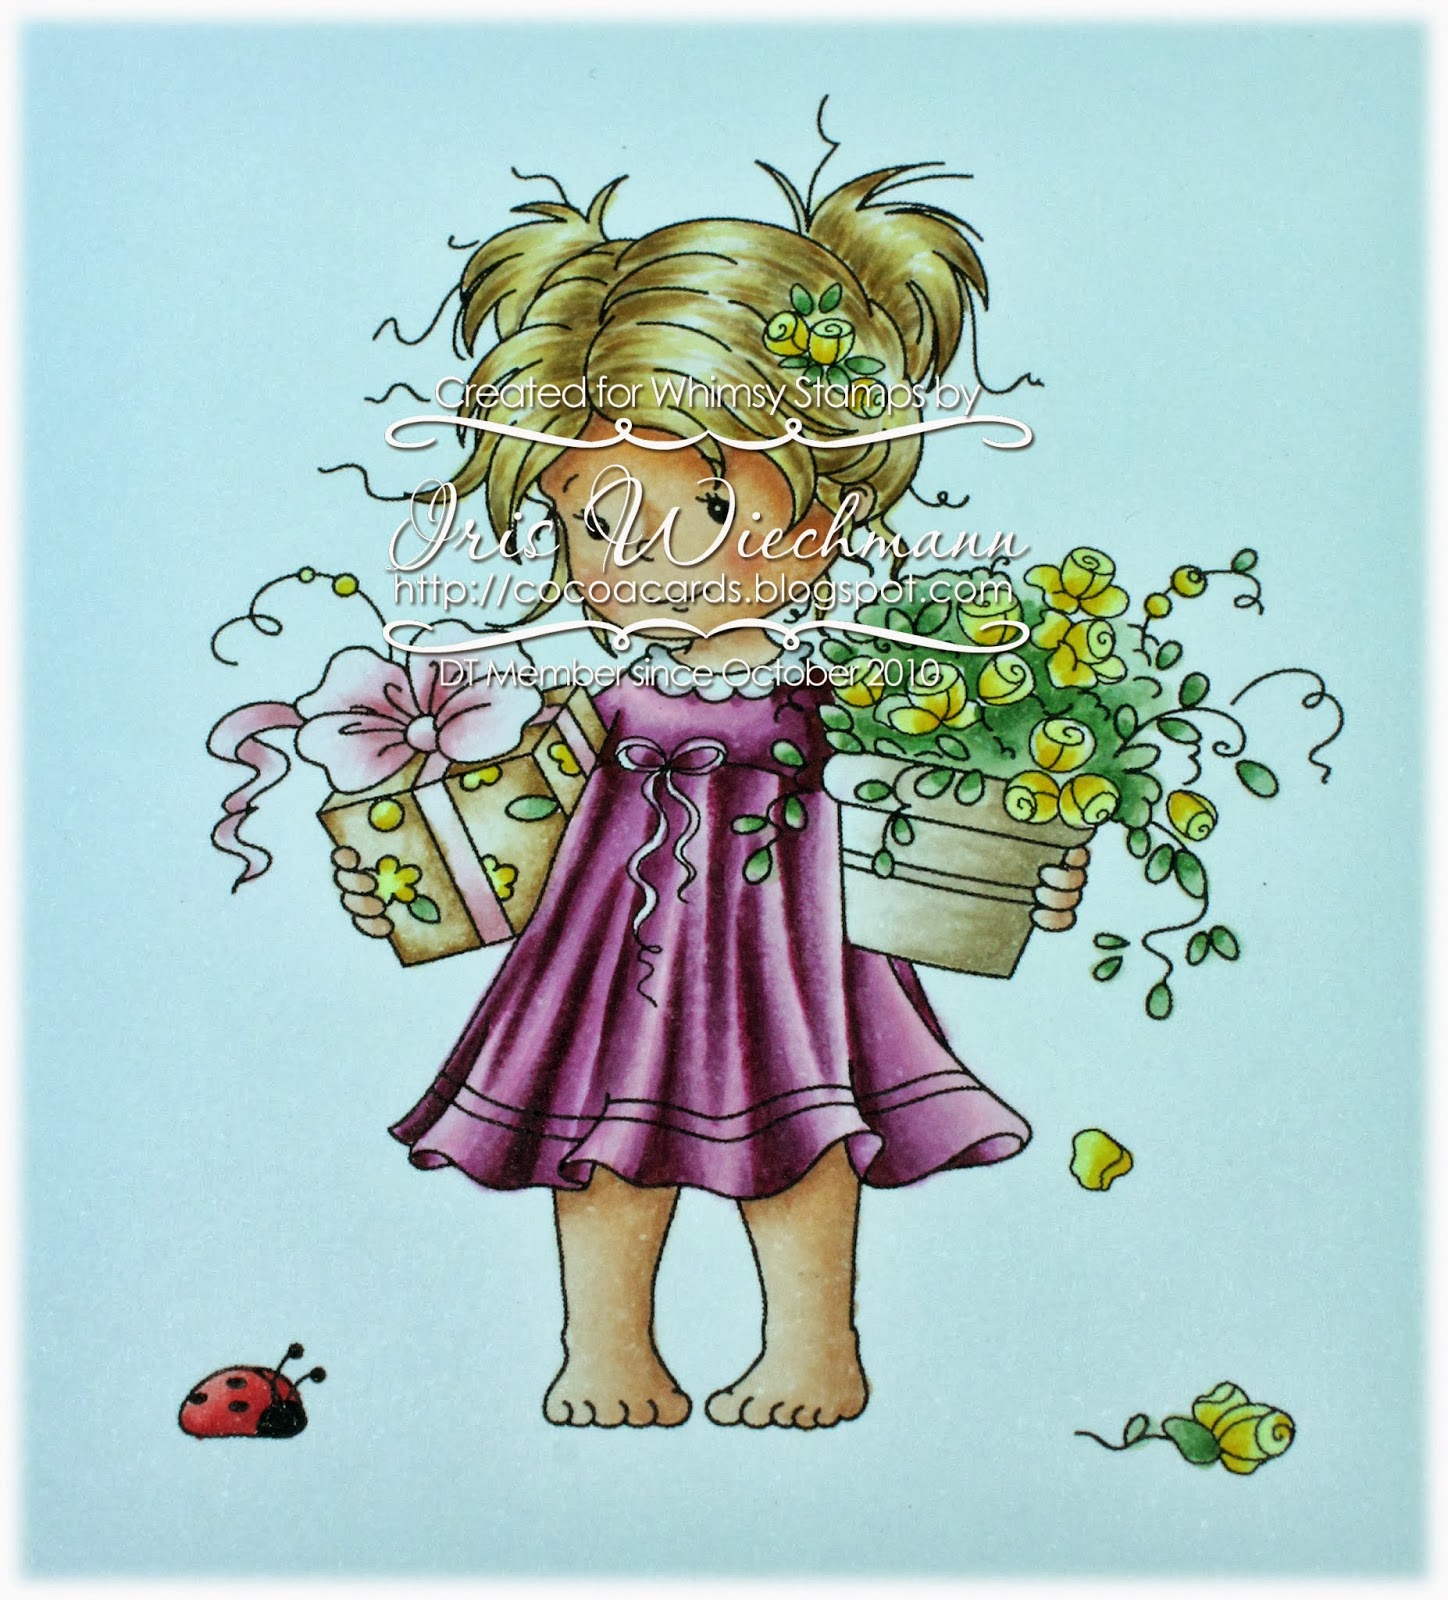
Finish coloring the dress and the rest of the image.
I hope you liked my tutorial and give it a try next time you want to have some pleats on your image.
Hugs,


Brilliant tutorial Iris!!!
ReplyDeleteHer dress looks wonderful.
Really beautiful!! Love the colors
ReplyDeleteAbsolutely great work!
ReplyDeleteAwesome tutorial! TFS!
ReplyDeleteIris, this is a wonderful tutorial - easy to follow and understand! Its like making magic with markers! You did such a great job!
ReplyDeleteWow what a great tutorial
ReplyDeleteThanx very much for sharing
Greetings Cinderella
oooh this is great x
ReplyDeleteThanks for this great tutorial. Your colouring is adorable
ReplyDeleteGreat tutorial. Thank you so much.
ReplyDeleteA W E S O M E !!!!!!!!!
ReplyDeleteThanks!!!!!!! I need help on pleats and your little tutorial is just absolutely perfect. I'm going to print it out in color so I can sit at home and try what you have shown. Hugs, Gail
Wow Wow Wow........you added yards of fabric to that dress. What a difference it makes when you know what you are doing. LOL Still learning here. Thanks for the tutorial.
ReplyDelete