Showing posts with label Toni Maddox. Show all posts

31 Nights of Halloween - Night 20


Woo hoo!  This is my favorite Whimsy event of the year.  Halloween?  Yes, please! In celebration of our annual 31 Nights of Halloween event, we will be giving away $300 in Whimsy Stamps gift cards throughout the month of October!  Check the link above for full details on how to win.


For my card, I'm mixing up some new products with my favorite Halloween set, Zombie Boy. These are so cute, especially when you add googly eyes!


I placed him on top of a graveyard scene created using Haunted 6x6 Paper and diecuts from the Build a Graveyard and Dracula Going Batty die sets.

The Halloween Scream sentiment is stamped on a Comic Speech Bubbles Die that I cut down to size.


I colored him up with Copics and added white pigment pen highlights.  Such a fun scene!

Now be sure to check out the giveaway details and the fun new products in the shop.  

If you'd like to check out my other creations, you can visit my blog, Frankie Helps Craft, my Instagram, or my Pinterest Board.


Tuesday Tutorial - Blingy Santa


Hello, everyone!  Toni here with a bit of bling-a-ding-ding for our holiday cardmaking!  This Greedy Santa image and sentiment gave me a chuckle for sure.  


My first step was to use a Versamark pen on the gold circles of the Gilded Holiday 6x6 Paper so I could emboss them in gold.  I also used the Twinkle Stencil the same way to add stars to some of the circles.


Next I cut out the Slimline Cityscape Die twice, cutting one of them in half so I could create a lot of city without wasting the gold mirror board which would be hidden behind Santa.  I used another piece of the  Gilded Holiday 6x6 Paper for the road.


I colored up the Greedy Santa image using Zig watercolor pens. I used a white pigment pen for his beard (and to cover up my boo boos). I added a bit of Marvy Snow Marker to his fur trim too.  The sentiment is embossed on a Comic Speech Bubbles Diecut that I trimmed down to size.


I hope you enjoyed today's tips!  Be sure to take a gander at the other goodies in the Whimsy shop.

If you'd like to check out my other creations, you can visit my blog, Frankie Helps Craft, my Instagram, or my Pinterest Board.


Tuesday Tutorial - Vellum Focal Point


Hello, Whimsy fans!  Today I'm going to show you how to use vellum to create a focal point.


I love patterned paper but sometimes the pattern is busy enough that it can be hard for the eye to focus on the image(s).  Check out the pic above.  Cute but the Christmas Tidings images are a bit lost on the Mermaid 6x6 Paper.


I cut out a piece of vellum using a Wavy Nested Frames Die and lightly brushed it with blue.  Just that tiny bit of color and translucent paper helps the eye to focus on the main images without losing the cuteness of the patterned paper beneath!  I like how the wavy edges mimic those of the Wonky Stitched Rectangle Die too.


Next I colored up the images using Copics with colors drawn from the paper. Notice the sentiment is stamped partially on the vellum. Super cute!


I hope you're inspired to try this and am looking forward to seeing the results!  If you'd like to check out my other creations, you can visit my blog, Frankie Helps Craft, my Instagram, or my Pinterest Board.

Be sure to check out the new goodies in the Whimsy shop too!


Tall, Dork and Sweet - Tutorial Tuesday with Toni


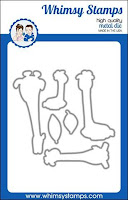
Hello, Whimsy fans! I'm sharing with you a little birthday card I made for my not so little sister. She's like NBA tall. Not WNBA...NBA. Yup, a tall drink of water. So I just had to play around with the Giraffes Smiles set.


First things first, I created the background by sponging Distress Oxides through the Giraffe Stencil. The stencil repeats so it was easy to reposition it as I went up the slimline base. I kept each color strip about the same height as each section of the Slimline Waves die.


Now the giraffe was really fun to do. I first stamped the body with Memento Tuxedo Black, having masked the head so it wouldn't stamp. I repeated the same procedure (far) above, masking the body this time so only the head would stamp.

I used a ruler and a Copic Multi-liner to connect the head and body then drew in spots by hand.


I colored up the giraffe using Copics E41, 42, 43, 55, 57, and 59. You don't even notice that the hand drawn spots are different.  But did you notice I wove the giraffe's head through the Slimline Waves die?  Just for fun.


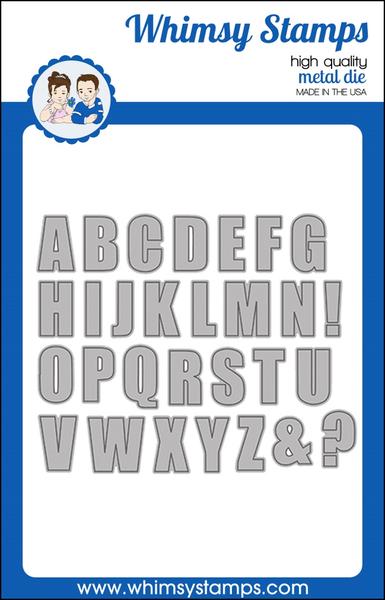
I thought I would emphasize the height of the card using the Bold ABCs for "sweet." I sponged those with the same Distress Oxides as the background, trying to keep the transitions about the same. I added a shadow letter so the sentiment would pop rather than fade. I also embossed part of one of the Giraffe Smiles sentiments onto a Quick Strip.


That black strip immediately draws the eye. And speaking of dies, I added glasses and used one of my Copic Multiliners to embiggen the eyes a bit. So cute!

If you haven't already, be sure to check out the Whimsy January release.

You can also check out my other creations by visiting my blog, Frankie Helps Craft, my Instagram, or my Pinterest Board.



Let It Snow


Happy holidays, everyone! I hope you're having a joyous season if you celebrate.

Today's card is for post-holiday--you know, you've sent out as many cards as you could before the holidays and now it's too late so a card in January or even February celebrating winter will do just fine. LOL.


I'm using the Glitter Globe stamps and dies. I love that this globe is almost bell-jar shaped so it allows you to add more "up" to your scene.

I colored up the images with Zigs, added a touch of glitter and embossed the snowflakes. Fun!


For the background, I'm using Therm O Web products leftover from when we had done a collaboration with them earlier this year. It goes so perfectly with my scene. I want use rainbow foil with this too!

Have a happy New Year!  See you soon!