Showing posts with label Halloween Scream. Show all posts

31 Nights of Halloween - Night 12 - Special Video Guest Kendra Morgan


Welcome back to another frightfully fun night! On this 12th night, we are haunted by Kendra Morgan from Cards by Kendra. She is sharing a video tutorial on how she created this spooktacular slimline card. Be sure to fly on over to her YouTube Channel and cast a spell on that subscribe button.

"I created this Halloween Horror Movie scene slimline card using the Halloween Scream Stamp set, Happy Halloween word die set, and Slimline Film Strip Die, along with distress oxide inks and Copic markers. The moon glows in the dark."


Fun fact about Kendra she runs a quarterly cardmaking challenge, Kendra's Card Challenge. It's a great way to use those amazing Whimsy Stamps 6x6 Paper Packs. 


You can find Kendra here:


31 Nights of Halloween - Night 8 - Special Guest Tami Bastiaans


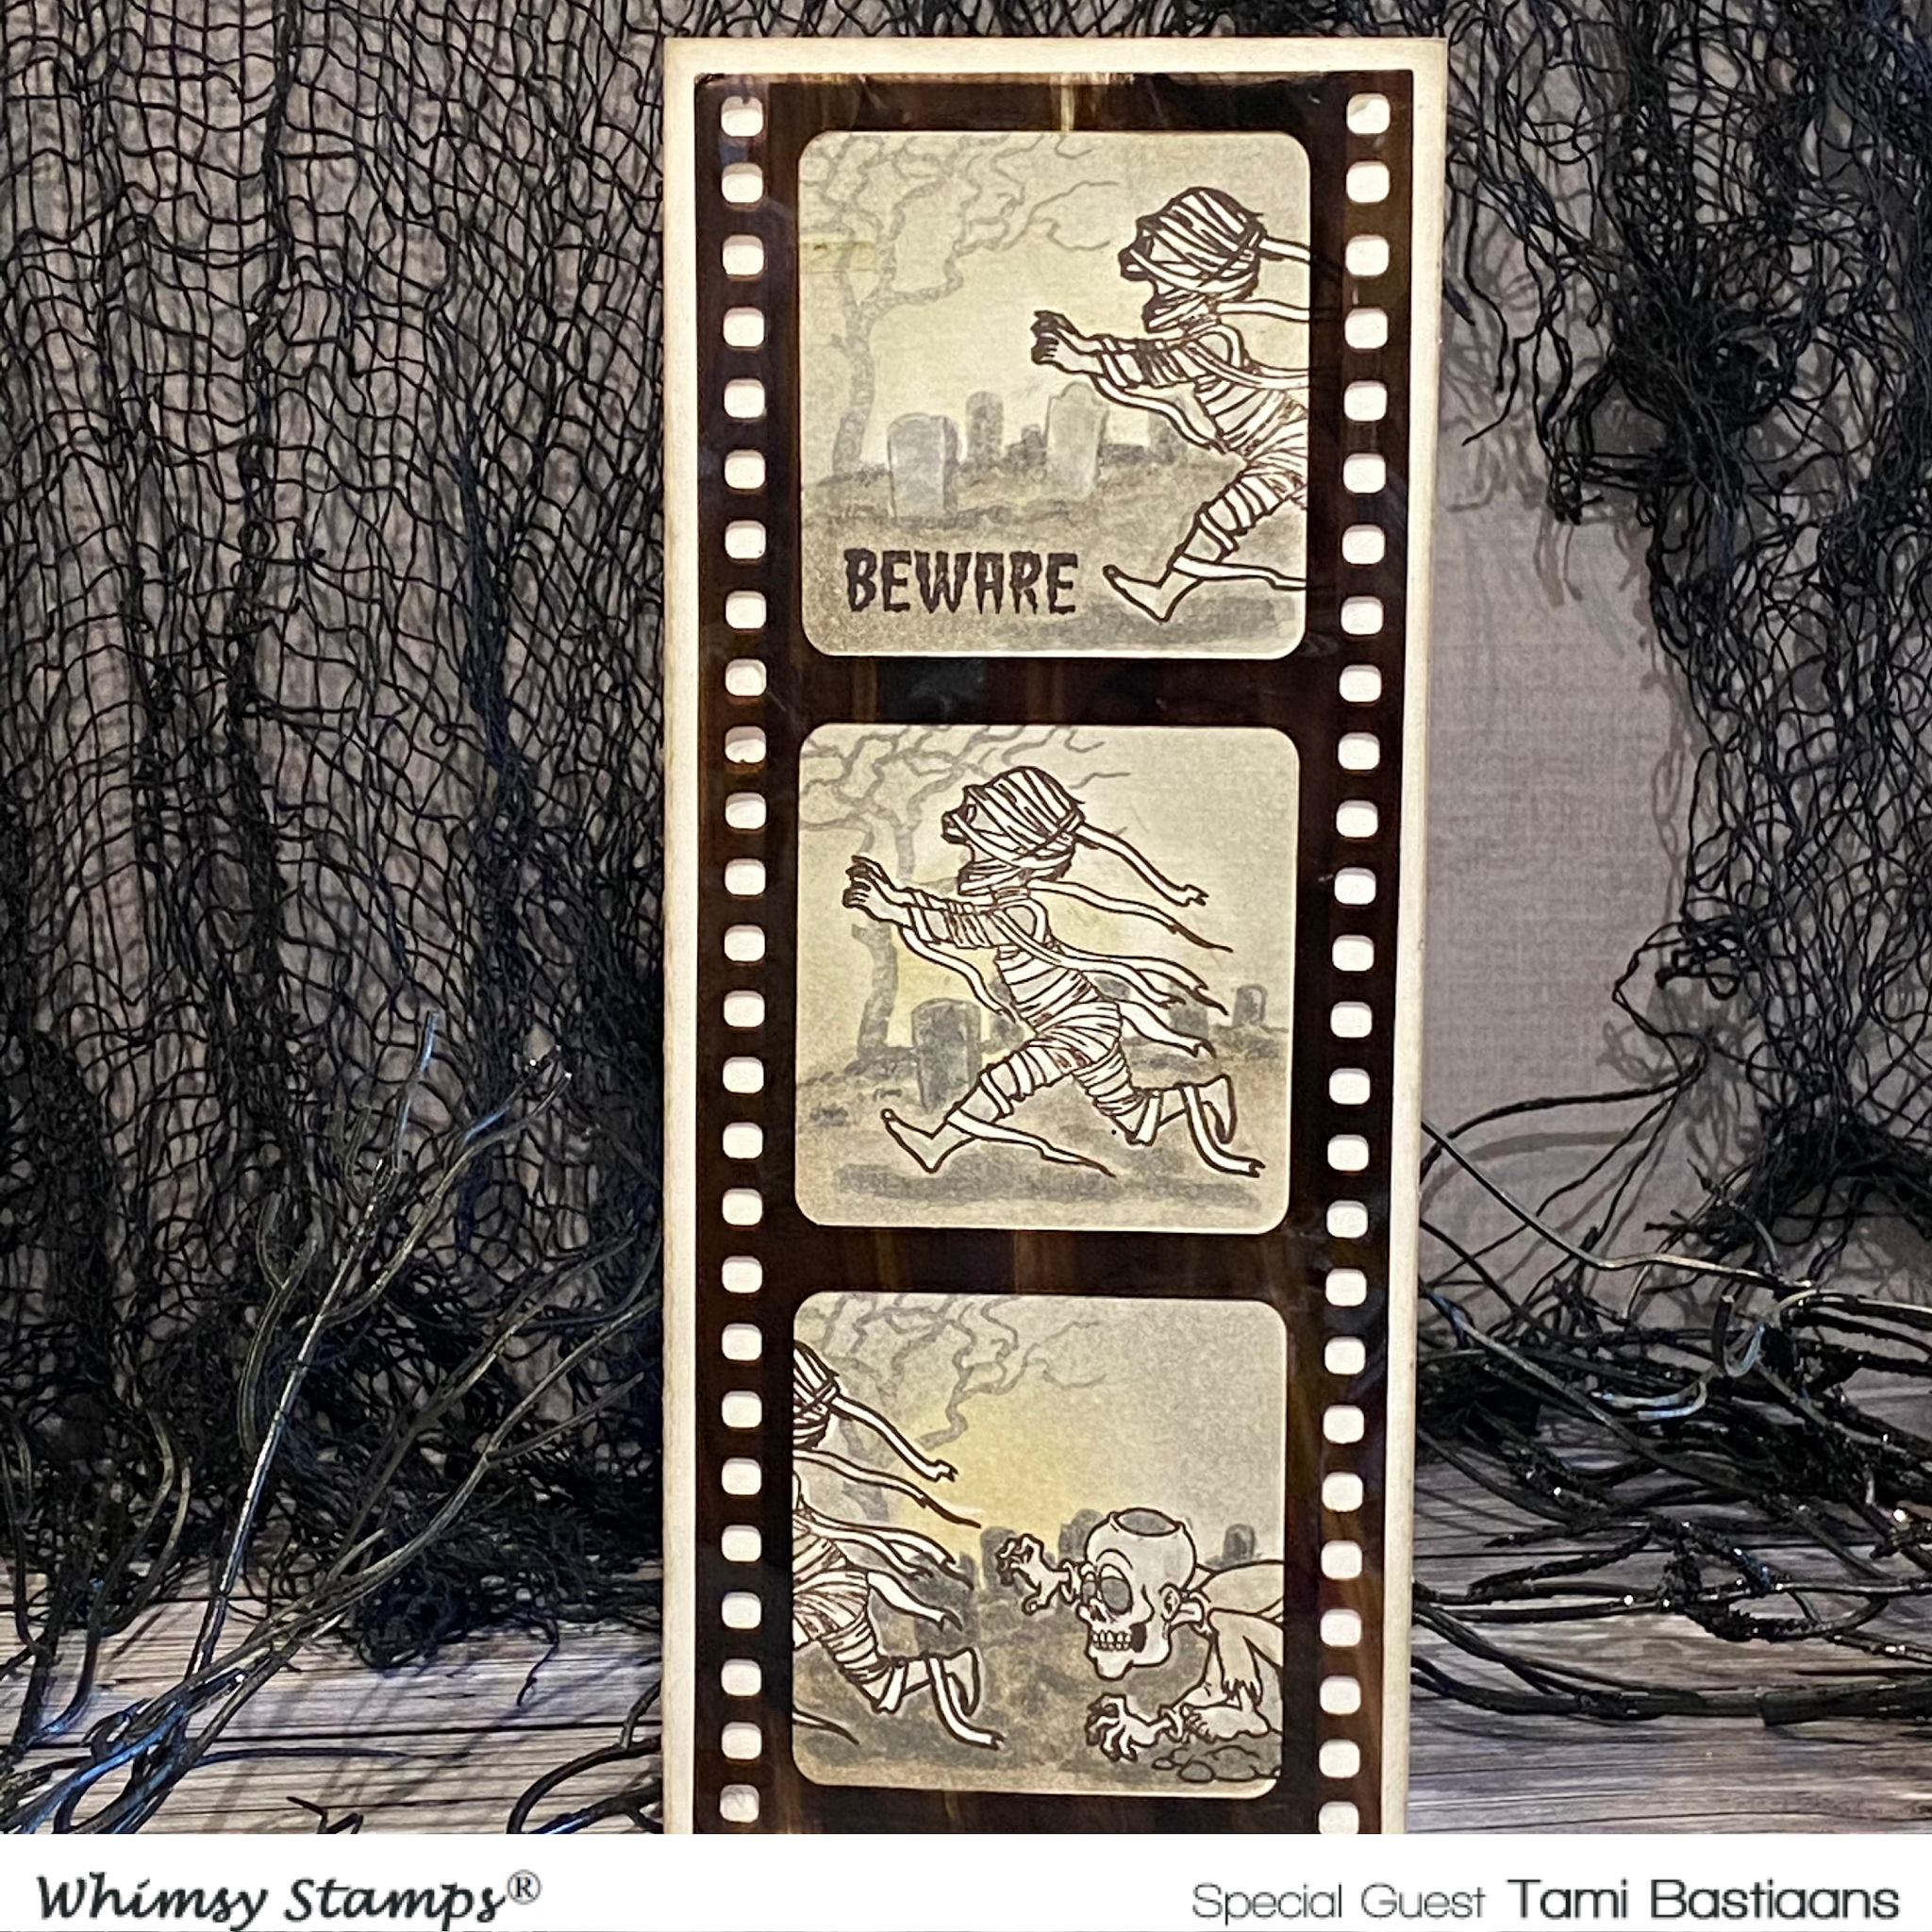
Hello! My name is Tami and I am so happy to have been invited to be a guest designer for Whimsy Stamps 31 Days of Halloween. I made a card today with a technique I enjoy. I used the Slimline Filmstrip Die, some masking paper and the Halloween Scream stamp to make a progressive scene in the film strip.


I thought it would make it fun if it was a scene from an old time scary movie.  Let's get started with how to do this. 


First, use the filmstrip die to cut a mask. For my mask, I cut some Judikins Masking Paper out of the filmstrip. 


I colored two pieces of acetate with alcohol inks.


There is no technique to this, just squeeze some ink on the felt and rub it on one side of the acetate, then let dry.


While I had the die out, I also cut two filmstrips from the acetate that had been colored with Alcohol Ink. Set the filmstrips aside. This gives you a choice and you can use the extra for a second card if you want.


Cut a piece of Distress Watercolor Cardstock that is the size of your slimline card - 3.5x8.5. Center the filmstrip mask over the piece of Heavystock and adhere.


Position the mummy stamp along the right side of the top frame and stamp with Distress Archival Ink in Ground Espresso and Black Soot. Then stamp it in the middle of the middle filmstrip frame, and along the left edge in the bottom frame. 


Lastly, cut a mask of the mummy out of masking paper by stamping it and fussy cutting around it. 


Then stamp the zombie from Halloween Scream along the right side of the bottom frame. In addition, stamp and cut a mask of the zombie on the right side of the bottom frame.


Mask off the mummy in the first frame, then stamp the graveyard background across the first frame. Masking off the mummy will make it look like it is in the background of the film strip. Then ink around the masked off mummy with Distress Ink. I used Old Paper, Hickory Smoke, and Pumice Stone.


Repeat the process with scene in the second frame. In the third scene, you need to mask off both the mummy and the zombie before you stamp the background.

Before adding color, stamp the BEWARE sentiment in the bottom left corner of the first frame.


Once the stamping is done, watercolor all the scenes with Distress inks. I used Black Soot, Pumice Stone and Hickory Smoke.  


When you are finished,  trim the piece to fit under the filmstrip and adhere the stamped piece to the front of the cardbase. 


Finish by adhering the Acetate Filmstip that was cut earlier.


Thank you so much to Whimsy Stamps for the opportunity to be a gest designer with for their 31 Nights of Halloween event! I had fun making this old Scary movie card. 

Tami


 Thanks, Tami, for this fabulous tutorial and awesome inspiration!

Don't forget to visit this post for giveaway information!


31 Nights of Halloween - Night 20


Woo hoo!  This is my favorite Whimsy event of the year.  Halloween?  Yes, please! In celebration of our annual 31 Nights of Halloween event, we will be giving away $300 in Whimsy Stamps gift cards throughout the month of October!  Check the link above for full details on how to win.


For my card, I'm mixing up some new products with my favorite Halloween set, Zombie Boy. These are so cute, especially when you add googly eyes!


I placed him on top of a graveyard scene created using Haunted 6x6 Paper and diecuts from the Build a Graveyard and Dracula Going Batty die sets.

The Halloween Scream sentiment is stamped on a Comic Speech Bubbles Die that I cut down to size.


I colored him up with Copics and added white pigment pen highlights.  Such a fun scene!

Now be sure to check out the giveaway details and the fun new products in the shop.  

If you'd like to check out my other creations, you can visit my blog, Frankie Helps Craft, my Instagram, or my Pinterest Board.


31 Nights of Halloween - Night 1


Good evening, my intrepid friends!  Are you ready for a frightfully fun month of Halloween inspiration and $300 in prizes?!  It's Andrea with you tonight, and I'm delighted to be kicking off Whimsy's annual 31 Nights of Halloween with a fun, interactive card featuring the Halloween Scream stamp set.


Now, personally, I don't like zombies.  I can't stand their appearance or the horrible sounds they make, not to mention the idea of being eaten by one is downright terrifying.  However, there's something about these images from Halloween Scream that tickle my funny bone.  Maybe it's how gleeful the zombie looks or how terrified the mummy is.  I don't know.


Usually, I start with my images, but for this card, I created the background first to allow the inks time to dry.  For the sky, I blended with the following colors of Distress Oxides: Mermaid Lagoon, Chipped Sapphire, and Black Soot.  I blended a separate panel of white cardstock with Mowed Lawn, Peeled Paint, and Black Soot for the grass.  I splattered white paint over the sky and set both panels aside to dry while I colored my images.


After stamping the mummy, zombie, and tombstone from Halloween Scream, I colored them with Copics.  I used my ScanNCut to cut out the images and then my scissors to cut out some interior places the machine didn't.  Then it was time for the fun part - creating the interactive element.


I die-cut the sky with the Slimline Card Builder Dies and created the slot for the slider with the Kinetic Straight Basics Dies.  I used the partial die-cutting technique and the Grass & Cloud Edger Dies to get the grass the right length before trimming it with the Slimline Card Builder Dies.  From that same green panel, I die-cut the pull-tab and two circles with the No-See Straight Basics Dies.  Finally, I die-cut the scored tab from the No-See Straight Basics Dies from white cardstock.


With all of my pieces cut out, it was time to assemble the card.  Using liquid adhesive, I adhered a plastic slider disc to one of the circles, attached the pull-tab around the disc, and placed the pull-tab behind my background.  I placed a bit of glue on the pull-tab and attached the coordinating end of the white tab, slipping the disc through the hole in the tab.  Next, I adhered the other circle to the top of the disc.  I placed a layer of foam tape on the back of my panel, making sure not to impede the movement of the slider, and attached it to a white card.  


I placed a layer of foam tape on the back of the grass panel, again making sure not to impede the movement of the slider, and adhered it to my background.  I scored the white tab along two of the score marks, trimmed off the excess, and adhered my mummy to the tab.  I attached the tombstone, placing a bit of foam tape behind the part sticking above the grass, and adhered the mummy with more foam tape.  I die-cut white cardstock with the Quick Strips Dies, stamped a sentiment from Halloween Scream, and popped it up onto my card with dimensional adhesive.  I stamped "pull" from the Halloween Postage set onto the pull-tab and white heat-embossed a second sentiment from Halloween Scream on the background.

Whew!  We made it to the end, and I hope it wasn't too confusing.  

In case you missed it, be sure to check out last night's blog post for all of the prize info and how to enter to win.

Have a great night!