

Hello crafty friends, welcome to Night 22 of Whimsy Stamps' "31 Nights of Halloween!" This is Special Guest designer Crystal Komara here with you today to celebrate this annual spooktacular event.
Halloween is one of my favorite holidays to make cards for and I think Whimsy Stamps offers one of the most extensive Halloween themed product collections. There is something for everyone, from zombies and aliens, snarky ghosts and spooky graveyards to their amazing line of slimline dies and slimline paper packs.
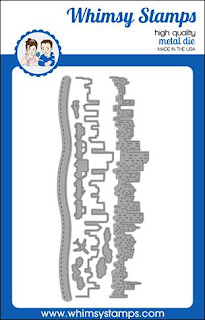
Today I am sharing a slimline card featuring the Spooky large word die, the Haunted Paper Pack and the Slimline Cityscape die set. You might even be surprised to learn that this card involved NO stamping at all!

This slimline card measures 8 1/2" x 3 1/2". Slimline cards are designed to fit inside a regular #10 business sized envelope and require no additional postage. The base of this slimline card was made from 80 lb. Neenah Solar White Smooth cardstock.
Card details:
First I created the background, but cutting out the moon and tree from a piece of paper in the Haunted Paper Pack:

I fussy cut the moon and tree and adhered it to the right side of my card base:

Then I used the Slimline Cityscape dies to cut the skyline. I cut the shadow outline layer from dark grey cardstock and the top window layer from black cardstock. I adhered the two layers together with a Tombow dot runner and adhered the skyline to the base of my card (over the moon and tree).


Next, using the Spooky Large word die, I die cut the word "spooky" twice, the first time in black cardstock and the second time in a piece of green/white spiderweb patterned paper from the 6"x 6" Haunted Paper Pack.

I then mixed-and-matched each the pieces together while adhering them to the card:


I used another patterned piece of paper from the Haunted Paper Pack that had pumpkins on it and I fussy cut the pumpkins out and adhered them to the right side of the card using 3M foam adhesive for added dimension:


I hope you have enjoyed this slimline card using some of the fabulous Halloween products from Whimsy Stamps. Thanks for visiting and have a wonderfully creative day!
XO, Crystal
P.S. - Be sure to continue to follow along for every night of Whimsy Stamp's Annual "31 Nights of Halloween" for a chance to win some fabulous prizes and to be a part of the spooky fun!