Showing posts with label Lee Holland. Show all posts

ThermOWeb & Whimsy Stamps Collaboration Day Two


This week Whimsy Stamps and ThermOWeb are partnering for a fabulous week of inspiration and prizes!  All week long designers from both teams will be sharing ways to add foils and more to your projects using products from ThermOWeb and Whimsy Stamps.  Read to the end of this post to find out how you can win!

Kerys here with a cute card using products from ThermOWeb new to me - the GinaK foil-mates and icraft deco foil. I must admit - this was highly addictive and fun to use!


For my card I used the Stars & Stripes GinaK Foil Mates along with the aqua and lime deco foil. I made a little pocket and tag on the card using these.


I stamped and colored the Teddy Birthday Hat from Lee Holland & Whimsy stamps. I used my prismacolor pencils to color him in and added some of the lime deco foil for his hat (I used regular glue to stick this on)! I fussy cut him out and stuck him onto the pocket.

The background was created using the Darice Wire Fence embossing folder and then die cut using the Hand Stitched Nested Rectangles - both from Whimsy Stamps.

The sentiment was created using the Shaker Builder Sweetest Birthday die (now retired) and You're My Favorite stamp set from Whimsy Stamps.


I hope this card has inspired you to try the deco foil and foil mates, or even to move out of your comfort zone and try something new.


Would you like to win a $25 gift certificate to Whimsy Stamps?  To enter, leave comments on all of the collaboration posts on the Whimsy blog this week.  One winner will be randomly chosen from all of the blog posts, so the more posts you comment on, the better your chances are of winning!  You have until Monday, February 11th at midnight CST to comment.  The winner will be announced on the Whimsy blog on Tuesday, February 12th.

ThermOWeb is also offering a gift certificate, so be sure to visit their blog each day this week for more inspiration.  Leave comments on their blog for another chance to win!

Teddy Birthday Hat Rubber Cling Stamp Wire Fence Embossing Folder Hand Stitched Nested Rectangles    You're My Favorite Clear Stamps

Penguin with Star - special guest - Kathy Tanner

Hi, it's Kathy here with my last Guest Design Team card for Whimsy Stamps.
I have really loved working with Whimsy again!!!
Such awesome products to play with and such awesome people to work with too :)

For my last card I chose to use this super adorable stamp by Lee Holland called Penguin With Star.


I think this penguin is a soft, fluffy one, perhaps he's just a chick?  
So I decided to colour him a soft warm grey.
I used Copics to colour the penguin and tree and cut them out.

Then I created my background.
I used Distress Inks and sponged on some Shaded Lilac, Peacock Feathers, Faded Jeans and Black Soot,  Then I splashed some water on top.

I used some Ranger Texture Paste with the Star Dangle Stencil to create the beautiful stars and I added some extra dots of "snow" with a gel pen.

I added a little Wink of Stella to the star the penguin is holding.

For the snowy ground I just tore some strips of white card which I think give a nice soft snow effect.

Copics Used :

R 22, 24, 27
YR 14, 16, 18
Y 15
B 0000
W 00, 1, 3, 5
G 21, 24, 82
YG 13
E 31, 37, 39


It is extremely rare for me not to use a sentiment on a card but I was just happy with the way this card looked without one.

This little penguin is just so sweet and I loved colouring him.
He made me realise that I need some more Lee Holland stamps :)

Thanks for dropping by

Kathy


Special Guest Crystal Thompson

Hello there! Crystal Thompson here as a special guest for Whimsy Stamps.
Today's very sweet post using the super cute stamp set called Teddy Best Friends from Whimsy Stamps.

The bears on this stamp set were just begging to be water colored, so with that in mind I decided to keep the card on a Clean and Simple vision with minimal embellishment.


To make this card, I heat embossed the bear image with gold embossing powder on regular 110lb white cardstock. 


 Once the image had dried up, I went ahead and hand cut around the image, and set aside.


 Now for my background , I have a piece of light kraft cardstock cut 4.25 in by 5.50in. Then I layered a white cardstock that is .25 in smaller than my base.


Once everything was layered, with a clean brush I drew a circle on the cardstock with clean water, then dropped some lilac water.  Once that dried, I water colored a blue circle, and splattered blue watercolor. Before it all dried, I did a few flickers of dark pink.


Once everything has dried, I heat embossed the sentiment in gold embossing powder Promise You Won't Forget Me. To add some sparkle with gold spray, I added flickers to the entire card.To finish up, I placed the bear with foam adhesive above the sentiment. I love the way this card turned out, very soft and subtle yet clean. Now don't go anywhere yet, I have a second card with a different technique.


For this card, the background is using the ever popular ink smooching technique, however I did it with some different ink that made this look kinda like alcohol blends. Let me tell you how I did this. 


Since the background on this is a background was too busy, I thought the bear should be simple and colored with Copics.


 To make the background, I used Distress Oxides. I thought the formula would work well to smooch and it would react different to a dye ink. On a piece of acetate I swirled Cracked Pistachio, Worn Lipstick, Wilted Violet and Broken China. Then I added a couple drops of water on the acetate. I did not blend blend the colors, just add the drops. Then on the cardstock that is to be smooched, I added a wash of clean water with my large brush. Then I smooched the paper onto the colors and lifted. I had some white left on my cardstock, so I turned the page and smooched again. Then allow it to air dry for about 5 minutes.


Once it was dried up, I heat embossed the sentiment in gold embossing powder. Then added gold splatters.


To finish off the card, the little bear was added to the center of the card with foam adhesive. 
I really liked using both techniques on the backgrounds as it allows to work on one card, while the other dries up. 
Didn't I say this stamp set was the cutest?! 

Which one is your favorite?
Thanks so much for stopping by!
Crystal 

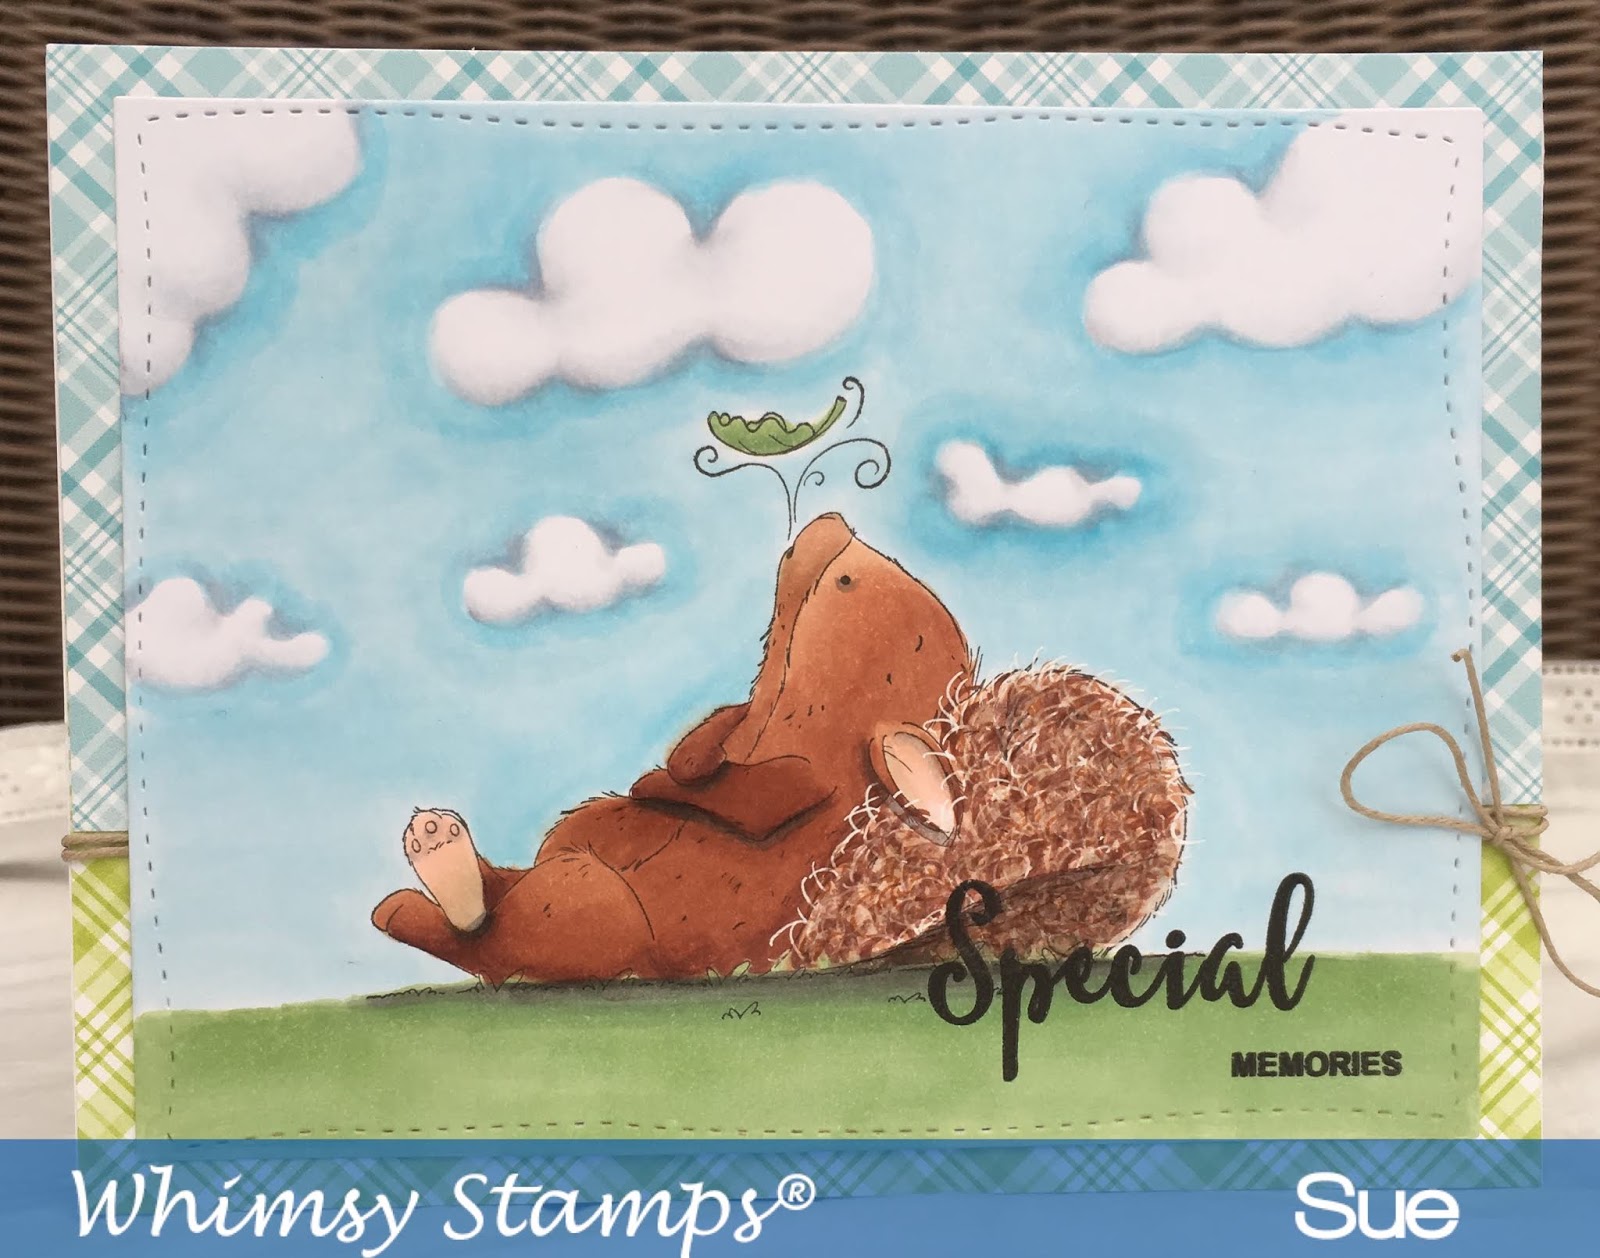
Squirrel Relaxing...

Happy Monday everyone!
Hope it's a good one!

It's Sue here today to show you something I have been wanting to do for aaaaages!

I have drawn (gulp)! my own background!

Please speak freely and let me know what you think!

Big thanks to my lovely DT Teamie Barbara at Forgotten Scraps for the cloud tutorial!

This cute little chap has been part of the wonderful
Whimsy Stamps family
for a while!
Ingredients from Whimsy Stamps 
Copic Markers
Clouds - C2, C1, C0, C00, B91, B00, B000, Colourless Blender
Sky - B00, B000
Mr Squirrel - E13, E15, E18, E81, R11, R01, W5, W3
Grass - G24, G43
Be sure to have a good look around our 
Whimsy Stamps Blog 
while you're here
to see the gorgeous DT creations there and then pop to 
to engage in some essential retail therapy!

Thank you for popping by,
Happy creating! 
love from

Mouse and Butterfly

Hi Everyone, it's Faye here today :)


This month, I thought I'd share a card I made for a recent issue of Making Cards Magazine.

I love Lee Holland's images and this one, Mouse and Butterfly, was a joy to colour. Isn't that mouse just THE cutest?!

Lovely Stuff Used...

Thanks so much for stopping by, have a great day...

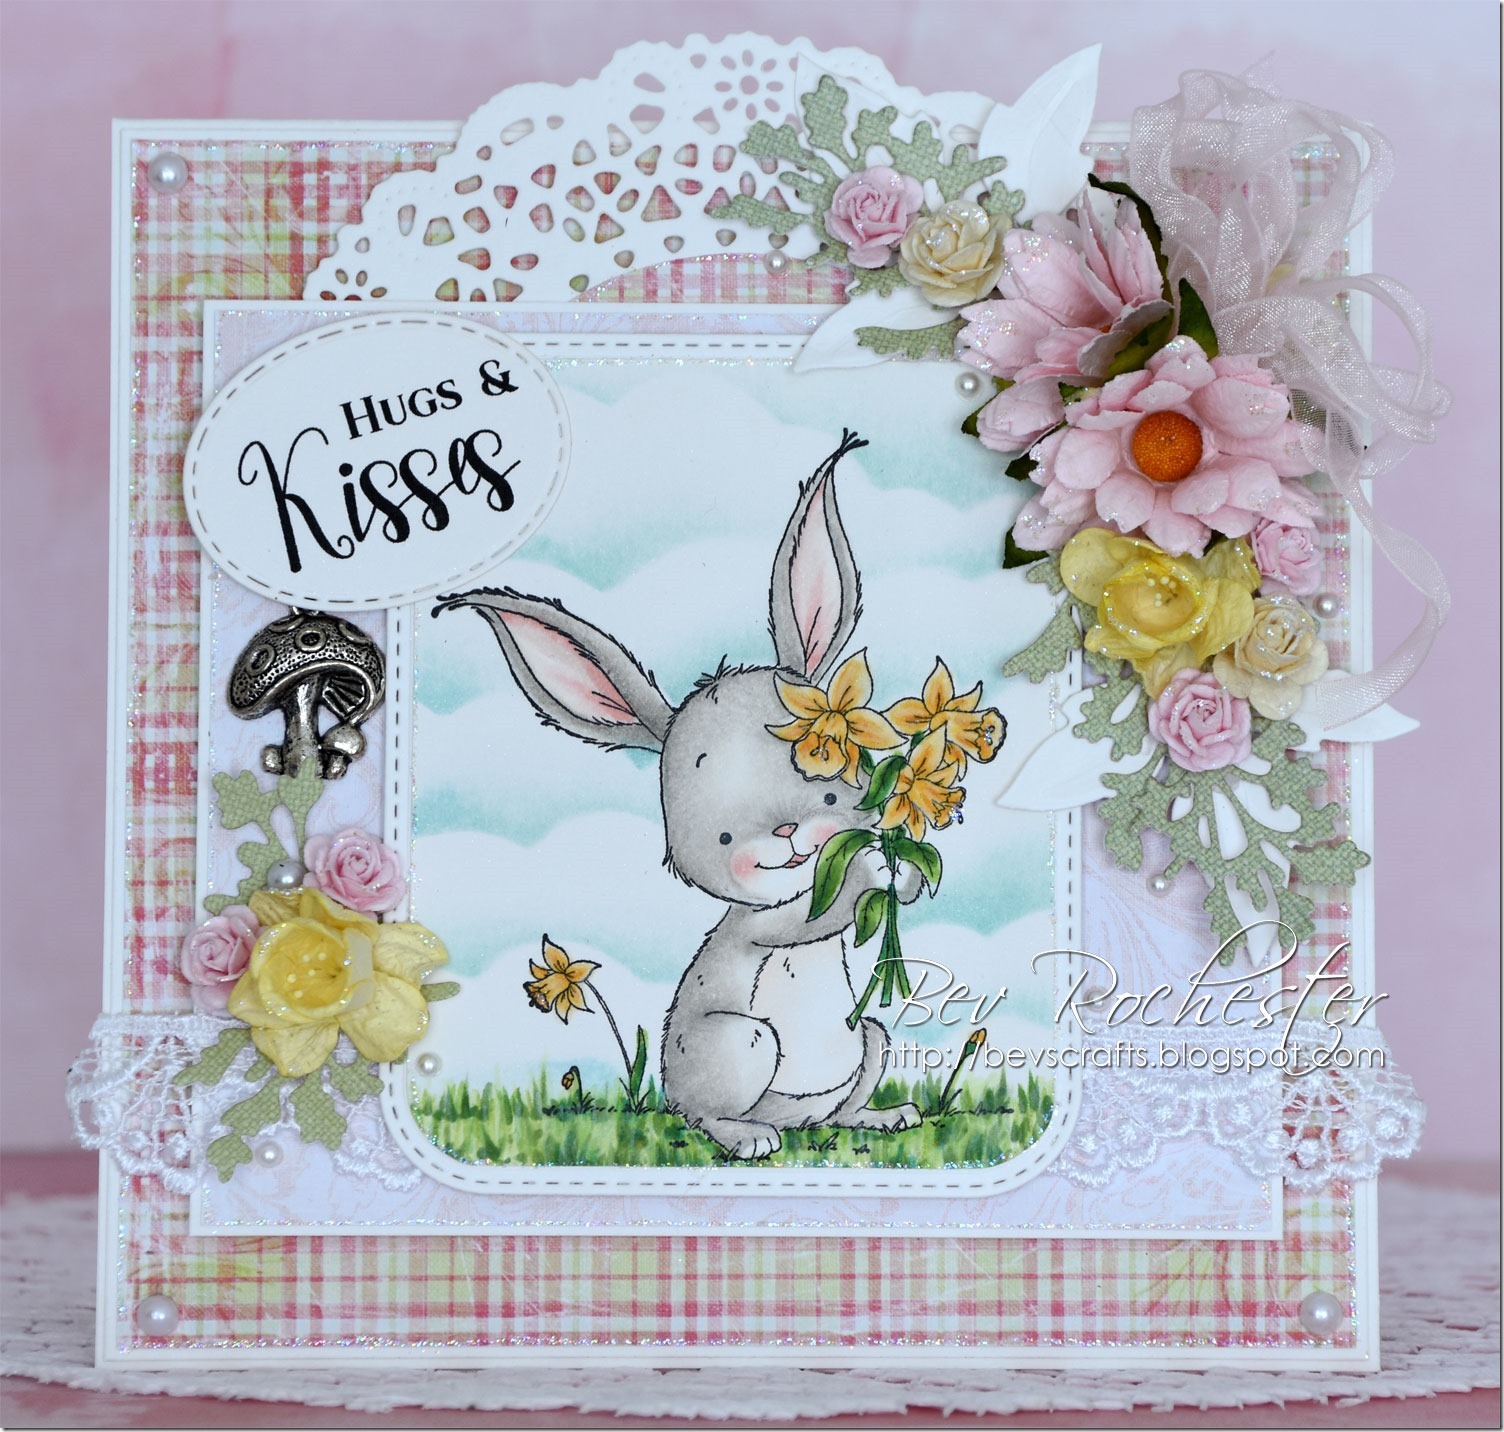
Spring Bouquet Bunny

I have the sweetest little bunny card to share today.  Spring Bouquet Bunny is from the Whimsy Stamps April release.  The sentiment is from the Big Wishes Sentiments (digital), I just resized it to fit the oval die.

bev-rochester-whimsy-spring-bouquet-bunny

Copic colours used:
Bunny: W5, 3, 1 0, 00, R20, R00
Daffodils: YR24, 21, Y13
Green: YG67, 61, 61, 20

bev-rochester-whimsy-spring-bouquet-bunny1

I finished off the card with mulberry flowers, some crinkled organza ribbon, pearls and a wee mushroom charm


Have a fabulous weekend.

Products used from Whimsy Stamps:
spring_bouquet_bunny_color_display_1024x1024 big_wishes_sentiments_display_1024x1024

12 Days of Christmas Day 4 - special guest Dina Kowal - Penguin Gift


I'm so grateful to Whimsy Stamps for having me as a guest designer this month - it's been a lot of fun! And now for my first 12 Days of Christmas post...


I used a couple of Whimsy's adorable penguin stamps for the challenges over at Splitcoast - the first was for a color challenge (black, grey and peachy pink). I watercolored this little scene (Penguin Gift) using QoR watercolors (my favorite tube paints) and added in a few details with colored pencil.


I did some negative coloring, which is always fun - coloring "outside the lines" to create the snowy ground and the glow around the lamp.


My second card was done with similar techniques, but I used a Sakura Clear Glaze Pen to mask off the snowflake first - did you know the Glaze inks dry a little raised, and they're waterproof? They're perfect for masking off fine lines like these. I watercolored with the QoR paints again, creating a blocked background for this adorable little guy (Snowflake Penguin), then I added some falling snow using acrylic paint, dotted with a small stylus.


There are a couple of other Whimsy products on my card - the sentiment is from this great set, which is full of tiny and practical sayings:

Everyday Mini Sentiments

And the paper on my card base, which you can barely see except for a few snowflakes peeking out... is from this paper collection:

Winter Wishes 6x6 Designer Paper
If you like the color scheme there, you'll love the sparkly enamel dots that match - eep! 

That's all I know today - thanks again to Whimsy Stamps for having me, and thanks to you for visiting me today! Be sure to check back tomorrow for another 12 Days of Christmas special guest post!
Thanks for stopping by!

Penguin Gift Snowflake Penguin

Penguin Gift

Hello, again, Whimsy fans!  It's Andrea back with you today to share a Christmas card featuring the adorable Penguin Gift by Lee Holland. 


Isn't he just the cutest?!  I stamped him onto Bristol Smooth paper with Versafine Onyx Black ink and watercolored him with my Zig Clean Color Real Brush markers.  The sky was watercolored with Wilted Violet Distress Ink.  Once everything was dry, I added some details with a white gel pen and a glitter gel pen.  


To frame that little guy, I die-cut a circle from an A2-sized piece of white cardstock.  That gorgeous sentiment is from the November CAS set.  I stamped it with Versamark and heat-embossed it in gold.  After backing the panel with foam tape, I popped it over my colored image and adhered both to a white card.


Using the Snowflake Dies, I die-cut a vellum snowflake and brushed on some Spectrum Noir Clear Sparkle Overlay.  Some clear sequins finish the card.

Thanks for stopping by!

Penguin Gift
Snowflakes Dies


Special Guest - Dina Kowal

Dina Kowal here with another guest spot for you today.  Before I get to my post I want to make sure that you all know about the Falliday Fest going on over at Splitcoast Stampers.  If not, head on over there and enter the challenges because Whimsy Stamps is one of the sponsors for prizes at the end of the fest.  And I'm sure you don't want to miss out on possible Whimsy Prizes do you?!

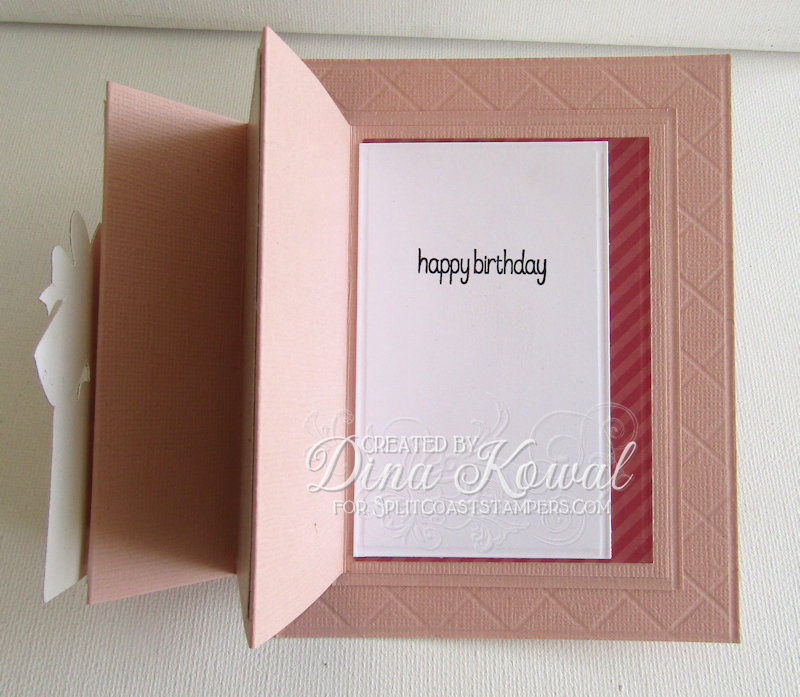
Okay so for today's tutorial I have a Panel Pull-Out Card - the base is a no-fold quarter sheet of cardstock, and the front panel folds in and out accordion style. Simple and fun!


The design of the card gives you 3 'front' panels to decorate - for my card front I've used the Puppy in Present stamp by Lee Holland, it might be fun to have some die cuts or other small birthday images peeking out from the other panels as well! I kept it simple here and just hid a sentiment on the third panel with some room for a handwritten greeting. 


The sentiment is from a really fun clear set from Whimsy - I love small greetings and this set is just full of practical ones.


Those smaller card panels are a great way to use up scraps too - that's one of my goals with these tutorials and challenges. 

Want to try the card yourself? Come over to the Falliday Fest Challenge Forum for all the details!


Thanks for stopping by!