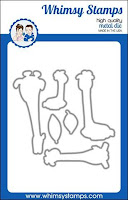
Showing posts with label Giraffe Smiles. Show all posts

Tuesday Tutorial- Trick or Treat

 Hello there! Michelle here, sharing my Tuesday Tutorial...


This giraffe has been begging me to dress her up for Halloween! She did not want traditional Halloween colors...yes, she told me that!😂
I used the stamp sets Giraffe Smiles and Candy Corn Dress Up. 
I stamped the giraffe once and the candy corn witch two times. For the candy corn witch, I only colored her hat on one image and the broom on the other image. I chose a no-line coloring technique using Memento Ink in desert sand and stamped onto X-Press Blending Paper. I colored with Copic Markers in shades:
hat: R81, R83, R85, R56, RV99; YR21, YR24; C4, C6, C8
giraffe: Y21, Y23, Y26, Y28; R81, R83, R85, R56
broom: Y23, Y26, Y28; C4, C6, C8.


I fussy cut the colored images and put two slits in the hat so it fits over the giraffe's head. I folded down the horns and glued the hat.
Next I inked up a piece of X-Press Blending Paper using fossilized amber and black soot distress oxide inks. I die cut stars and bats using Elvira Moonlighting Die Set and Array of Rainbows Die Set.

Next, I inked up Giraffe Stencil with spun sugar, picked raspberry and black soot distress oxide inks. 
Before arranging the elements I die cut a panel for the giraffe using Wonky Stitched Recangles Dies. I trimmed the stencil panel and a strip of silver glitter paper to fit the width of an A2 (4 1/4) card base.
When happy with the arrangement, adhere the elements.
Turn the card over and trim the excess image that hangs over the edges.

I adhered the giraffe on top of the broom to appear she is flying. Than adhere to the die cut panel with foam tape. I embossed the sentiment with silver embossing powder onto black cardstock. 


As always, for a finishing touch I add some shimmer with Stickles clear glitter glue and added some iridescent gems. I just love her!
In the mail box she goes....my niece will enjoy this cute card!
Thanks for stopping by!


Clean and Simple Cards with Split Stencil Backgrounds


Hello, Whimsy friends! Lisa here with you today sharing two clean and simple cards featuring one of my favorite backgrounds, split stencil backgrounds. I have a video tutorial over on the Whimsy Stamps YouTube Channel, be sure to check it out. 


TWO STENCIL SPLIT

I start with a 4.25" x 5.5" 110lb card base, lay stencil over the card base, secure in place with adhesive spray or purple tape/ painter's tape. Mask the center of the stencil with cardstock cut to 2.75" x 3.5" or use a masking stencil. Run purple tape across straight across the center of the stencil. 


Apply ink using a blender brush to the top half of the card base. Remove stencil. 


Replace with Teadrop Splash stencil, replace masking to the center of the stencil, and apply ink using blender brush to the bottom half of the cardbase. 


ONE STENCIL SPLIT

Cover a 4.25" x 5.5" card base with the Giraffe stencil, place masking in the center of the stencil, and run purple tape straight across the center. 


Apply ink to the top half of the card base using a blender brush. 


Apply ink to the bottom half of the card base using a blender brush. 

Stamp images onto 80lb smooth cardstock and color.

Cut gold foil cardstock to 1/8" wide then into 7/8" sections. Apply to the card between stenciled areas using liquid adhesive and a T-Ruler


Add images using round foam adhesives. 

Stamp sentiments and add to the card base with foam adhesive strips. 


Thanks for stopping by today! 

Giraffe Smiles Clear Stamps - Whimsy Stamps     Mermaid Escape Clear Stamps - Whimsy Stamps  Mermaid Escape Die Set - Whimsy Stamps
   Giraffe Stencil - Whimsy Stamps

Mermaid Scales Stencil - Whimsy Stamps


Teardrop Splash Stencil - Whimsy Stamps


Tall, Dork and Sweet - Tutorial Tuesday with Toni


Hello, Whimsy fans! I'm sharing with you a little birthday card I made for my not so little sister. She's like NBA tall. Not WNBA...NBA. Yup, a tall drink of water. So I just had to play around with the Giraffes Smiles set.


First things first, I created the background by sponging Distress Oxides through the Giraffe Stencil. The stencil repeats so it was easy to reposition it as I went up the slimline base. I kept each color strip about the same height as each section of the Slimline Waves die.


Now the giraffe was really fun to do. I first stamped the body with Memento Tuxedo Black, having masked the head so it wouldn't stamp. I repeated the same procedure (far) above, masking the body this time so only the head would stamp.

I used a ruler and a Copic Multi-liner to connect the head and body then drew in spots by hand.


I colored up the giraffe using Copics E41, 42, 43, 55, 57, and 59. You don't even notice that the hand drawn spots are different.  But did you notice I wove the giraffe's head through the Slimline Waves die?  Just for fun.


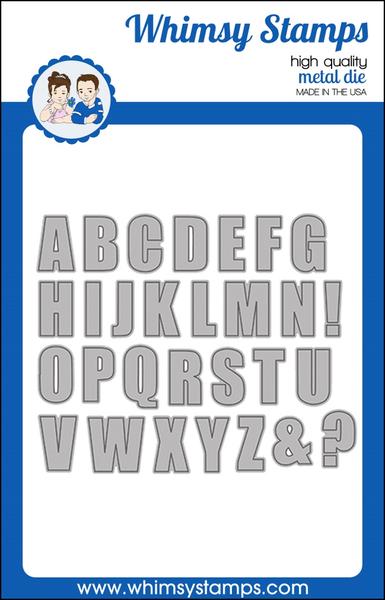
I thought I would emphasize the height of the card using the Bold ABCs for "sweet." I sponged those with the same Distress Oxides as the background, trying to keep the transitions about the same. I added a shadow letter so the sentiment would pop rather than fade. I also embossed part of one of the Giraffe Smiles sentiments onto a Quick Strip.


That black strip immediately draws the eye. And speaking of dies, I added glasses and used one of my Copic Multiliners to embiggen the eyes a bit. So cute!

If you haven't already, be sure to check out the Whimsy January release.

You can also check out my other creations by visiting my blog, Frankie Helps Craft, my Instagram, or my Pinterest Board.