
Showing posts with label Wonky Stitched Rectangle. Show all posts

31 Nights of Halloween - Night 15 - Special Guest Tami Bastiaans


Good evening, Whimsy friends!
Tonight we welcome the talented Tami Bastiaans back to the blog.


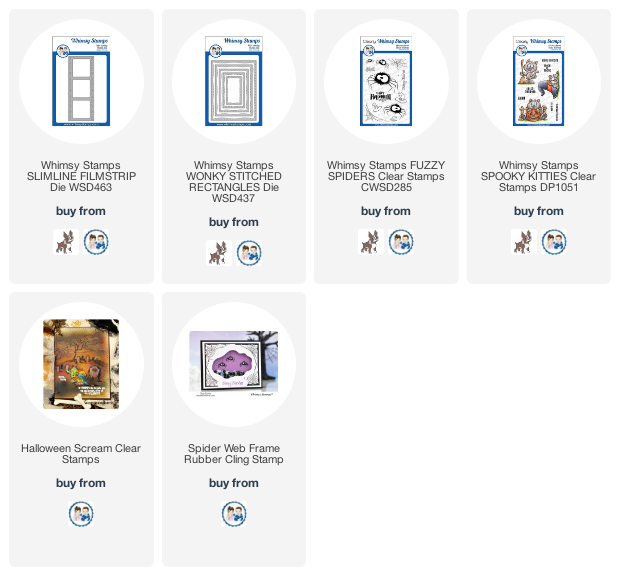
Hello again! My name is Tami and I am so pleased to have been invited back to share a card for the Whimsy Stamps 31 Nights of Halloween. I love cats, so I wanted to make a fun card with the Spooky Kitties stamps.  This is a simple shaker card that uses an old technique called Iron-off Resist that I learned just last year from Jennifer McGuire, and I love it!
 

Begin by stamping the Whimsy Spider Web Frame rubber cling stamp in clear embossing ink on a piece of watercolor cardstock, then heat emboss with clear embossing powder.


The clear embossing will act like a resist, so you can blend or spray color onto the piece. I chose to spray some water and then some of the Distress Halloween Mica Stains from Tim Holtz. Let this dry naturally before the next step.


Get a clean piece of watercolor cardstock and place it directly on top of the stamped/embossed piece. This picture is just to show you the stamped piece is covered by a clean piece. But you need to make sure they are completely aligned.


Then using a hot dry iron, slowly iron over the papers long enough that the embossing powder reheats and soaks into the other piece of cardstock.


You will end up with two pieces with the image. The original, colored piece will no longer have shiny embossing powder, it will be matte. It kind of has a batik look. The Mica stain will still be shimmery even though the embossing powder has lost it's shine.


I cut the largest Wonky Stitched Rectangle out of some Black Metallic Kraftstock and cut a window out with the second largest Wonky Stitched Rectangle. 


To make the stitches stand out, I scribbled some of the Jack-o Lantern Distress Mica Crayon over them and rubbed the pearlescent crayon into the stitches and I love how they stand out.


I cut multiple large Wonky Rectangles from heavy cardstock and layered them to make a raised window for a shaker card. I cut the centers out and adhered all the frames together. 


Then I attached a piece of acetate to the top frame and covered it with the black, metallic frame.


I put some shaker bits in the middle of the spiderweb and then attached the Wonky frame. The spiders and webs were some confetti I found on Amazon.


I stamped a Spooky Kitty on some watercolor cardstock with Distress Archival Black Soot ink. Then watercolor the cat whatever colors you want. I chose the kitty with the broom because he is cleaning up all the spiders and spider webs. And I colored him orange because my alpha male cat is an orange kitty.


For the sentiment, I stamped the word BOO! In Ripe Persimmon and Wilted Violet Distress Oxide and clear heat-embossed it. 


Then I colored the watercolor paper with Black Soot Distress Stain. 


I adhered the sentiment and the cat to the front of the acetate, and there you have a quick, cute little Halloween card.

Thank you so much for reading this blog and thank you so much to Whimsy Stamps for inviting me to be a part of their fun 31 Nights of Halloween Blog Celebration this year! I really enjoyed it!

Tami

I am an affiliate with Simon Says Stamp, and Whimsy Stamps so the links below send you to one of those stores depending on which logo you choose.  If you wish to purchase something from either store and use one of my affiliate links below, I get a small percentage of your order, at no additional cost to you. This helps me to defray the costs of this blog, the time, the ideas and tutorials I post here. Your help is greatly appreciated! Thank you!


Tuesday Tutorial- Trick or Treat

 Hello there! Michelle here, sharing my Tuesday Tutorial...


This giraffe has been begging me to dress her up for Halloween! She did not want traditional Halloween colors...yes, she told me that!😂
I used the stamp sets Giraffe Smiles and Candy Corn Dress Up. 
I stamped the giraffe once and the candy corn witch two times. For the candy corn witch, I only colored her hat on one image and the broom on the other image. I chose a no-line coloring technique using Memento Ink in desert sand and stamped onto X-Press Blending Paper. I colored with Copic Markers in shades:
hat: R81, R83, R85, R56, RV99; YR21, YR24; C4, C6, C8
giraffe: Y21, Y23, Y26, Y28; R81, R83, R85, R56
broom: Y23, Y26, Y28; C4, C6, C8.


I fussy cut the colored images and put two slits in the hat so it fits over the giraffe's head. I folded down the horns and glued the hat.
Next I inked up a piece of X-Press Blending Paper using fossilized amber and black soot distress oxide inks. I die cut stars and bats using Elvira Moonlighting Die Set and Array of Rainbows Die Set.

Next, I inked up Giraffe Stencil with spun sugar, picked raspberry and black soot distress oxide inks. 
Before arranging the elements I die cut a panel for the giraffe using Wonky Stitched Recangles Dies. I trimmed the stencil panel and a strip of silver glitter paper to fit the width of an A2 (4 1/4) card base.
When happy with the arrangement, adhere the elements.
Turn the card over and trim the excess image that hangs over the edges.

I adhered the giraffe on top of the broom to appear she is flying. Than adhere to the die cut panel with foam tape. I embossed the sentiment with silver embossing powder onto black cardstock. 


As always, for a finishing touch I add some shimmer with Stickles clear glitter glue and added some iridescent gems. I just love her!
In the mail box she goes....my niece will enjoy this cute card!
Thanks for stopping by!


Tuesday Tutorial - Layering Rubber Stamps over Clear Stamps

Hello, Whimsy friends!  It's Andrea with you today.  I hope you're all doing well and staying healthy and safe!

I love this hippo from the Hippo Fun in the Sun set.  Can't you just feel her embarrassment?!  Poor thing, all she wants to do is have a relaxing day on the beach, but this little pup has other ideas!  
I also love the way the new Burst Background stamp draws your eye into the scene, but it can be tricky stamping a rubber image on top of a previously-stamped one.  Today, I'm going to show you how you can get perfect placement every time.

I first stamped that cutie patootie with Memento Tuxedo Black ink in the center of an A2 panel of white cardstock.  I stamped her a second time onto some masking paper and trimmed her out.  Pretty straight forward so far, right?

This picture might be a bit confusing (Yes, I failed to take a photo of one step.  Sorry).  I stamped the Burst Background onto some leftover, clear packaging with Stazon Ink.  You could use acetate or vellum if you prefer, but I was being green (Read "cheap". ;) ).  I cleaned the stamp (Be sure to clean it well and let it dry!) and placed the packaging over the stamp, making sure it was aligned.  I placed some purple tape onto the back of the packaging and closed my MISTI (I lifted the base rather than the lid so that the packaging didn't shift).  I carefully opened the lid of my MISTI so as not to dislodge the packaging.


I created a hinge for the packaging with two pieces of purple tape on one side and removed the tape from the back.  I slid my stamped panel underneath the packaging and, once I was happy with the placement, secured the cardstock with some tape.  I should mention that prior to this, I had treated the panel with an anti-static tool.  After removing the packaging, I inked up the Burst Background stamp with Versamark ink, stamped it onto my panel, and sprinkled it with white embossing powder, which I then heat-set.  Now, here's a bit of advice if you want to use clear embossing powder: Clean the stamp a second time after you have the packaging in place on your stamp positioner.   I'm not sure why but some residual Stazon showed up on my panel, maybe the packaging wasn't fully dry and some ink transferred back to the stamp or maybe I hadn't cleaned the stamp as well as I thought.


After heat-embossing, I blended the following distress inks onto my panel:  Antique Linen and Frayed Burlap for the sand with Peacock Feathers and Faded Jeans for the sky.  I buffed the embossed image with a paper towel to clean off any ink that had pooled there.
  
I removed the mask and colored the image with Copics (colors are listed at the end of this post).  Next, I die-cut the panel with the largest die from the Wonky Stitched Rectangle Dies and adhered it to a white card.

How fun is the new Oops Word and Shadow Dies?!  I die-cut them from white and pink cardstocks and layered them together.  I stamped a sentiment from Hippo Fun in the Sun onto a banner die-cut with the Quick Strips Dies.  I adhered the die-cut word and sentiment strip with foam tape.  For some sparkle, I added Glossy Accents to my colored image and brushed clear sparkle over the hippo's swimsuit and "oops".

Thanks for stopping by!  I hope you find this technique useful.

Copics:
Hippo - E70, E71, E74, E77, E79, E49, R20, BG0000, BG000, 
V05, Y13, Y18, RV02, RV04, RV06, RV09
Dog - E33, E35, E37, E39, W7, W9
Shadow - Y28, E31

*Affiliate links used at no cost to you.

Hippo Fun in the Sun Clear StampsWonky Stitched Rectangles Die SetQuick Strips Die Set


Tuesday Tutorial - Vellum Focal Point


Hello, Whimsy fans!  Today I'm going to show you how to use vellum to create a focal point.


I love patterned paper but sometimes the pattern is busy enough that it can be hard for the eye to focus on the image(s).  Check out the pic above.  Cute but the Christmas Tidings images are a bit lost on the Mermaid 6x6 Paper.


I cut out a piece of vellum using a Wavy Nested Frames Die and lightly brushed it with blue.  Just that tiny bit of color and translucent paper helps the eye to focus on the main images without losing the cuteness of the patterned paper beneath!  I like how the wavy edges mimic those of the Wonky Stitched Rectangle Die too.


Next I colored up the images using Copics with colors drawn from the paper. Notice the sentiment is stamped partially on the vellum. Super cute!


I hope you're inspired to try this and am looking forward to seeing the results!  If you'd like to check out my other creations, you can visit my blog, Frankie Helps Craft, my Instagram, or my Pinterest Board.

Be sure to check out the new goodies in the Whimsy shop too!