Showing posts with label Slimline Card. Show all posts

31 Nights of Halloween Night 31 - Hourglass and Winners Announced!


HAPPY HALLOWEEEEEN! 
It's my favorite day of the year, and I'm excited to announce all of the winners from our 31 Nights of Halloween event!
 THANK YOU to all our awesome customers who entered, shared, and participated in our spooktacular festivities. 

And what better day to share with my fellow Halloweeners one of my favorite cards.
 Keep reading to the end for a link to all the winners from our 31 Nights of Halloween Give-a-ways!


This card came together super easy using the slimline SurREALLY Cool Halloween papers, and the killer cool new slimline Hourglass die. 


I trimmed the (girl) SurReally Cool Halloween paper down to 2.75 x 8.25 and added it to a black card base. Prepping for my shaker card, I trimmed the sunburst paper down to 3.25 x 8.25 and used the slimline Hourglass die to cut out the hour glass shape from the center. Then added clear acetate to the back and then foam tape all the way around the hourglass shaped opening, making sure there were no gaps/openings that would allow any shaker pieces to escape.


I die cut the black spindles, the hourglass topper, and the hourglass base pieces twice each and glued the matching pieces together to make them each two layers thick. I like the stability and dimension of stacking dies and I typically do that with all my die cut pieces often even more than two layers.

 Once I had them stacked I added some foam tape to the back of all the pieces (except the two feet). For the two feet I just kept those a single piece each because I didn't need the dimension for those.  

(*I fully assembled the hourglass before adding it to the card front.)


On the card base I added the Sprinkletz shaker pieces that I wanted toward the bottom of the girl, then placed the foam backed sunburst hourglass piece on top. Then carefully placed the fully assembled black hourglass to the front. 

My final step was to add the black feet using tweezers to easily tuck them underneath the base. 

This is just one of the many ways to assemble/use the Slimline Hourglass die, there are so many cool options for this die, I hope you find it as fun and easy as I do. And I hope you have a HAPPY HALLOWEEN! Until next year my friends...Mwaaaahahahaaa!

THANK YOU to EVERYONE who participated and who shared their WONDERFUL Halloween Whimsy Stamps creations on the blog and across social media, we enjoyed every single one of them and we hope you're already looking forward to next years party!!

The GRAND PRIZE WINNER of a $100 Whimsy Stamps shopping spree is...
Waleska Galindo
CONGRATULATIONS Waleska, you have until November 7, 2021 to claim your prize by emailing WhimsyStamps@gmail.com

$25 Whimsy weekly winners have all been sent gift certificate confirmations via email, there's no need to claim your prize.

CONGRATULATIONS to:

Week 1 - Sylvia Riet & Monica Ornelas
Week 2- Mari Campbell & Londa Beebe
Week 3 - Melanie Tong & Heather Armstrong
Week 4 - Anne Trouw & Debra McGill


 Thanks for stopping by...see you soon,


31 Nights of Halloween - Night 22 - Special Guest Crystal Komara


Hello crafty friends, welcome to Night 22 of Whimsy Stamps' "31 Nights of Halloween!"  This is Special Guest designer Crystal Komara here with you today to celebrate this annual spooktacular event.

Halloween is one of my favorite holidays to make cards for and I think Whimsy Stamps offers one of the most extensive Halloween themed product collections.  There is something for everyone, from zombies and aliens, snarky ghosts and spooky graveyards to their amazing line of slimline dies and slimline paper packs.  

Today I am sharing a slimline card featuring the Spooky large word die, the Haunted Paper Pack and the Slimline Cityscape die set.  You might even be surprised to learn that this card involved NO stamping at all!

This slimline card measures 8 1/2" x 3 1/2".  Slimline cards are designed to fit inside a regular #10 business sized envelope and require no additional postage.  The base of this slimline card was made from 80 lb. Neenah Solar White Smooth cardstock.  

Card details: 

First I created the background, but cutting out the moon and tree from a piece of paper in the Haunted Paper Pack:


I fussy cut the moon and tree and adhered it to the right side of my card base:


Then I used the Slimline Cityscape dies to cut the skyline. I cut the shadow outline layer from dark grey cardstock and the top window layer from black cardstock.  I adhered the two layers together with a Tombow dot runner and adhered the skyline to the base of my card (over the moon and tree). 


Next, using the Spooky Large word die, I die cut the word "spooky" twice, the first time in black cardstock and the second time in a piece of green/white spiderweb patterned paper from the 6"x 6" Haunted Paper Pack. 


I then mixed-and-matched each the pieces together while adhering them to the card: 


I used another patterned piece of paper from the Haunted Paper Pack that had pumpkins on it and I fussy cut the pumpkins out and adhered them to the right side of the card using 3M foam adhesive for added dimension:


I hope you have enjoyed this slimline card using some of the fabulous Halloween products from Whimsy Stamps.  Thanks for visiting and have a wonderfully creative day!

XO, Crystal 

P.S. - Be sure to continue to follow along for every night of Whimsy Stamp's Annual "31 Nights of Halloween" for a chance to win some fabulous prizes and to be a part of the spooky fun!


31 Nights of Halloween - Night 8 - Special Guest Tami Bastiaans


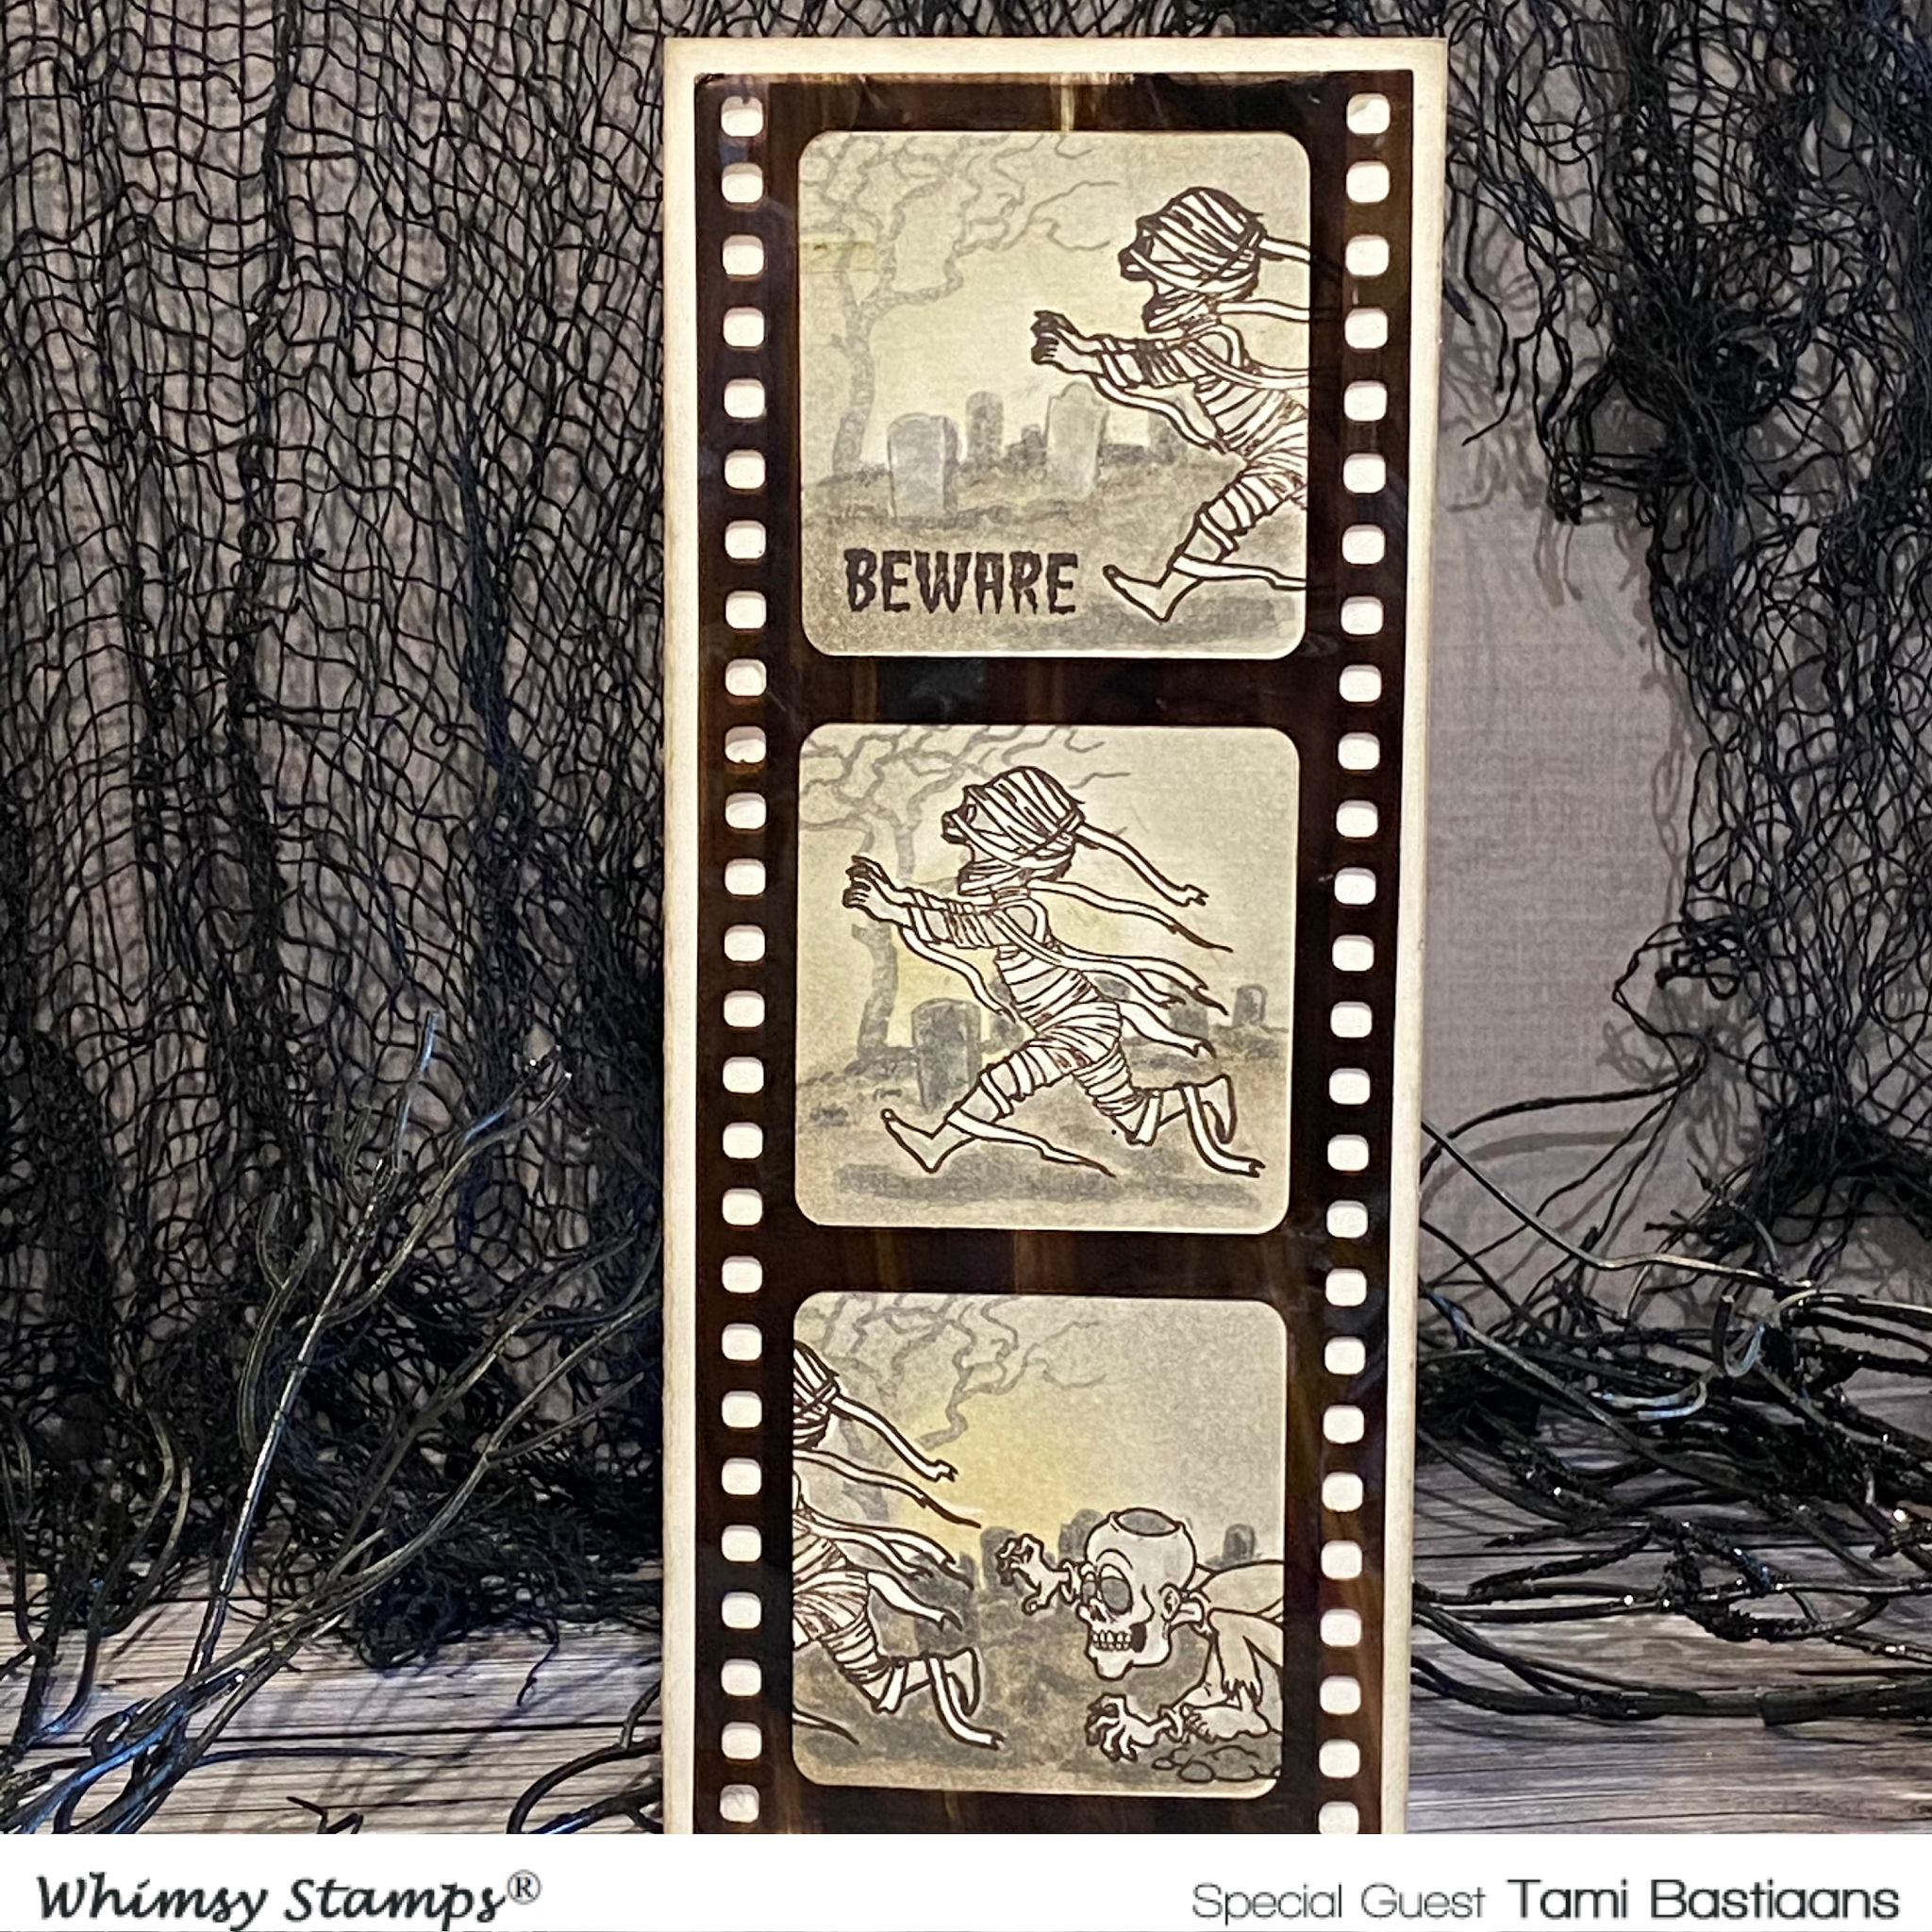
Hello! My name is Tami and I am so happy to have been invited to be a guest designer for Whimsy Stamps 31 Days of Halloween. I made a card today with a technique I enjoy. I used the Slimline Filmstrip Die, some masking paper and the Halloween Scream stamp to make a progressive scene in the film strip.


I thought it would make it fun if it was a scene from an old time scary movie.  Let's get started with how to do this. 


First, use the filmstrip die to cut a mask. For my mask, I cut some Judikins Masking Paper out of the filmstrip. 


I colored two pieces of acetate with alcohol inks.


There is no technique to this, just squeeze some ink on the felt and rub it on one side of the acetate, then let dry.


While I had the die out, I also cut two filmstrips from the acetate that had been colored with Alcohol Ink. Set the filmstrips aside. This gives you a choice and you can use the extra for a second card if you want.


Cut a piece of Distress Watercolor Cardstock that is the size of your slimline card - 3.5x8.5. Center the filmstrip mask over the piece of Heavystock and adhere.


Position the mummy stamp along the right side of the top frame and stamp with Distress Archival Ink in Ground Espresso and Black Soot. Then stamp it in the middle of the middle filmstrip frame, and along the left edge in the bottom frame. 


Lastly, cut a mask of the mummy out of masking paper by stamping it and fussy cutting around it. 


Then stamp the zombie from Halloween Scream along the right side of the bottom frame. In addition, stamp and cut a mask of the zombie on the right side of the bottom frame.

Mask off the mummy in the first frame, then stamp the graveyard background across the first frame. Masking off the mummy will make it look like it is in the background of the film strip. Then ink around the masked off mummy with Distress Ink. I used Old Paper, Hickory Smoke, and Pumice Stone.


Repeat the process with scene in the second frame. In the third scene, you need to mask off both the mummy and the zombie before you stamp the background.

Before adding color, stamp the BEWARE sentiment in the bottom left corner of the first frame.


Once the stamping is done, watercolor all the scenes with Distress inks. I used Black Soot, Pumice Stone and Hickory Smoke.  


When you are finished,  trim the piece to fit under the filmstrip and adhere the stamped piece to the front of the cardbase. 


Finish by adhering the Acetate Filmstip that was cut earlier.


Thank you so much to Whimsy Stamps for the opportunity to be a gest designer with for their 31 Nights of Halloween event! I had fun making this old Scary movie card. 

Tami


 Thanks, Tami, for this fabulous tutorial and awesome inspiration!

Don't forget to visit this post for giveaway information!


Whimsy August Digital Designer Showcase ~ Pat Kuzenko

Welcome Whimsy friends to our Inspiration Post today
showcasing the wonderful creations from our lovely

August Digital Guest Designer


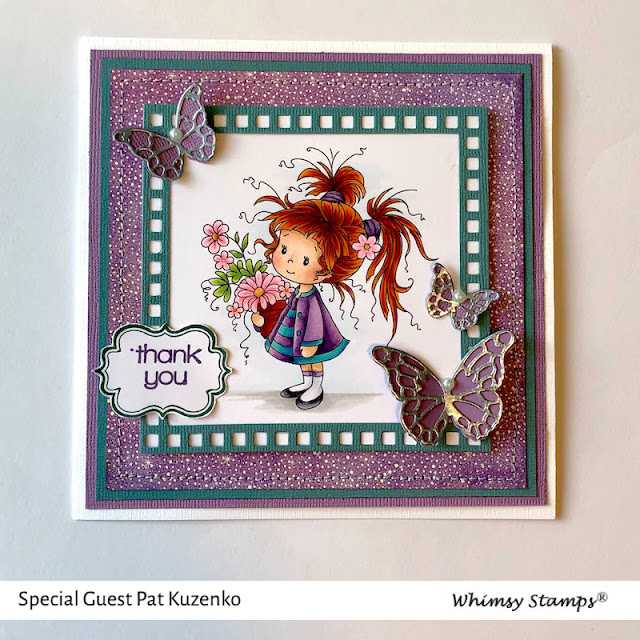
Pat's first creation features this super sweet image Dolly from our Wee Stamps collection. I just adore the way Pat coloured her hair, it's delish! Such an adorable creation, don't you just love the colour combo?!

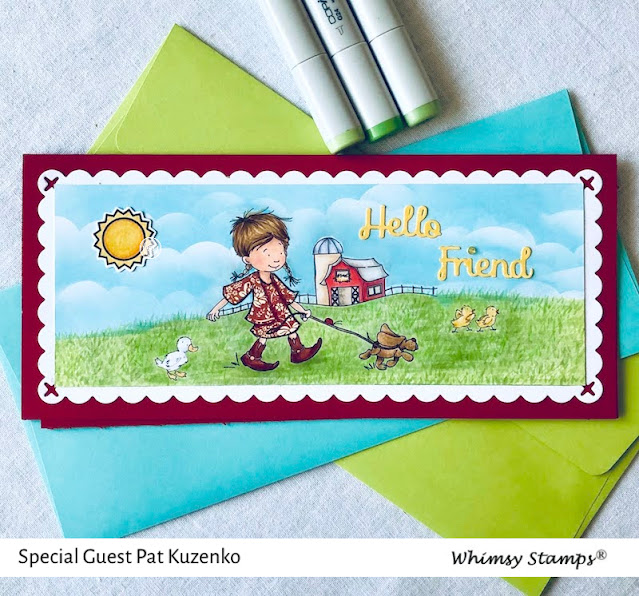
Pat's second creation is the sweetest slimline design using a couple of images from our Sassy Cheryl Collection. An afternoon Walk and Another Day on the Farm Accessory Set made the sweetest scene in combination here and the slimline design lends itself so well to this sweet scene. I love the soft clouds Pat added here and did you spot the fabulous paper piecing in that cute outfit?! What a gorgeous touch! I love seeing how others interpret an image and the ideas they come up with, it really is such a creative world out there!


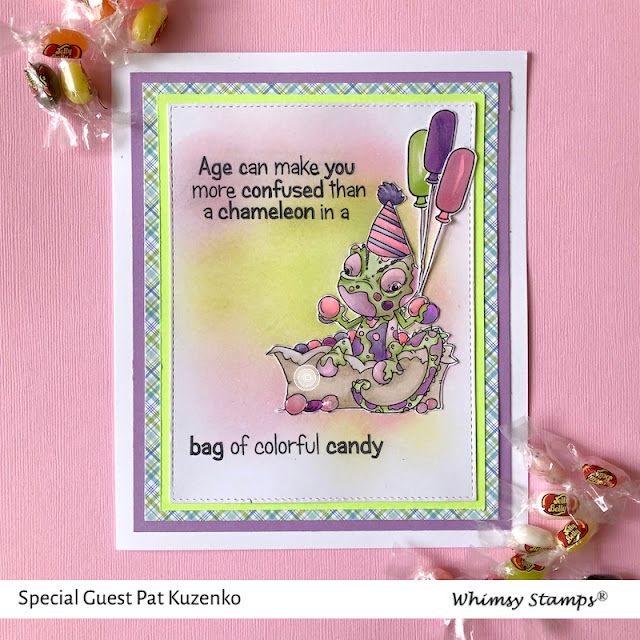
Pat's final creation used a fun Dustin Pike image full of mischief and sass. I think this Chameleon is so funny and Pat's brilliant take on this stamp works a treat! I really love the colour combo she used here too! I love the inky background she created, it all works together so beautifully.


Huge thanks to the lovely Pat Kuzenko for all her gorgeous creations this month,
it was a real pleasure to have her designing with us here at Whimsy this month.

You can check out all the Whimsy Elements Pat used in her designs via the thumbnails below,
but be sure to stop by her blog too for all the delish details! Photos above are linked.

We hope you're having a wonderful August everyone,
be sure to share your Whimsy creations with us over in our Facebook Group.
Before you know it, it'll be time for our September release!

Hugs and happy crafting from me