Showing posts with label Distress Oxide. Show all posts

31 Nights of Halloween - Night 4


Hello!  Tricia here with you tonight to share a spooky cute card using the Candy Corn Dress Up!  I started off by taking a black card panel and embossed with the Bats Galore Slimline Embossing Folder.  I love the spooky details that it adds to the card.   


I stamped the images from Candy Corn Dress Up onto Neenah cardstock and colored with my Copic markers.  I added some details with a white gel pen to the images.  I used the following Copics for my coloring: 

W00, W1, W3, W5, W7, C1, C3, C5, 0, YR04, YR07, YR09, Y11, Y13, Y15, Y19, BG11, BG53, BG13, R20, YG03, YG23, YG17, E41, E42, E44


I die cut the panel with the Build-a-Graveyard die set.   I used Distress Inks of Prized Ribbon, Peacock Feathers and Twisted Citron and placed behind the die cut panel.  I then stamped the Grave Epitaphs with several of the images from the stamp set.   I then die cut some of the extra images: grave, fence, bats and skull using the Build-a-Graveyard die set to spook up my card. 


I love Halloween and just love that Whimsy Stamps celebrates with a month long of inspiration through the 31 Nights of Halloween!  So much fun to be had each day - be sure to watch for the posts every night!  Play along with us and link up your Halloween creations - see the post here for the link up and details. 


In celebration of our annual 31 Nights of Halloween event, Whimsy Stamps will be giving away $300 in Whimsy Stamps gift cards throughout the month of October!  Please be sure to check out this post here for more details! 

Happy Halloween to you all! 


Special Guest - Crystal Komara


Hello, Whimsy fans!  We are delighted to welcome the sweet Crystal Komara to the Whimsy blog!

Hello Whimsy friends!  This is Special Guest Designer Crystal Komara here with you today and I'm thrilled that the ladies behind Whimsy Stamps invited me back to be a guest for all things Halloween, because it my my favorite time of the year to make cards!  Whimsy Stamps has some of the best Halloween themed products around from zombies and aliens to gravestones and haunted houses.   Today I am sharing a card made using the oh-so-spooky-cute stamp set, Candy Corn Dress Up. 


I just love these cute little candy corns and I wanted to color them in non-traditional colors, hence the addition of pink.  But wait, there's more - it's a shaker card too!  Because cards are just infinitely more fun when they move and shake!  

Card details: 

The base of this A2 sized card was made from 80 lb. Neenah Solar White Smooth cardstock.  Using the Wonky Window 4 die, I die cut the frame from the same white cardstock. 


I lined the back of frame with a piece of acetate:


I then made sure to line over the the acetate with foam adhesive, end-to-end so that no sequins could fall out:


On a 5 1/4" x 4" piece of Bristol White Smooth cardstock, I ink blended Distress Oxide inks in Spiced Marmalade and Picked Raspberry:


I placed color sequins in the coordinating color section of the background (so that they would remain separated when I added my shaker frame).   I stamped the Candy Corn Dress Up images in Memento Tuxedo black ink on Neenah Solar White cardstock and colored the images using Copic markers.  I used my Brother Scan and Cut 2 e-cutting machine to cut the images, in lieu of fussy cutting.  

Using a piece of black glitter cardstock, I cut the haunted house using the Slimline Hill House die.  I only wanted the haunted house portion, so I cut it down to size.  I adhered the haunted house to the card using a Tombow adhesive runner. 


I adhered the candy corn characters to the card using 3M foam adhesive for added dimension.  Lastly, I stamped the sentiment "Hauntingly Sweet" in Versamark ink on black cardstock.  This sentiment is also included the Candy Corn Dress Up stamp set.  I heat embossed the sentiment in white embossing powder and adhered it to the top left side of the card using 3M foam adhesive. 


I hope you have enjoyed this fun Halloween inspired shaker card.   Thanks for visiting and have a wonderfully creative day!

XO, Crystal 
_____________________________________________________

P.S. - Are YOU ready for Whimsy Stamps annual 31 Nights of Halloween?!


Get ready for Whimsy's creepy Creative Team and spooky Special Guests sharing 31 haunted Halloween projects and inspiration all month long!  It's seriously spooktacular!  



Special Guest - Marie Marco


Hi, Whimsy friends!  If you haven't guessed it, we at Whimsy Stamps LOVE Halloween!  We've invited lots of fellow Halloweeners to share some amazing inspiration over the next month and a half.

First up is the awesome Marie Marco!  She is going to WOW you with her creations!

Hello Crafty Friends! 
I’m Marie and it’s my first time ever being a guest for a special Halloween blog post at Whimsy Stamps ! I’m so honored and excited to be here to share my Halloween 🎃 Card because Spooky season is my favorite season of all!! 

https://drive.google.com/uc?export=view&id=18JV729sW-0v0b-luR5gcoCTV99Y3h6n_

My Halloween card today features images from the Eye Scream Stamp Set. This set just spoke to my soul! It’s such a beautifully, creepy and unique stamp set! I haven’t seen anything like it before! 

The first step I took to making this card was to die cut an A2 size panel from Bristol Smooth Cardstock in order to do some ink blending. 

https://drive.google.com/uc?export=view&id=1yrI8BTXlPZ0M6a1a77FI_N6VYrZvI2qe
 
After inkblending, I added a few water splatters for texture, and I let it dry for a few minutes while I created a border frame from black cardstock. Using A2 sized nesting dies, I cut my border. After cutting my border, I used a white colored pencils to color in some white stripes reminiscent of Beetlejuice stripes! 

https://drive.google.com/uc?export=view&id=1PDLg_p8UEbpPczHZjqk10DFEEqKht7CO

The fun part of any card I create is the coloring part! I first stamped my images in Antique Linen distress ink on Arches Watercolor Paper. I then colored them using watercolor pencils in the noline coloring style I love and adore so much.  After coloring my images, I fussy cut them using a small pair of detail scissors.

https://drive.google.com/uc?export=view&id=197_GSOpFpjTqzfs5EDrufiDVXLoNjHyL

 When all my images had been cut, I started on my inked background panel by stamping out my background in a beautiful spiderweb design using Whimsy Stamp’s  Web Background Rubber Cling Stamp. I heat embossed my spiderweb background using black embossing powder. 

https://drive.google.com/uc?export=view&id=18l_vvCCM53lbVUEr9zIy3lKVeMJOEAk_

I cut out some black bats using the dies from the Build-a-graveyard Die Set as accents to my card! 
I played around with positioning my images and then glued them all down using liquid glue and ScorTape. For some of the eyeball bats, I used some fun foam at the back of each to add some dimension to my card, and that finishes off this super fun and Spooky Halloween Card! Thank you so much for stopping by and allowing me to share in my Cardmaking Passion! 
Have a wonderful day! Happy Halloween 🎃👻🕷🕸🦇

https://drive.google.com/uc?export=view&id=1xvsH-fyFw7D8O_qZT5x8po_JywEgl0FI
https://drive.google.com/uc?export=view&id=1MyeSoPw1LTYjMGQZfXFzXp3MCMnpgwq_https://drive.google.com/uc?export=view&id=1tHtST7SG91kbAlFEgigoqzaQU9SEGDO2https://drive.google.com/uc?export=view&id=1jLM36fW4jjwUNPjFNyCWF1OyeyJHPTHqhttps://drive.google.com/uc?export=view&id=1Tsb556qkURDwz49fCy0Sf_7TsPqymyxT

Thank you, Marie, for that awesome inspiration!!  
To see more of Marie's work, please visit her blog.


Special Guest - Becky Roberts


Hello, Whimsy fans!  Today we welcome Becky Roberts back to the blog!

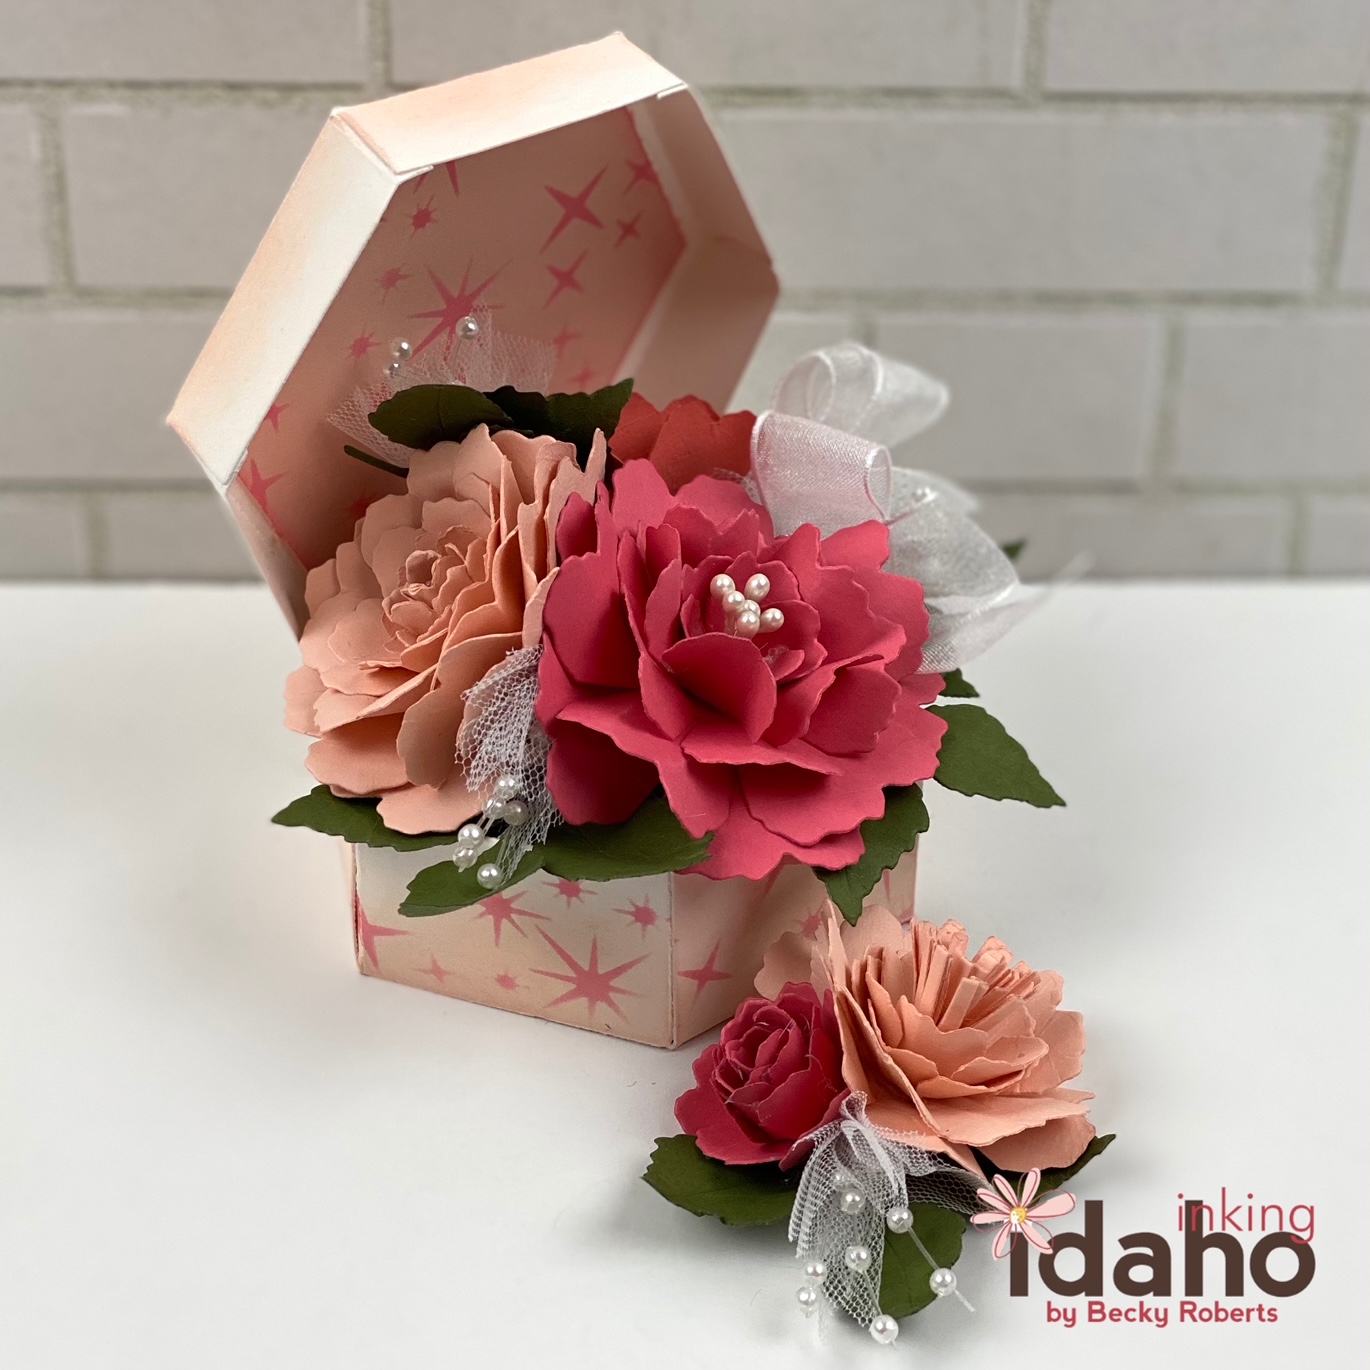
Welcome back to my second posting for Whimsy Stamps.  Today I have the cute little Hexagon Treat Box full of gorgeous paper flowers made with the Peony Flower Dies.
 

I love paper flowers and if you've followed me for any length of time, you've seen a LOT of them.  These pretty little flowers are made using the Peony Flower Die set from Whimsy Stamps.  
I added a few filler pieces of tulle and pearls in between the flowers and that dresses up any bouquet.  

I made a few extra as I wasn't sure how many it would take to fill this 3" box, so I just laid them on the outside for the picture...you can't waste paper flowers!


I stenciled with the Twinkle Cluster Stencil on the box with Distress Oxide ink, I love those little sparkle shapes!


Thanks Whimsy Stamps for allowing me to create and blog for you!

For more creative ideas, please follow Becky on her social media platforms. 
Facebook       Pinterest       Instagram

Special Guest - Waleska Galindo


Hi, Whimsy friends!  Today we welcome the fabulous Waleska Galindo back to the blog!

 Hello Friends!!! Waleska Galindo here from craftinglovew, and I'm super happy to share with you my second post as a Guest Designer for Whimsy Stamps.  I am crazy for the new Lookin' Shark stamp set!  I have a crazy love for shark stamps, and this one is definitely one of my favorites so far.  I mixed this funny stamp set with the Slimline Connected Bubbles die set to create an underwater card.


CARD DETAILS:

To create this card I started with the background.  For the background I used Oxide inks in colors Peacock Feathers in the middle of the panel and then Salty Ocean, and on the edges I used Lucky Clover. I blended these three colors very well and added some water splashes for more texture and to create the under water feel to this panel.


I set this panel aside to dry.  I die cut six of the Slimline Connected Bubbles die and adhered them together so they can have dimension.  I then put glue around the bubbles and added sparkling glitter to them. They look super fun with the dimension and glitter.  


I colored the super adorable and fun sharks with Tri-blend Spectrum Noir markers in colors Ice Grey Blend, Dark Red Blend and Jade Green Blend. I cut them and adhered them to the back of the biggest bubbles, so they will look like they are inside the bubbles.  I stamped the sentiment with black ink and glued this panel to a white card base.


I had so much fun creating this card. I want to thank Whimsy Stamps for the amazing opportunity to design with their awesome products!!! I hope you can be inspired to create some fun summer cards with Whimsy Stamps products, and remember to stay safe and stay crafty! hugs!!!