Tonight we welcome the lovely Vyvie Nguyen back for some Halloween inspiration.
Vyvie used the Halloween Postage stamp set to create this spooky bookmark.
First, she created a mixed media background using distress inks on plain, white cardstock. She stamped the spider web image and some sentiments from Halloween Postage and embossed them in gold. She filled in the background by stamping the small, solid spider from the set in black.
For her focal image, she stamped the larger spider from Halloween Postage, colored it and fussy-cut it. She stamped a sentiment from the set, trimmed it and added it to the bookmark.
She backed the panel with a patterned paper from her stash and finished with some colorful yarns and ribbons.
Thank you, Vyvie, for this fun inspiration!
To see more of Vyvie's work, please visit her on Instagram.
Tonight you are in for quite a treat as we welcome the talented Kulbir Kirkland to the blog!
Hello friends I am so excited to have been invited to be a guest designer for Whimsy Stamps 31 Days of Halloween. Definitely my favorite time of the year. I am sharing a card I made using some super fun and creepy Whimsy stamp sets and ..distress everything :)
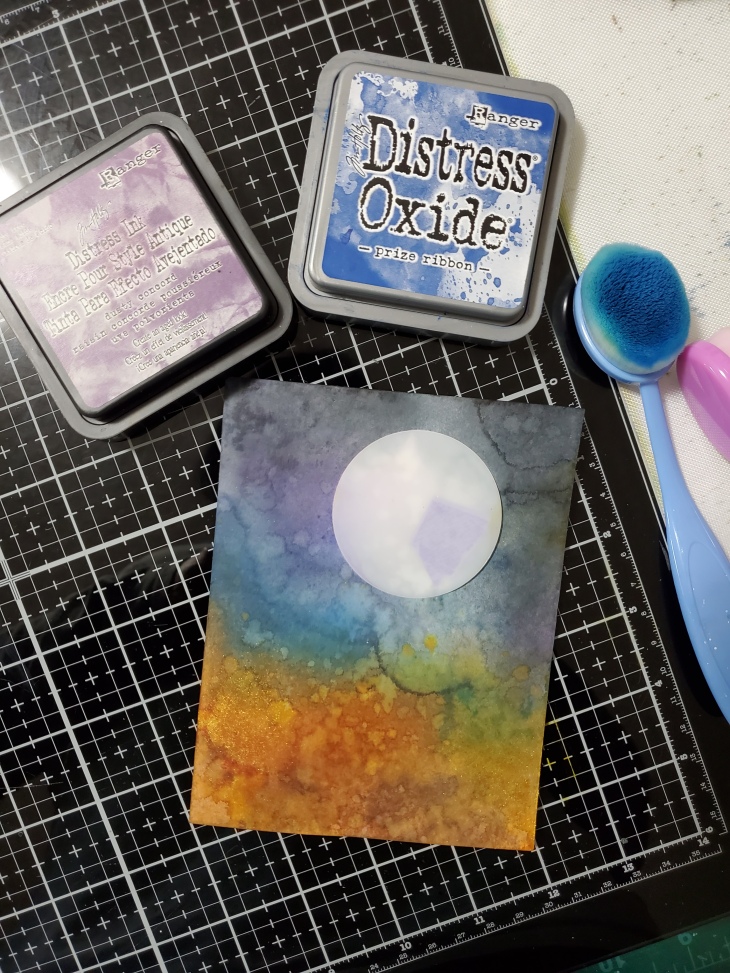
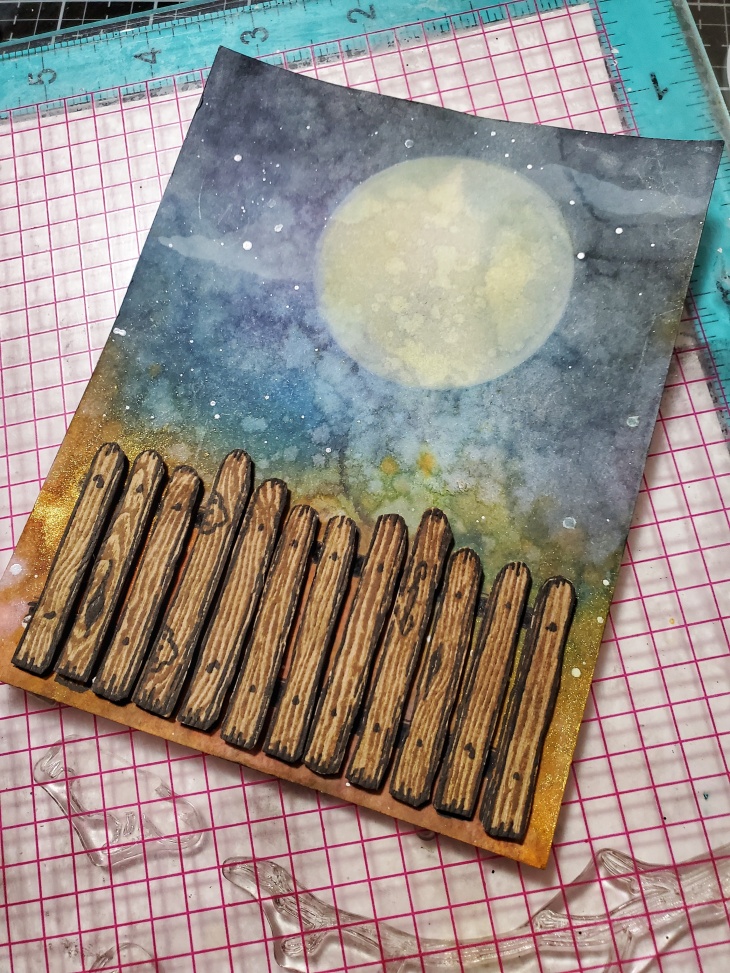
My cardstock for this project was Distress Heavystock. I first used distress spray colors salty ocean, wilted violet, rusty hinge, walnut stain and black soot. After I had dried it I went over with prize ribbon and dusty concord , sprtiz with water and dried it with my heat tool. Last part I add sprays of flickering candle and splatters of Dina Wakely white acrylic paint.
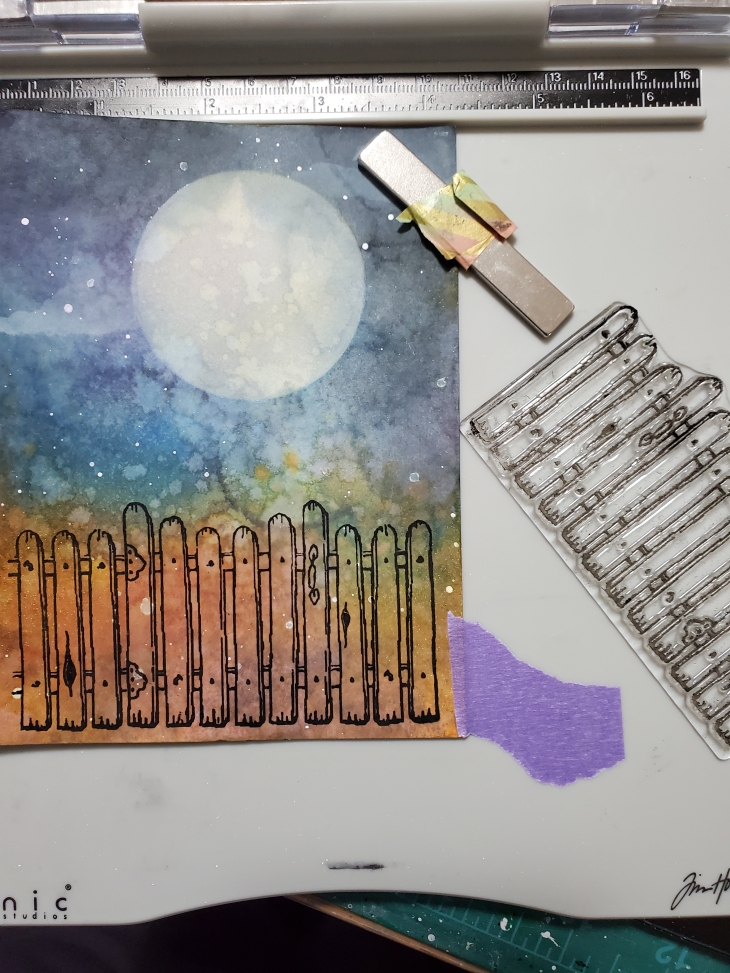
I stamped on the same fence from Attempted Murder with black archival ink.
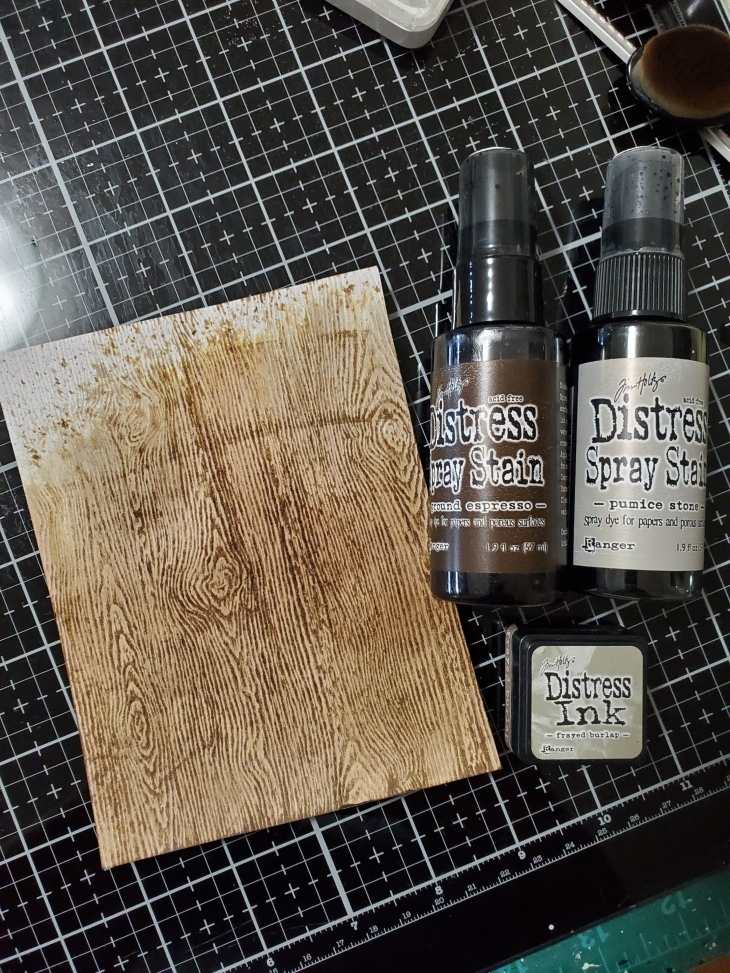
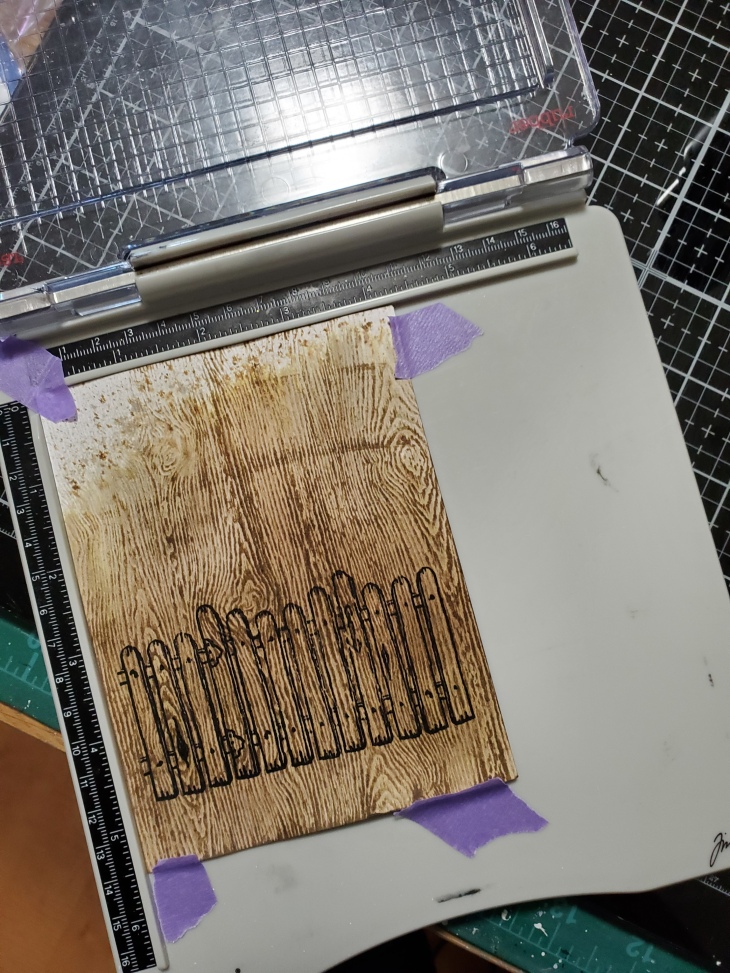
Using distress woodgrain cardstock I inked it up using ground espress and pumice stone distress spray and dried with a heat tool. After it had dried I added some frayed burlap with a blending brush. Inked up the same fence and stamped it onto of the woodgrain using the same archival ink.
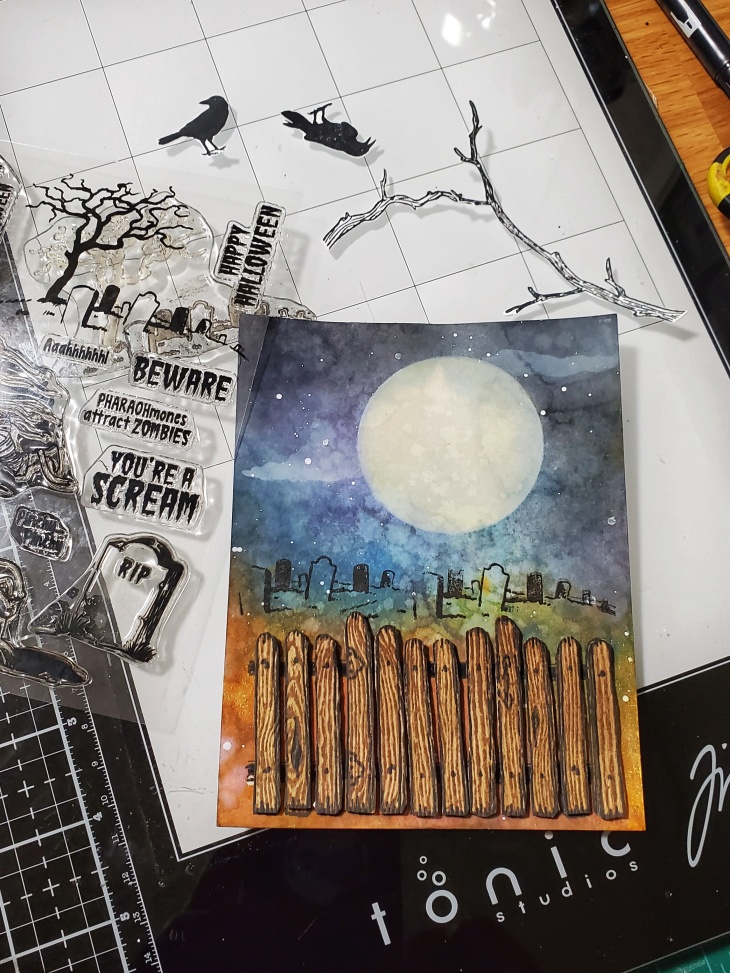
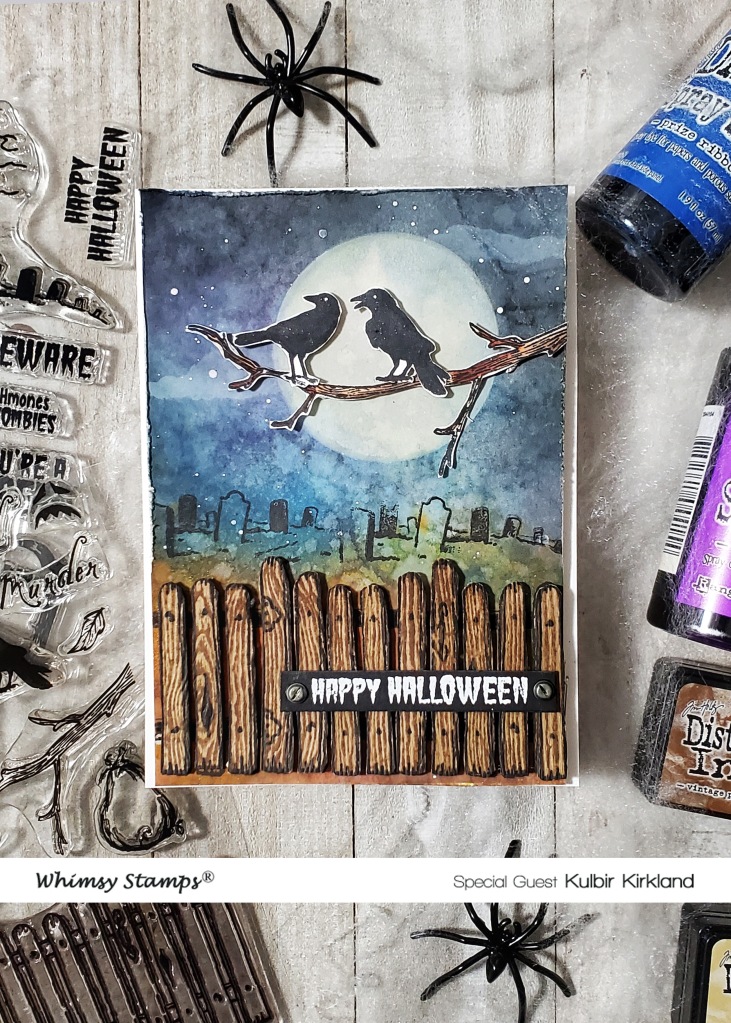
Yes I cut up each panel and using foam tape I pieced it on top the original fence I had stamped on the panel. I inked up the cemetery from the Halloween Scream and stamped it above the fence to give the illusion that it was on the other side.
To finish off the card I used colored the branch using copic markers and popped everything up on foam tape. I wanted the Happy Halloween sentiment to look like it was bolted to the fence. For that I used the hardware set from Tim Holtz Idea-ology. I cut the panel down to fit on an A2 card base.
You can find links to the supplies I've used below: click on the picture and it will take you directly to the product. If purchased through the link provided I will receive a small commission at no extra cost to you. I truly appreciate all your amazing support. Looking forward to sharing many more projects and techniques including my favorite mixed media.
Thank you so much for taking the time to stop by today. Hope you will subscribe to my blog for future posts. See you again soon with another crafty project.
Hello, Whimsy friends! Today we welcome the fabulous Brianna Lepper back with her second scrapbook layout!
~~~
Hey friends! I'm back today sharing my last layout as the June Guest Designer for Whimsy Stamps! I'm super grateful for this wonderful opportunity to work with their amazing products! Thank you again for having me! Here's my layout:
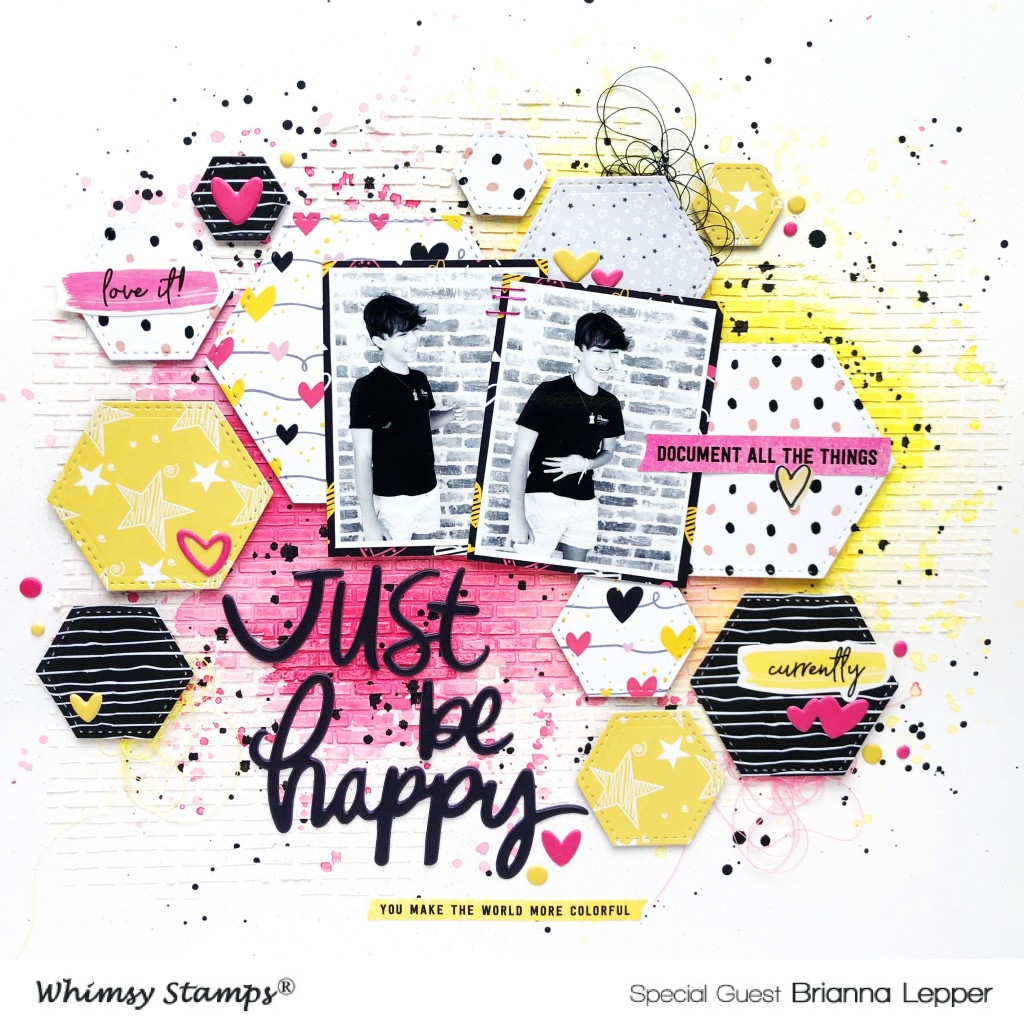
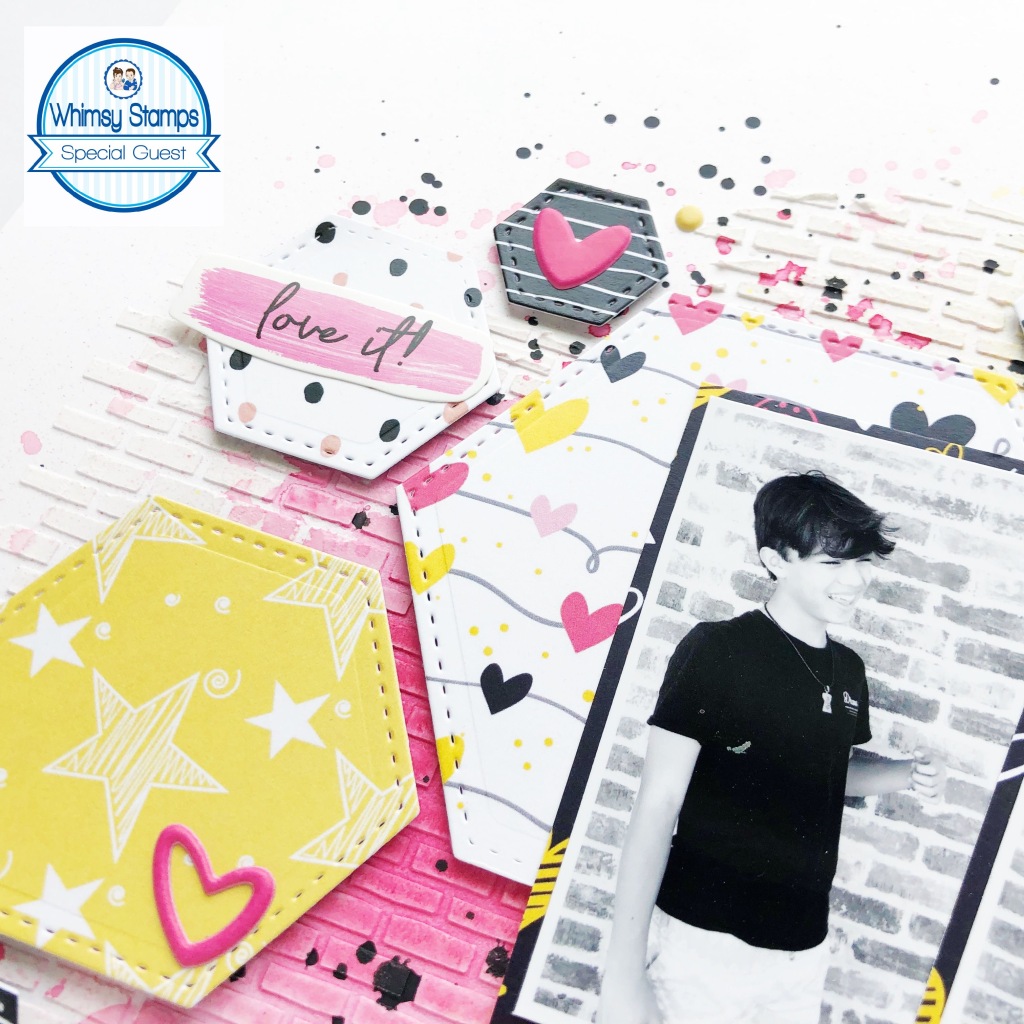
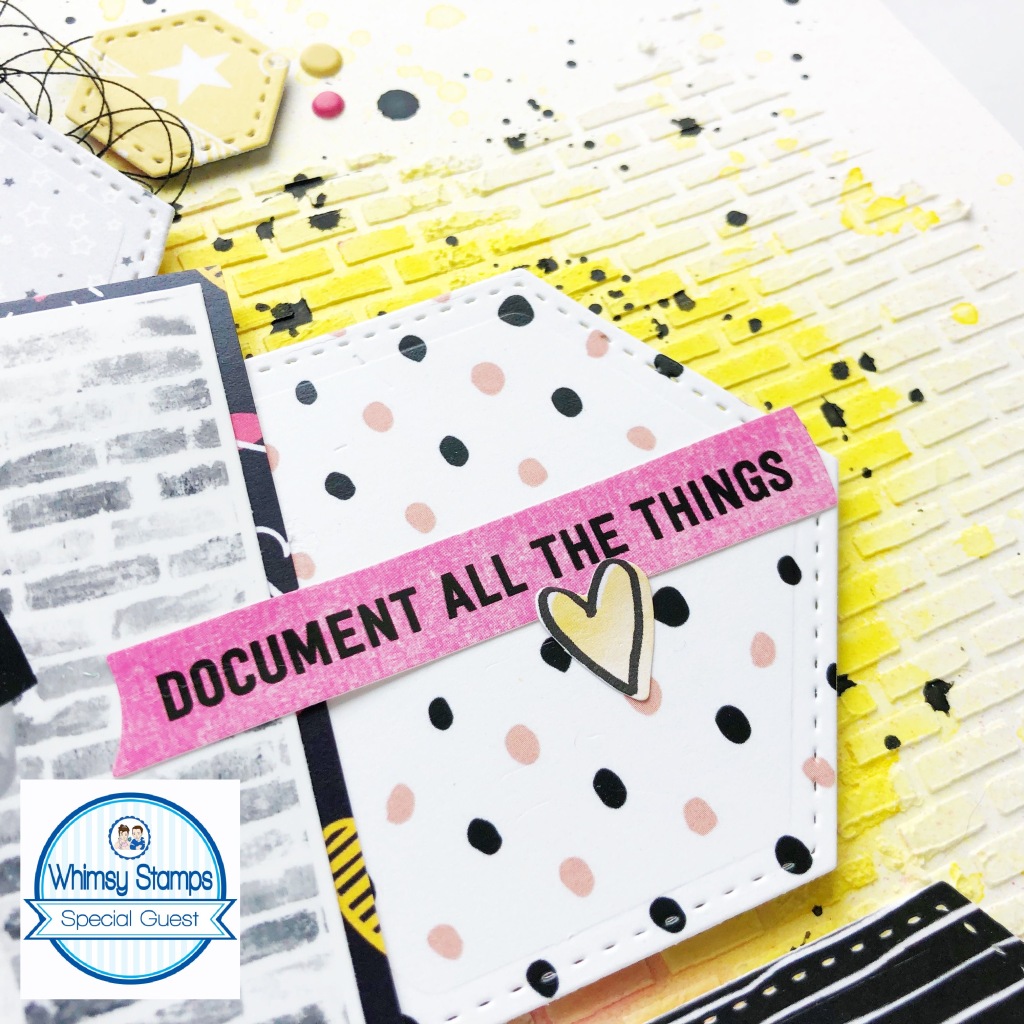
I've had these photos of my son that I had taken in front of the brick wall on our house and knew that they would go perfectly with the 6x6 Brick Pattern Stencil. So, I chose a piece of thick white cardstock as my base and pushed some white modeling paste through that stencil. Once it was finished drying, I took some Shimmerz Paints from my stash and sprayed some pinks and yellows right on top. I also added in some black splatters as well. The texture and dimension are just amazing!!!!
I went with pink, yellow and black as my mixed media colors because it matched the Starring Hearts 6x6 Paper Pack. I ended up picking a few of the patterned papers and die cut them several times using the Nested Hexagon Die Set. Who doesn't love a good hexagon shape? And they look fabulous on top of that brick pattern too!
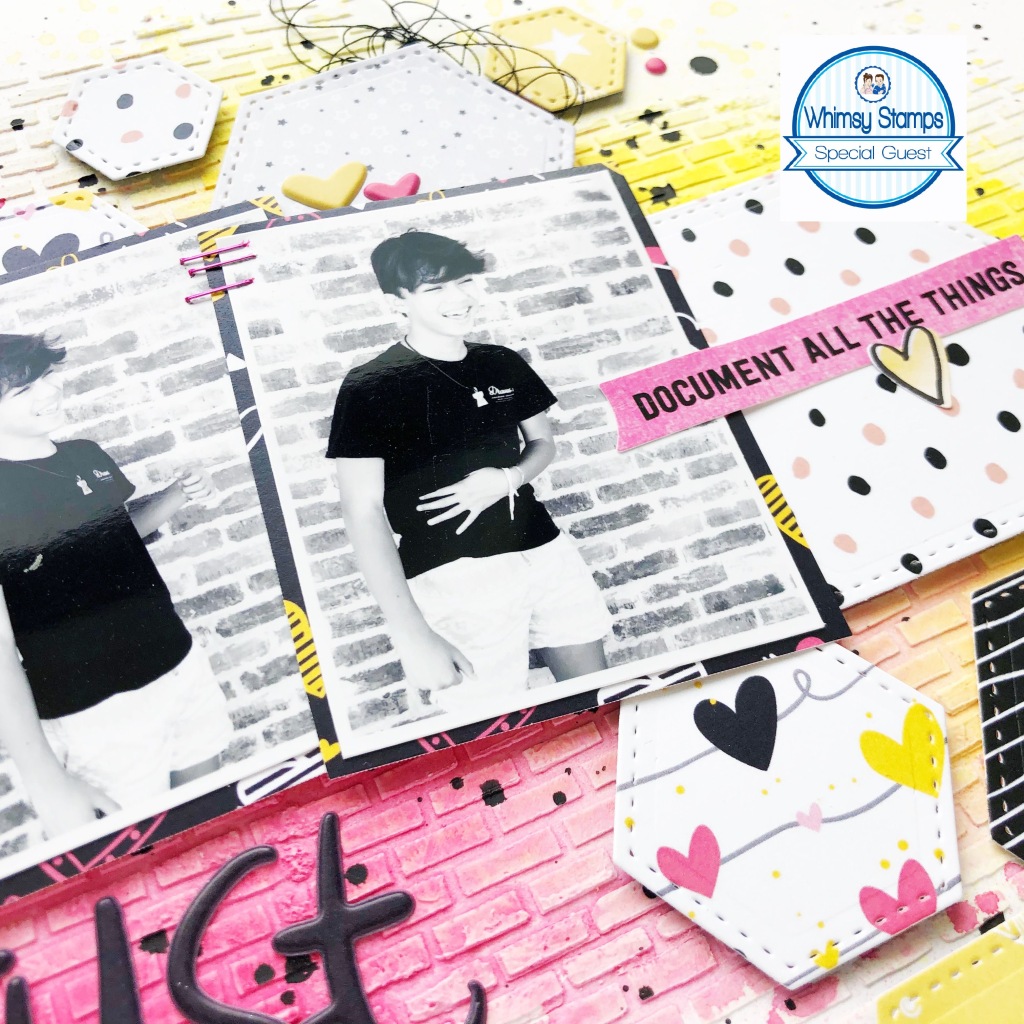
I love the stitched marks! It totally adds so much more interest to each die cut. Next, I popped each hexagon on foam tape and arranged them on my background. I matted my photos using another piece of patterned paper and adhered them directly onto the hexagons.
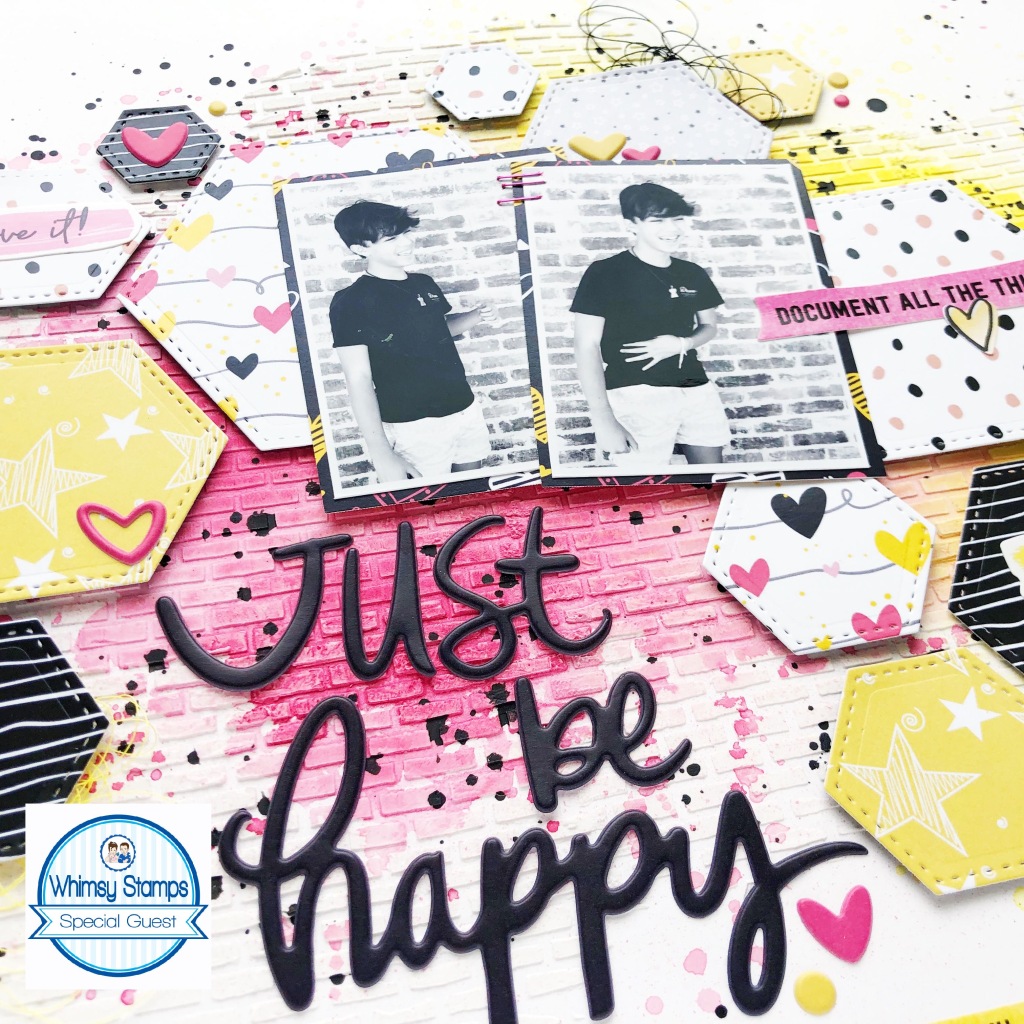
Since my mixed media background and all of the large hexagons were already pretty busy on my page, I didn't embellish too heavily. I pulled in some Vicki Boutin Color Study puffy phrase stickers as my title and also added in a few other stickers but that was it!
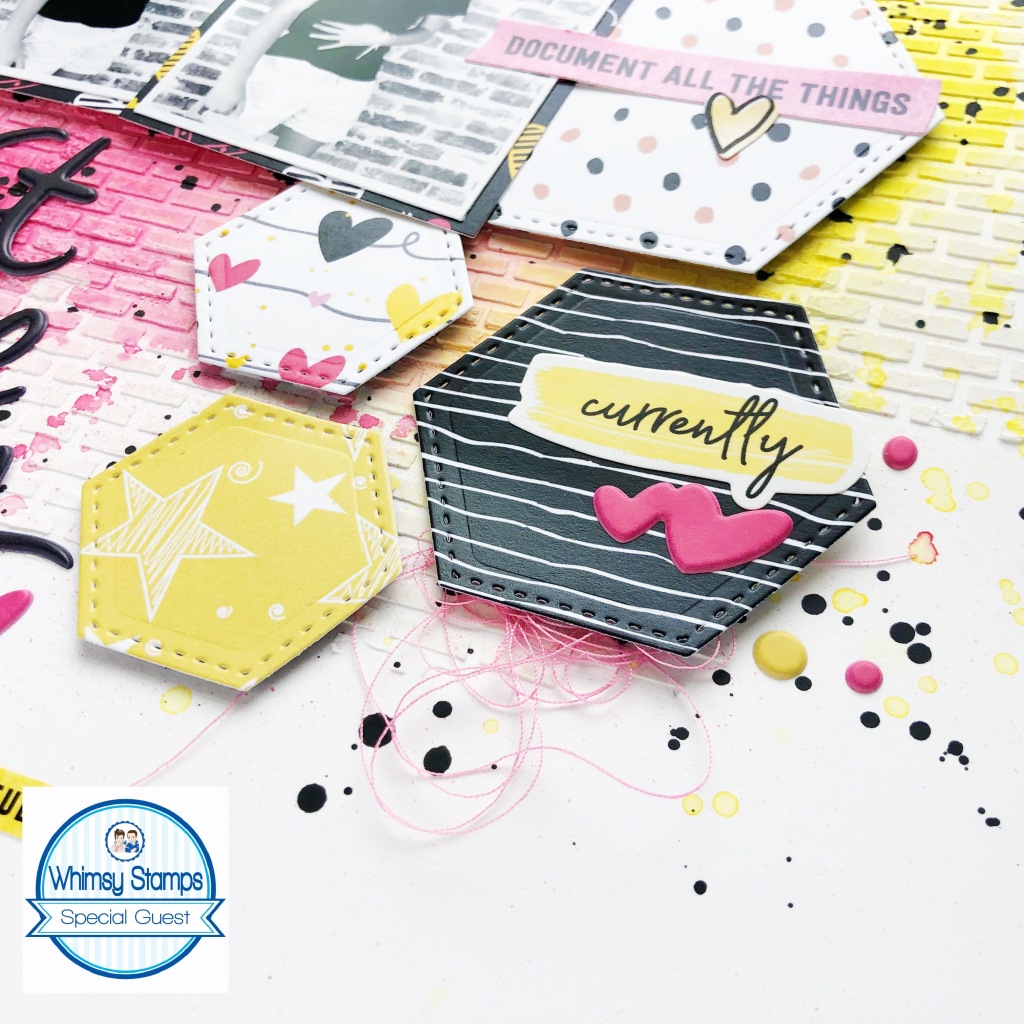
I love adding additional pops of color using some tangled thread.
Here's another up close shot of all of that gorgeous texture and dimension. I am loving the yellow with the pops of black.
I had so much fun with this layout and really enjoyed working with the Whimsy dies, stencil and patterned papers! It's a simple layout that just really packs a nice punch!
Thank you so much for stopping by today and I hope that I've inspired you in some way! Another big "Thank You!" to Whimsy Stamps for having me, I just love your products and had so much fun creating with them. Cheers friends!
~~~
Thank you, Brianna, for this gorgeous inspiration!!
To see more of Brianna's work, be sure to visit her blog and YouTube channel!
Hi, everyone! Toni here ready to blast off with my first post on the Whimsy Stamps blog! Come join me for the ride!
I've used WS A Boy's Dream and the Wonky Window Die
from the new January release to create a super cute mixed media appreciation card. I cut the Wonky Windows twice: once in black and once from an acrylic pull panel that I had embossed using Dreamweaver Glossy White Embossing Paste and the WS Speckled Hearts Stencil. Isn't that shine fantastic?
I sponged the base lavender panel with Distress Oxide to create a bit of an ombre pattern before embossing sentiments from A Boy's Dream. I used Ranger Super Fine Detail White Embossing Powder which
is my absolute fav. Be sure if you're using it over Oxides, you allow
the Oxides to dry so the powder doesn't stick to it. Been there, done
that!
I used the below Copics to color up the images before adhering them. I love this combo, don't you?!