Showing posts with label dies. Show all posts

Teddy Bear Hugs

HI, Céline here to share with you my latest Whimsy stamps card.

Today I chose this cutie girl
It's Teddy Bear Hugs


It's an easy card, just to keep this wonderful stamp as focus point

My card base is a  silhouette file
White cardstock is cut at 14cm x 14cm and 11,3 x 11,3 cm
Papers at 13,7 x 13,7 cm and 11 x 11 cm
I've used Glimmer past with Flight of the Butterflies stencil and add some butterflies on the left side of my card
Then I glued the papers
I stamped and colored my image and add it on 3D foam
I cut some leaves and glued them on the bottom right side of my card
I've added some flowers and enamel dots


         Memento Full-Size Ink Pad - Tuxedo Black    *NEW It's a Party Enamel Dots Basic Stitched Ovals Die Set Leaf Foliage 1 Die Set
Flight of the Butterflies Stencil Nuvo - Glimmer Paste - Moonstone Palette Knife Set  

+
COPIC SKETCH MARKERS 

Copic Colors used :
Skin : E13, 11, 21, 00, 000
Hair : E33, YR21, E51, 50
Clothes : B97, 95, 93, RV95, 93, 91, C2, 1
Teddy : E37, 35, 33, 31

Hugs
Céline

Inlaid Die Cuts with July Paper Door


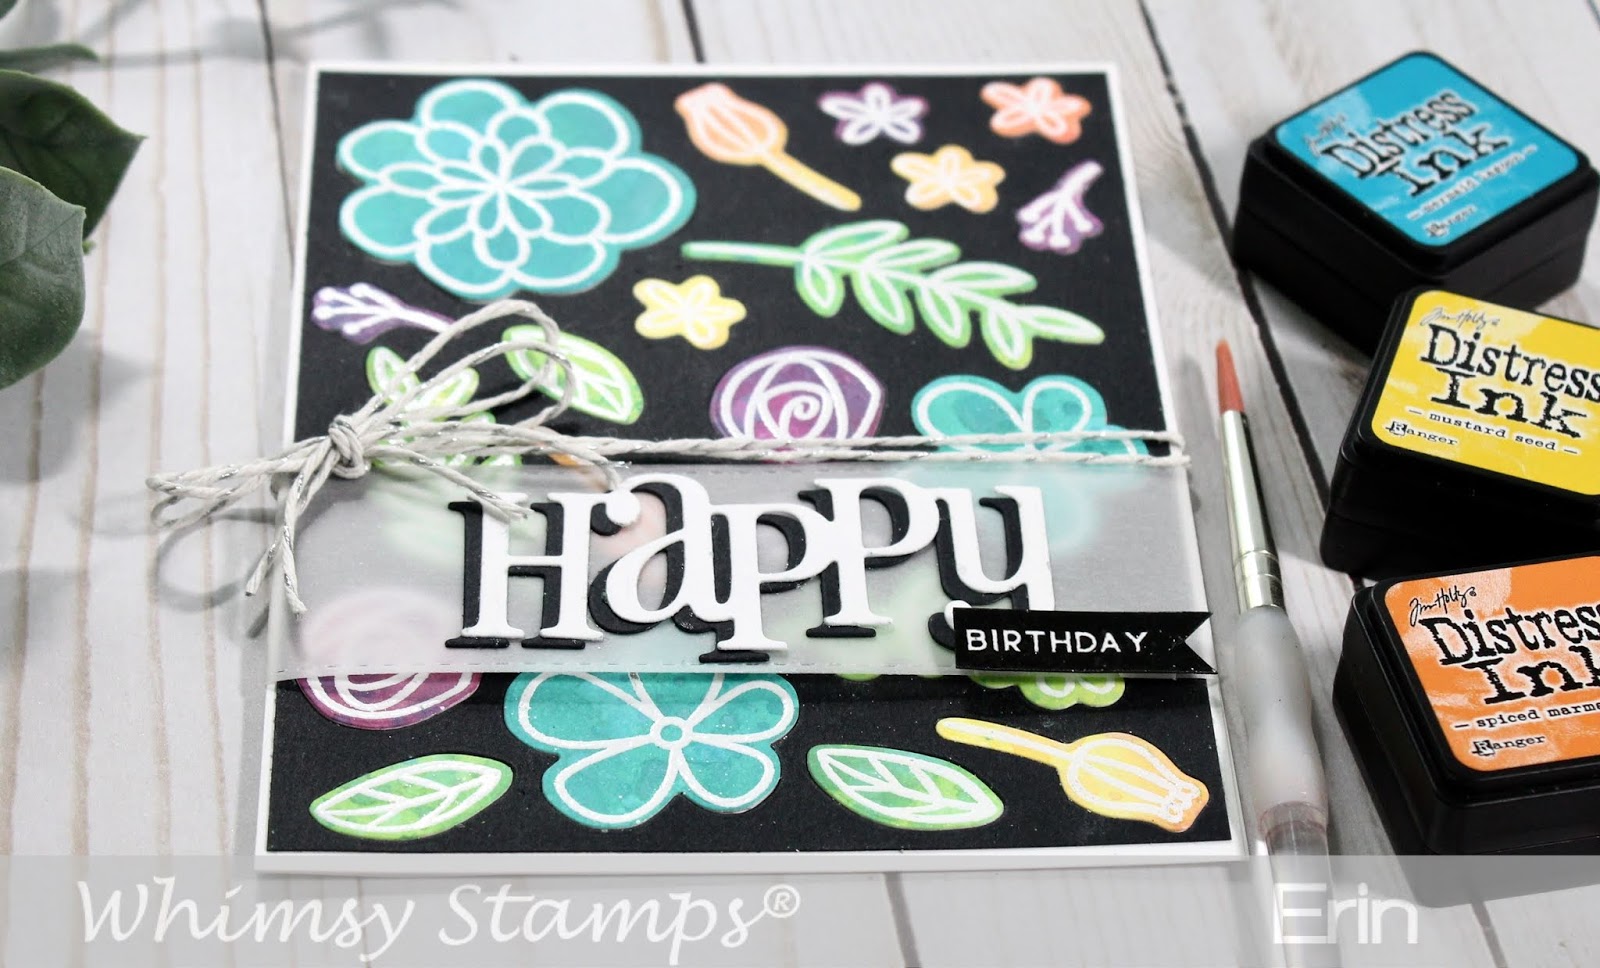
Hi Everyone, and welcome back! Today is my first official blog post for Whimsy Stamps, and I am so excited to share this inlaid die cut card using the July Paper Door kit stamps and dies, Beaucoup Bouquet. Have you ordered your kit yet?

Technique: Inlaid die cutting

I began by creating my flower and leaf background papers using Distress Oxide inks on Bristol smooth paper. First I “smooshed” the ink pads (two colors at a time for this project) onto the craft mat, spritzed with water until the ink pooled into drops, and blotted or pulled the paper through the wet ink. At times I spritzed the paper with more water to create a marbled effect. Then I dried it with the heat gun, and repeated the process a couple more times. TIP: The nice thing about Oxide inks is that they layer over previous colors, so you don’t get a “muddy” effect. Finally, I spritzed the paper with water, let it sit for a couple of seconds, dabbed it with a paper towel, and dried with a heat gun. I repeated until I was pleased with the outcome.

Distress Oxide inks used: Picked raspberry, seedless preserves, mermaid lagoon, cracked pistachio, squeezed lemonade, abandoned coral, lucky clover, and twisted citron.
TIP: Set your inked paper aside and die cut your background to insure that your paper is completely dry before embossing! The inking process is very wet, and the embossing powder will stick everywhere that the inked paper is not absolutely dry.

Can you see the "triangle" of flowers, and the visual balance of threes?
When designing a card layout, I usually stick to the tried-and-true composition rule of using odd numbers or groups of three, and you can see that in this background. I cut a piece of black cardstock to A2 size (5.5” x 4.24”), and began by die cutting one large flower in the upper left corner. Then I cut two smaller flowers forming a visual triangle (another design “rule” I use often). Can you see it? I worked from there to place the dies, and kept a small border around the edge. When the background was finished, I returned to my inked paper to emboss and cut the flowers.


Next I completely covered the inked paper with an anti-static tool to help insure I didn't get excess powder everywhere, and stamped all of the flower and leaf images with VersaMark then heat embossed. Finally, I die cut all of my pieces for my background, and glued them into place. TIP: I used my Tombow Mono eraser to remove some extra adhesive, ink, and “gunk” from the background panel. I found that all of the inking, taping, and glueing was messy, and the eraser helped clean up the final product to make it look clean and finished.

Finally, I trimmed the black background panel just a little to leave a white edge on the card. Then I finished it by adding a vellum strip, the die cut "Happy" sentiment with the "Birthday" banner, and a twine bow.


What do you think? I can't wait to see everything you create with this month's kit. Be sure to join and post your creations on the Whimsy Stamps and Inspiration Facebook page! Love and crafty hugs!

Erin


**PAPER DOOR - with USA shipping included**Distress Oxide Ink Pad - Seedless PreservesDistress Oxide Ink Pad - Cracked PistachioDistress Oxide Ink Pad - Picked RaspberryHappy Large Word DieVersaMark Full-Size Ink Pad - Original (Clear)

Bonus Bundle Fun

Hello friends, welcome to another blogpost. It's Ellen here. I'm excited to show you two cards with a Whimsy Stamps Bonus Bundles. You can find kits in the shop, these bundles are a group of stamps and dies you can buy for a more affordable price ($ 34,99). Below you see the "Autumn" and "Holiday" bundles that I used for making my cards.


For this card I used most of the time the "Holiday bundle". first I cut out the snowflakes from masking paper and did put them down on my card base. After that I did go over my masks with white ink and took them off the card base. Then I sprinkled white ink on top of de card base and finished of the card with the rest of the dies and stamps from the bundle.


On the second card I made a background by using the stamp set (the leaves and berries) and Hand Stitched Nested Rectangles from the "Autumn" and "Holiday" bundle. Further I cut out velume the Doodled Doily Die and on top of that a circle I did die cut out the wreath and some extra's. The senitmend is made by the stamps of both bundles. Finished off the card with an enamel dot on top of the flower.


In my opinion the items from these bundles are picked out very carefully; a lot of these items belong to my favorites and they go so well together. So I hope you liked my inspiration on them.

Faux Chipboard and Christmas Sparkle

Hi Everyone! 
I am pleased to be back with another Whimsy inspiration post and video for you.  This week I am using an October release die alongside the snowflake set we used last month over on my blog Hedgehog Hollow!

Let's look at today's project...
   
I love this two-part die that adds snow capping to the letters. I also really like this technique to create extra dimension to your cards, I created my own chipboard effect letters!  The red embossing adds a great pop and so much sparkle form the WOW! embossing powder! Let's look at the tutorial...


I love making multiple cards with the same supplies and showing you new ways to mix it up too!

Happy Stamping!
Alexandra