Showing posts with label Christmas cards. Show all posts

Special Guest - Julee Tilman

Hello, Whimsy friends!
Today we welcome the lovely Julee Tilman back to the blog.
Hi crafty friends! I'm super excited to be back for another post as a Special Guest at Whimsy Stamps. I'm a huge fan of their adorable gnomes, so I just had to play with the Gnome For the Holidays and Gnome for Christmas stamp sets.


I started by coloring up the Santa hat and Christmas lights gnomes from Gnome for the Holidays with Copic colors in a traditional Christmas color combo.  I then die cut them with the coordinating Gnome for the Holidays Outline Dies, die cutting the Santa one a couple more times to layer up for dimension.


I grabbed some designer paper scraps from my Christmas stash and went to work creating some simple layouts for these sweet little gnomes. I'm usually a more is more girl, but I try to keep Christmas cards pretty tame so they don't cost a fortune to mail! Santa got a buffalo plaid print to ground him, then the sentiment stamped on a die cut circle up above. I accented with sequins and rhinestones to finish off this sweet card.


For the Christmas lights gnome, I decided to make a mini slimline card with a gift card pocket. I created some easy layers and a pocket that would fit a mini Starbucks gift card, then added the darling gnome to the front of it. The sentiment is from the Gnome for Christmas set, and I stamped it onto a die cut  from the fabulous Antique ATC Frames Die Set. My finished card size is 3.5 x 6".


My final card for today uses the adorable elf gnome from Gnome for Christmas. I die cut him with the coordinating Gnome for Christmas Outline Dies, cutting a few more die cuts two layer up for dimension.  Next I used the Antique ATC Frames Die Set to cut a sentiment panel from white cardstock and a mat from patterned paper.  I used the Twinkle Stencil with a light green ink to add a little interest to the sentiment panel, then embossed the holly jolly sentiment in a darker green ink. A few layers of paper and some rhinestones and this card was finished.


Thank you for stopping by today! I am so honored to have been a special guest and it was such a treat creating with all their wonderful products. If you love gnomes as much as I do, you don't want to miss their brand new Gnome Warm Wishes stamp set. It's the next thing on my gigantic wishlist!

Thank you, Julee, for this adorable inspiration!
To see more of her work, please check out her blog and Instagram account.

An Ink Blended Christmas Eve

Hello! Niki here, and I just have to tell you that I love the Dash Away Stamp Set from this month's release! It’s so versatile – the sheer number of cards you can make with this set is fantastic. Of course, the first thing I did with it was to create a Distress Ink blended Christmas Eve scene.


I couldn’t resist. The little silhouette stamps are perfect, don’t you think?

The first thing I did was cut my card front pieces: one 4″ x 5-1/4″ rectangle of Neenah Solar White, and the snowy hill section, which measures 5-1/4″ long by about 1-1/4″ at the low point. I used Royal Sundance Felt Cardstock for that piece since it has a snowy-looking texture.

To figure out where I needed to start with the blending, I drew a light pencil line where I planned to put the hill.


Next, I blended my ink color in from the sides starting with the lightest, Scattered Straw, then moving on to Seedless Preserves and finally to Chipped Sapphire at the top.


It took a few layers of color to get the blend I was looking for but when it was done, I let it dry just a little bit.  Then, I added a few flicks of water with my paintbrush to make the beginning of a snowfall.


I re-drew my pencil line at this point and aligned all my stamps in a Mini MISTI. I stamped the images with Versafine CLAIR in Nocturne. You know, if you make a bunch of backgrounds first, you can mass produce these cards!


Then, I adhered my snowy hill over the bottom of the inked panel and attached the card front to an A2 card base. And to finish up, I drew some tiny stars with a Silver Star GellyRoll Pen.


Thanks for reading today! Check back tomorrow for more crafty goodness!


12 Days of Christmas Day 8 - special guest Kay Miller - Snow Flurry

Hi there! It's Kay again and I'm excited to share with you another Whimsy Stamps 12 Days of Christmas post. 

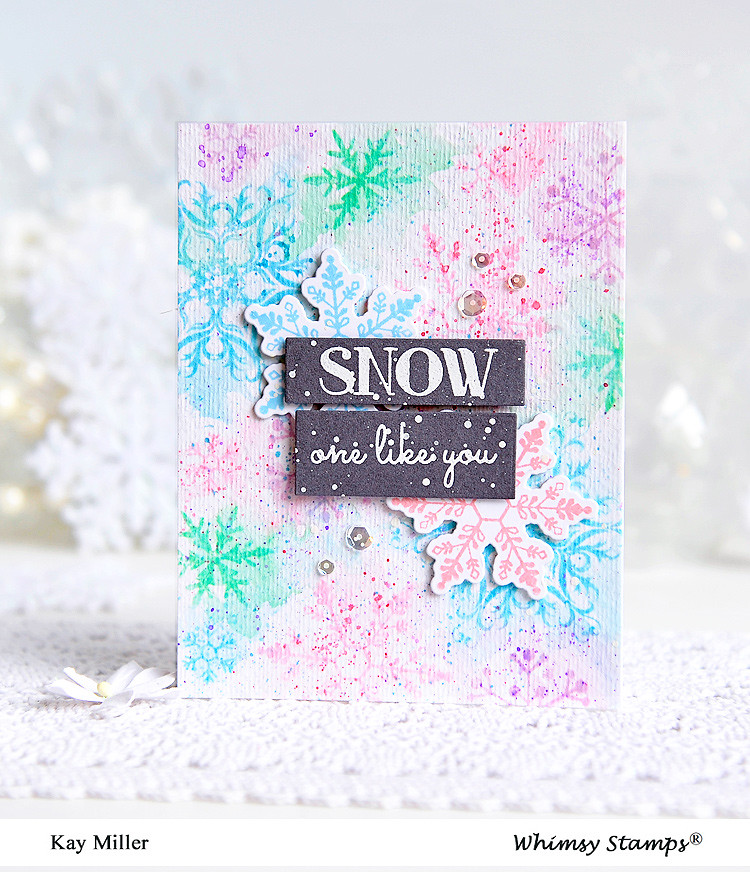
For today's card I used a beautiful set from the October Whimsy Stamps Release called Snow Flurry designed by Deb Davis. 


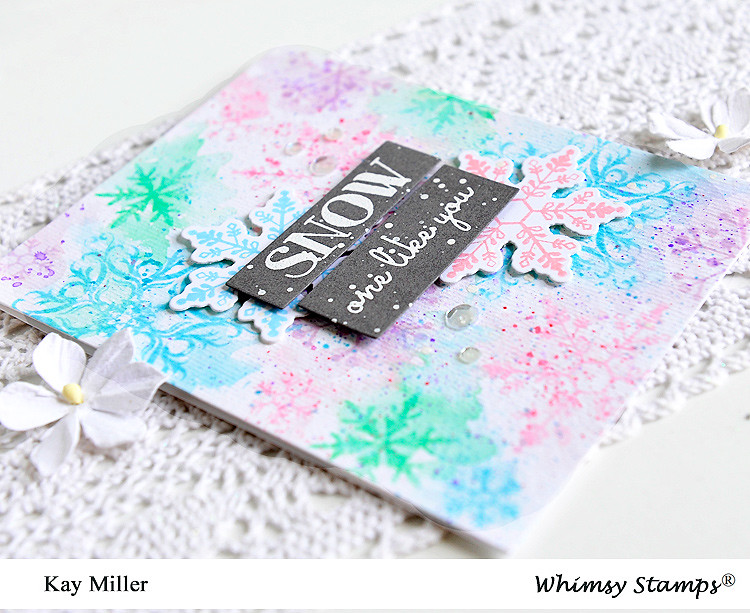
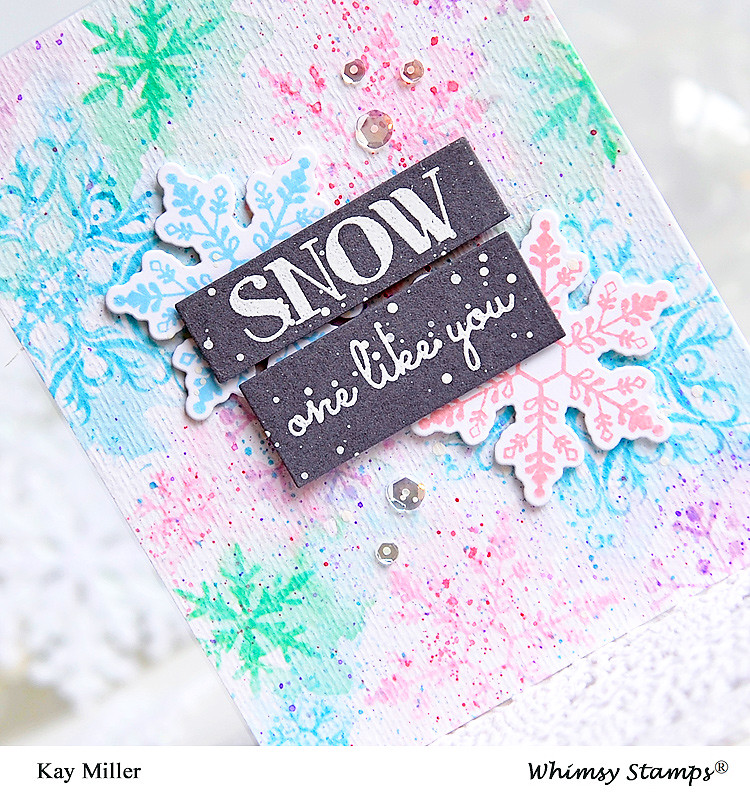
So for the background here, I stamped the pretty snowflakes in different Distress inks onto Master's Touch watercolor paper. I then took a wet brush and went around the edges of the stamped images to soften them and give them a watercolored look. After it was dry, I speckled it with each color of the different inks that I had stamped the snowflakes in.


I aslo stamped a couple of the snowflakes in the same colors and cut them out with the Snow Flurry Dies. I added those to my watercolored panel with foam tape. 


For the sentiment, I embossed it onto some dark gray card stock with white embossing powder. It looked a little plain to me, so I also speckled it with some white ink too. I adhered those to my panel with foam tape. And lastly I added some clear sequins.

Whimsy Stamps Products Used:

Snow Flurry  Snow Flurry Die Set

You're welcome to come by my blog to say hello anytime :).  And be sure to come back here tomorrow for another special guest 12 Days of Christmas post too.

Kay :)


12 Days of Christmas Day 6 - special guest - Heidi Jakobs - Penguin Christmas Tree


Hi everyone, Heidi here, today is Day 6 of the Whimsy Stamps 12 Days of Christmas Blog Celebration and I’m very excited to be back on the Whimsy blog and bring you today’s project as guest designer!

For both of today’s cards I used the same stamps but by changing up the colors and design these cards look totally different! I love to use my craft supplies in different ways to make them as versatile as possible! For today’s project I used the fabulous Whimsy Stamps “Penguin Christmas Tree” stamp,  the Whimsy Stamps “Snow FlurryBackground“ stamp (which is gorgeous and super detailed) and Whimsy Stamps digital stamp “Christmas Long and Lean Sentiments“.

I’ll describe step by step for you how I created these fun cards:

For my first card I stamped the “Penguin Christmas Tree“ stamp onto some Strathmore “Toned Tan“ paper using Versafine “Onyx Black“ ink and my MISTI. Then I colored this cutie with my Faber Castell Polychromos colored pencils and my “White” Caran d‘Ache Luminance pencil. From my Polychromos I used the following colors: 199, 115, 271, 272, 138, 155, 250 and 119. I used the white pencil to ad highlights to the image or burnish to create a smooth finish, I like my Caran d ‘Ache white pencil better for this then the one from the Polychromos line.


I love my traditional green, red and gold Christmas colors (as you’ll see on my next card) but this year I have also created several teal and purple Christmas cards to change it up!

When the coloring was finished I die cut around the penguin using a square die. I also die cut a slightly larger stitched squire panel from some matching dusty pink colored card stock. I adhered both squares together using liquid glue.

Then I started working on my background. I knew what size my (crème colored and linen textured) card base would be and for this I created two mats: the brown one is the same Strathmore paper that I colored the image on and the smaller one is die cut from matching teal colored linen textured card stock. On this teal panel I stamped the beautiful “Snow Flurry Background“ stamp using VersaMark ink and I heat embossed with Wow “Opaque Bright White“ embossing powder. Super easy to do and the result is gorgeous! For some additional interesting element in the background I splattered on this teal Snow Flurry panel with Coliro Pearl Colors by Finetec GmbH in the colour “Deep Purple “ and set the panel aside to dry. When the pearl color had dried I adhered those combined mats together using liquid glue.


Now it’s time for the sentiment: I printed the “Christmas Long and Lean Sentiments“ on a crème colored sheet of A4 sized paper and then first die cut the sentiment for my second card and then this one (because they are right above each other and I didn’t wanted the other sentiment to miss a piece of the banner shape) using the Clearly Besotted “Long Flag Die”.

Then it’s already time to put this card together: I adhered the smaller set of mats, with the colored image, on the larger set of mats using one millimetre thick foam tape and then I adhered the sentiment banner using some see through tape runner and a small piece of one millimetre thick foam tape, folding the top half around the back and adhering it there with regular tape. And to finish this first card I adhered this combination to my card base also using one millimetre thick foam tape.
I love the pink, purple and teal combination on this card, how about you?

For my second card I stamped the same penguin, but now only the top part, onto some Strathmore  “Toned Gray“ paper and I colored the image with the “white“ Caran d ‘Ache Luminance pencil and the following Faber Castell Polychromos colors: 199, 217, 126, 111, 185, 232, 165, 276 and 251.
As you can see for this card I choose a more traditional color theme!
To create a different look and feel for this card I this time used a circle shaped die to cut the image and I also die cut a slightly larger stitched circle mat from some slightly shimmery matching red linen textured card stock. These mats I adhered together using liquid glue.


 Now it‘s time to have some fun with creating another background panel: I first die cut my largest square mat from some slightly shimmery matching green linen textured card stock and then I die cut a slightly smaller square panel from the same crème colored linen textured card stock that I also used for my card base. On this panel I again stamped the Snow Flurry Backgroundstamp using VersaMark ink and this time I used Ranger Super Fine Detail “Gold“ embossing powder to heat emboss with. This background stamp is so elegant and yet it has this movement in it that I love and the combination with the gold embossing powder worked out wonderfully even when the card stock has this linen texture! I also created some splatters on this panel and for this card I used the Coliro Pearl Colors by Finetec GmbH in the color “Moss Green“ and then set this panel aside to dry.


As I mentioned before I already die cut the banner with my sentiment on it and now I created the mat for this sentiment by tracing the outline of the banner die (that I used for die cutting the banner) on the same gray Strathmore paper that I used to color the image on and cutting the shape out with scissors. I adhered the two banner shapes together using see through tape runner.

When the background panel was dry I adhered the largest squares together using liquid glue, I put some matching yellow ribbon from my stash across the front of the card and adhering on the back with regular tape and then I adhered the mats with the colored image and the banner to the project using one millimetre thick foam tape, folding the banner around the back and adhering there with regular tape. Now I only had to adhere these combined panels to the card base using one millimetre thick foam tape!

And that finishes today’s project! I had so much fun creating these cards, I think this must be the  most adorable penguin stamp ever! 

 Thank you Whimsy Stamps for having me as a guest designer again!

If you would like to see more of my creations that feel free to visit my blog:


I wish you’ll Happy Holidays and lots of crafty fun in the New Year!

Christmas Long and Lean Sentiments - Digital SentimentsPenguin Christmas Tree Snow Flurry Background

12 Days of Christmas PRIZE ENTRY


Welcome to Whimsy's 12 Days of Christmas blog celebration we're so glad you're here!  
We have an all-star special guest designer lineup, giveaways and holiday inspiration waiting for you.  

PRIZE ENTRY and rules for a Whimsy Stamps Holiday Bonus Bundle...


  •   Share our 12 Days of Christmas banner on any/all social media
  •   Link your posts back here on the Whimsy blog with the linky tool below
  •   Each new post counts for one entry
  •   Enter as many times as you'd like between now and 12/25/17 by 11:55pm
The more individual posts you share the more chances you have to have win so share all day, everyday, everywhere!  
The winner will be announced on 12/27/17 in this post.

And now for our first post with Deb Davis and her hilarious Grumpy Holidays dog...

Head on over to Deb's blog for details on how she made this card using the Grumpy Holidays stamp set and water coloring.  Merry Christmas, Happy (or Grumpy;) Holidays and good luck to everyone!

Be sure to check back here tomorrow for our first 12 Days of Christmas special guest!

*NEW Grumpy Holidays

CONGRATULATIONS to the 12 Days of Christmas blog celebration winners!
To claim your prize email: whimsystamps@gmail.com no later than 1/15/18

Day 1 - Holiday Bonus Bundle - FitKitty
Day 5 - $10 Whimsy Stamps gift certificate - SueLD
Day 9 - $10 Whimsy Stamps gift certificate - Fikreta

Thanks for playing along and sharing in the Whimsy Stamps holiday fun!  Happy New Year!


Sledding Time

Hello Whimsy Stamps fans Happy Sunday, I hope
you have had a good week and I hope that Thanksgiving was
a day filled with love ones and lots of delicious food, a day to be truly thankful for.

I have a Christmas holiday card to share with you today 
this is Sledding Time and don't these mice look like
they are having the best time.


I just love this release so many cute images and if like me 
you find it difficult to choose just one or two stamps,
they you may be interested in Whimsy Stamps 
Customer Appreciation Stamp set its free with a purchase over $75


 I will see you fine peeps next month, so Happy Holidays
my friends....Big hugs

Abstract Christmas by Deb Davis

I'm loving this Abstract Christmas tree stamp and all the sentiments it has with it.  
There are countless combinations of holiday sayings you can create with this set.


I stamped the tree onto watercolor paper with versmark ink and heat embossed it with white embossing powder.  Using SU! reinkers I squeezed out a couple drops each of regal rose, gumball green and so saffron onto a palette to have them ready to go.  Then I spritzed the paper with plain water from a spray bottle and got it pretty wet.  Then I dipped a wet paint brush into one of the reinker colors and just touched it to the paper letting the ink float to wherever it wanted to.  Then did the same with the two other colors.  Once it was dry I hand cut the tree which was super easy to do because of the straight lines on this image 


I stamped the sentiment that I wanted and cut each word out individually popping them up with foam tape.  The tree is also on foam tape.  To complete the card I added a bakers twin bow and a few sequins, then mounted it onto a pretty in pink card base.


All it took was ONE stamp set and a couple accessories (that you probably already have) to make this pretty pink Christmas card.
Head over to my blog and say hello sometime :) www.amped2stamp.com

Would you like to make your own version of this project?  You can SHOP NOW or click on the product images below for details about these and other stamps, dies and more available at the Whimsy Stamps store.  And be sure to take advantage of  this month's EXCLUSIVE 4x6 CAS (Customer Appreciation Stamp set) that you can get for FREE when you place an order of $75 or more! 

Thanks for stopping by...see you soon,


Abstract Christmas


Quick and Easy Last Minute Christmas Cards

Need quick and easy, last minute Christmas cards? Here are a couple of CAS cards.


The first card uses the Holly Vine Die from Whimsy Stamps.
I cut out the shape from the white card stock and used the negative on the card. I used the Hand Stitched Nest Rectangles from Whimsy Stamps for a simple border on the white cardstock. I backed it onto some red cardstock, added a sentiment from Whimsy Stamps Scripty Occasions clear stamp set and added a few enamel dots from Whimsy Stamps Christmas Cheer collection.


For my second card I cut out the 'snow hill' using the Pierced Border Trio dies from Whimsy Stamps. The sentiment was stamped onto the card using the In My Backyard clear stamp set from Whimsy Stamps. I used snowflake dies from Whimsy Stamps - Snowflake dies and Layered Snowflake Dies.

Hope this has given you some quick and easy ideas!

Thanks for looking!
Happy crafting :-)
Kerys x