Today we welcome Heidi Jakobs back to the Whimsy blog!
Stretch your Stamp Collection
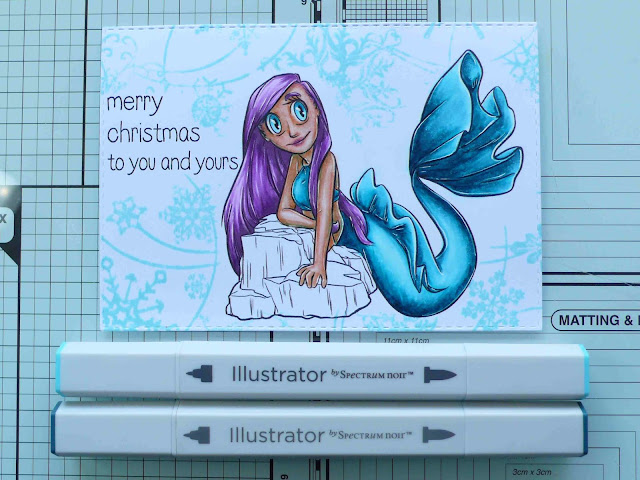
Hi everyone, I’m so happy to be guest designing for Whimsy Stamps this month and today I’m creating a Christmas card using a digital stamp that is not necessarily Christmas themed, but it shows that you can stretch your stamp collection for multiple uses!
Step 1:
I started my card project by printing this Whimsy Stamps' Waiting Mermaid digital image onto alcohol marker friendly paper and die cutting around it using a rectangle nesting die that is two sizes smaller than my card base. I left room on the left hand side to stamp my sentiment.
I also stamped one of the gift packages from the Whimsy Stamps' The Nutcracker stamp set onto the same paper using alcohol proof black ink.
Next, I stamped my sentiment, which is a combination of words from the You’re My Jolly stamp set, next to the mermaid. For this I also used some alcohol proof black ink.
To create an illusion of water around the mermaid and enhance the Christmas theme, I stamped around the image (cover the image and the sentiment up before stamping) using the Snow Flurry Background stamp using Spectrum Noir Water-Reactive ink in “Oasis”.
Step 2:
Now I’m ready for the coloouring process! For this I used my Spectrum Noir Illustrator alcohol markers: I started with the skin for which I used FS7 and TN1, later on I will add in some of the turquoise to enhance the idea that the mermaid is under water.
Step 3:
For the hair I picked PV1, PV3 (also for the mouth), PV4 and PL5. Part of the hair will be covered up by the gift package but I don’t know what that part will be at this point so I just coloured it all!
Step 4:
For the turquoise parts I picked BT1, BT4 and BT9. As you can see, I used the same colours for her eyes, and adding a white highlight to the eyes (using a white gel pen) changes a lot!
Step 5:
For the rocks I picked BG2, BG4 and BG7. For the sand part I picked GB1 and GB5, adding in some brown greys that I used for the rocks and also some turquoise to add to the under water illusion.
Step 6:
Around the mermaid I used a hint of GG1, and for the gift package I used a combination of GG1, GG3, GG5 and the turquoise as well as BP3 and MG5 for the ribbon.
I also added in some highlights using a white gel pen where I felt this was needed.
Initially, I figured I would fussy cut the gift package, but later on I preferred just cutting around the outlines.
Step 7:
Now I’m ready to put my card together: for this I die cut a slightly larger rectangle mat from dark magenta card stock, one size smaller than my card base, and adhered both panels together using liquid glue. This combination I adhered to a white linen textured card base using one millimeter thick foam tape. And to finish my card I now only have to adhere the gift package on top also using one millimetre thick foam tape.
And that is it for my first guest design project! I wish you a creative day!


This is gorgeous.
ReplyDeleteHugs Miranda
Beautiful coloring and such a clever combination of stamps!
ReplyDelete