Sunday, October 31, 2021

31 Nights of Halloween Night 31 - Hourglass and Winners Announced!


HAPPY HALLOWEEEEEN! 
It's my favorite day of the year, and I'm excited to announce all of the winners from our 31 Nights of Halloween event!
 THANK YOU to all our awesome customers who entered, shared, and participated in our spooktacular festivities. 

And what better day to share with my fellow Halloweeners one of my favorite cards.
 Keep reading to the end for a link to all the winners from our 31 Nights of Halloween Give-a-ways!


This card came together super easy using the slimline SurREALLY Cool Halloween papers, and the killer cool new slimline Hourglass die


I trimmed the (girl) SurReally Cool Halloween paper down to 2.75 x 8.25 and added it to a black card base. Prepping for my shaker card, I trimmed the sunburst paper down to 3.25 x 8.25 and used the slimline Hourglass die to cut out the hour glass shape from the center. Then added clear acetate to the back and then foam tape all the way around the hourglass shaped opening, making sure there were no gaps/openings that would allow any shaker pieces to escape.


I die cut the black spindles, the hourglass topper, and the hourglass base pieces twice each and glued the matching pieces together to make them each two layers thick. I like the stability and dimension of stacking dies and I typically do that with all my die cut pieces often even more than two layers.

 Once I had them stacked I added some foam tape to the back of all the pieces (except the two feet). For the two feet I just kept those a single piece each because I didn't need the dimension for those.  

(*I fully assembled the hourglass before adding it to the card front.)


On the card base I added the Sprinkletz shaker pieces that I wanted toward the bottom of the girl, then placed the foam backed sunburst hourglass piece on top. Then carefully placed the fully assembled black hourglass to the front. 

My final step was to add the black feet using tweezers to easily tuck them underneath the base. 

This is just one of the many ways to assemble/use the Slimline Hourglass die, there are so many cool options for this die, I hope you find it as fun and easy as I do. And I hope you have a HAPPY HALLOWEEN! Until next year my friends...Mwaaaahahahaaa!

THANK YOU to EVERYONE who participated and who shared their WONDERFUL Halloween Whimsy Stamps creations on the blog and across social media, we enjoyed every single one of them and we hope you're already looking forward to next years party!!

The GRAND PRIZE WINNER of a $100 Whimsy Stamps shopping spree is...
Waleska Galindo
CONGRATULATIONS Waleska, you have until November 7, 2021 to claim your prize by emailing WhimsyStamps@gmail.com

$25 Whimsy weekly winners have all been sent gift certificate confirmations via email, there's no need to claim your prize.

CONGRATULATIONS to:

Week 1 - Sylvia Riet & Monica Ornelas
Week 2- Mari Campbell & Londa Beebe
Week 3 - Melanie Tong & Heather Armstrong
Week 4 - Anne Trouw & Debra McGill


 Thanks for stopping by...see you soon,


Saturday, October 30, 2021

31 Nights of Halloween - Night 30 - Special Guest Kulbir Kirkland


This image has an empty alt attribute; its file name is whimsy-blog-badge-special-guest-1.jpg

Good evening, Whimsy friends!  

Tonight we welcome back the lovely Kulbir Kirkland for some creepy inspiration.


Hello friends I am so excited to back as a guest designer for Whimsy Stamps 31 Days of Halloween. I have always wanted to create a spooky tombstone ectetera tag. The Grim Reaper stamp set was so perfect for it.


I used the small tombstone etcetera tag and covered it it with gesso. After it had dried I started layering on hickory smoke , pumice stone and a little bit of black soot. After a couple of coats I added on some translucent grit paste and some crypt grave paste.
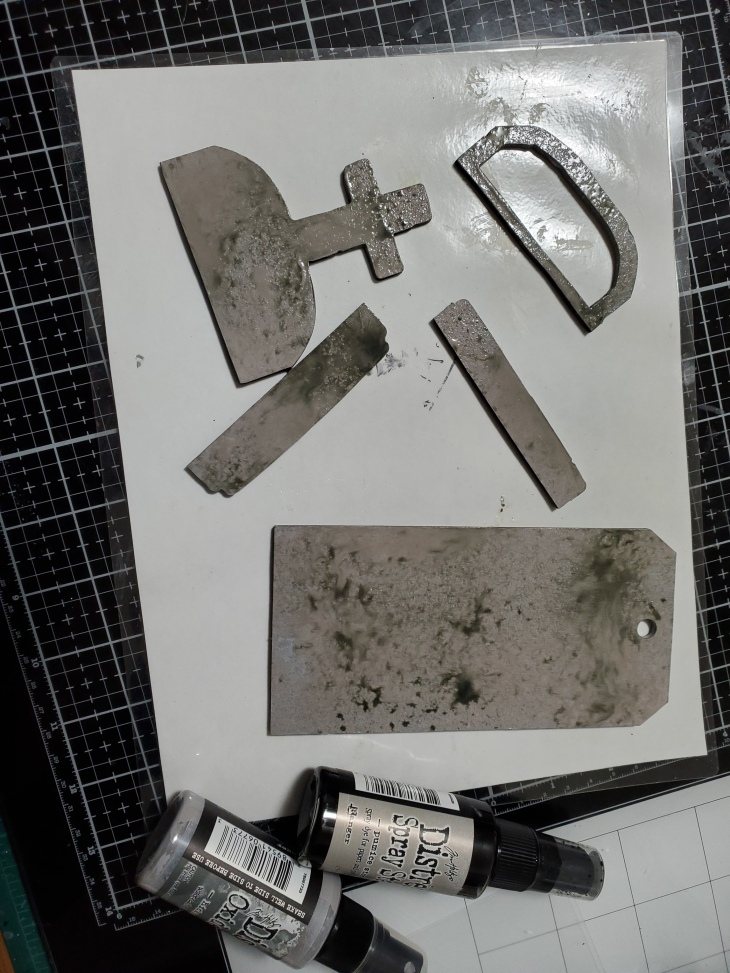
I added on some crackle paste for added texture. Using collage medium I started gluing pieces together and clamping them in place...yes I raided my husband's workshop :) I stamped the grim reaper onto the tag only because I could cut all the cool little bits on the bottom of his robe. I stamped the image onto a piece of distress water color paperwork and fussy cut it.
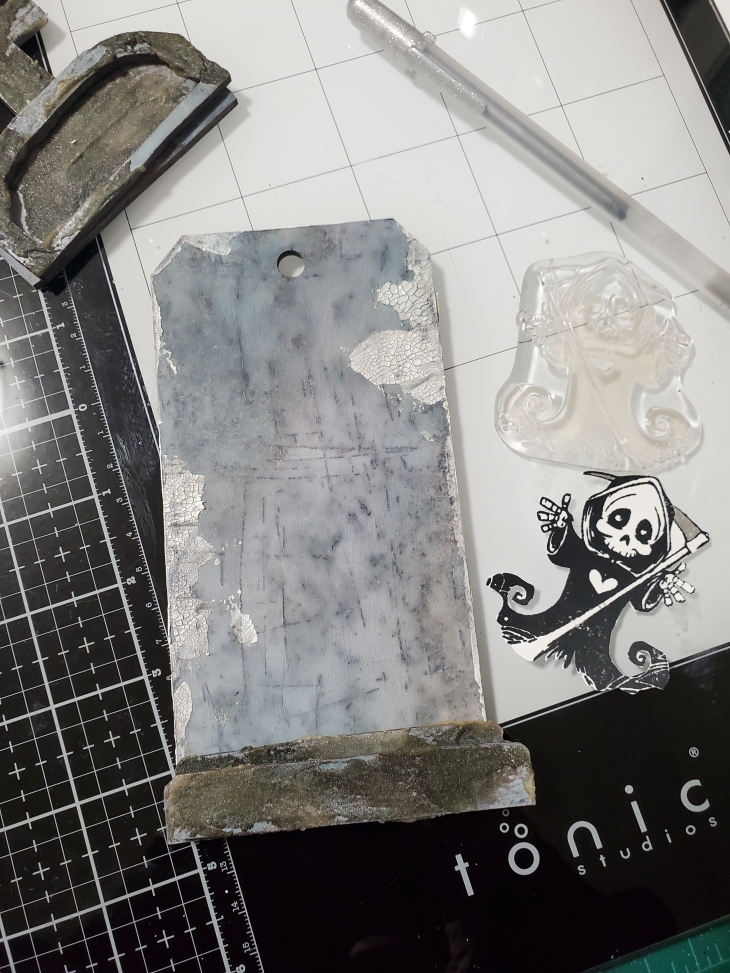
I colored the grim reaper with my distress inks and layrered it on top of the one I had stamped. I don't think I really needed to stamp it onto the tag since the smoke was covering the bottom of the reaper. Always learning :) I really wanted the illusion of smoke so I got some batting and sprayed it with hickory smoke oxide spray and glued it in place. For the R.I.P I wasn't able to stamp on top of the paste so I ended up embossing it onto clear acetate and put it in between the cross and the top frame. For the sentiment I used silver cardstock and stamped it with archival ink and ran it through with Tim Holtz Foundery embossing folder.


To finish off the tag I used some moss and glued it in random spots. I had so much fun putting this tag together. Hope you liked this project and if you give it a try, please do share. Happy Halloween my crafty friends.


You can find links to the supplies I've used below: click on the picture and it will take you directly to the product. If purchased through the link provided I will receive a small commission at no extra cost to you. I truly appreciate all your amazing support. Looking forward to sharing many more projects and techniques including my favorite mixed media.

Thank you so much for taking the time to stop by today. Hope you will subscribe to my blog for future posts. See you again soon with another crafty project.


Thank you, Kulbir, for this awesome inspiration!  To see more of Kulbir's work, please check her out on Instagram.


Grim Reaper Clear Stamps


Friday, October 29, 2021

31 Nights of Halloween - Night 29 - Digital Divas


Hey there lovely Whimsy friends,
the Digital Divas are in the house today with some super fun and fabulous
ooky spooky, possibly kooky Halloween fun for ya!

We roll a little differently in October and I'm sure you've been joining in
our month long fun here on the blog, but today is the Divas first post of the month,
so grab yourself a REALLY BIG cuppa, because it's going to be a long one!

If you've been following our Facebook Group, you'll have seen these awesome creations
along with other 'non-Halloween' creations shared by the Divas over this month,
but today, we're all about the Halloween creations!


New Release Week


Week One


Week Two


Week Three


Week Four


We hope you've had fun checking out this fun line up
of Halloween creations by the Whimsy Stamps Digital Design Divas!
We sure have had fun creating them for you!

Before we go, we'd like to say a huge thanks to our lovely
 

October Digital Guest Designer


Betsy shared three gorgeous creations with us in our Facebook Group during October
and here they all are together. Such gorgeous creations all of them!

Betsy's first creation is all set to get us in the Christmas crafting mood
with her wonderful design using the super sweet Jungle Bell Trio from Crissy Armstrong.


Betsy's second creation uses the sweet Lomasi from our Wee Stamps range.
Lomasi means Pretty Flower in Native American dialects. Her stunning colouring on this sweet image
 was all that was needed to create the most beautiful card. I love the blue sheen in her hair and the CAS design.


Betsy's final creation used another of Crissy Armstrong's adorable images,
this one is called Ellie's Snowman. This sweet image looks adorable in Betsy's lovely easel design!


Thank you Betsy for joining us this month and sharing your wonderful talents with us all.
I'm totally inspired to do some Christmas crafting after seeing these cuties!
For all the details of Betsy's sweet creations, click on her photos above.


Be sure to join all the remaining fun and games here on the Inspiration Blog folks,
where we've been celebrating 31 Nights of Halloween all month long!

Hugs and Happy Halloween
from me and all the Digital Design Divas